Showing posts with label Stamparatus. Show all posts

Saturday, January 9, 2021

Berry, Berry, 3D Berries and a video

 I love strawberries, juicy red strawberries, picked fresh from the plants. There is nothing more that signals spring than strawberries.

There is nothing more satisfying than picking (and eating) your own berries on a warm spring day. 

Today I picked strawberries but 3D paper ones using the Strawberry Builder Punch and the Stamparatus.


These memories played out as I was making this card, but more so when I was making the video describing how I made the 3D berries pictured above.


To make the 3D berries I punched 3 berries and 3 leaves/stems per berry and then used the stamparatus to stamp on the punched pieces. 


Sunday, July 5, 2020

Watercolour Blossoms and Blooms

I can't seem to get enough of the Blossoms and Blooms stamp set.  There are so many ways to create beautiful cards.
Today I used my stamparatus and spritzer to create a watercolour look.


1. Start with a piece of Whisper White cardstock 3 3/4 by 5”
2. Place on Stamparatus
3. Position stamp on glass plate
4. Add Rocco Rose ink to stamp.  Spritz lightly with water
5. Stamp.
5. Clean stamp.
6.Using a sponge or finger dauber add Rich Razzelberry ink to the centers of the flowers only.
7. Spritz lightly and stamp.  Clean stamp.
8. Using a finger dauber add Blackberry Bliss to the flower centers taking care to stay in the centers.      Spritz and stamp.
    Stamp centers of flowers with Daffodil Delight
9. Repeat for leaves.  Stamp first with Pear Pizzaz followed by Old Olive
10.  Add 3 small flowers stamping and spritzing first with Balmy Blue and then Pacific Point
11. Fill in white spaces using Crumb Cake and splatter stamp from Forever Fern.

Stamp sentiment with Rich Razzelberry ink and die cut with the Tasteful Label Dies. Using another die, die a label with Vellum

Add sentiment label with Vellum label and adhere to card front over ribbon.


Mat with Rocco Rose card stock and before adhering to Pear Pizzazz card base add some ribbon near bottom.
Ribbon is Whisper White stamped with a leaf stamp and Pear Pizzazz ink.

Finish card by adding Guilded Gems.

Supplies Used
Stamps:  Blossoms and Blooms, Forever Fern
Inks: Rocco Rose, Rich Razzelberry, Blackberry Bliss, Daffodil Delight, Balmy Blue, Pacific, Point, pear Pizzazz, Old Olive, Crumb Cake
Papers: Whisper White, Rocco Rose,Vellum, Pear Pizzazz
Accessories: Stamparatus, Spritzer, Tasteful Label Dies,1/4” Whisper White ribbon,Guilded Gems

Sunday, March 22, 2020

Well Dressed With Shoes - with tutorial

This is the second of the 3 cards I made using the Well Dressed SAB stamp set.

Below is a picture of the 3 cards


Check yesterday’s post Here  regarding the first card. The post also includes a link to a free printable tutorial.

Card #2 is also a birthday card  and focuses on shoes.


It has a Basic Gray base layered with Basic Black, both colours that are in the plaid Country Club DSP .

Peg stamping with the Stamparatus was used to place stamp the shoe images on the art piece, which is also matted with Basic Black.

The birthday sentiment is from Itty Bitty Birthdays

Supplies Used:
Stamps:  Well Dressed, Itty Bitty Birthdays
Inks:  Black Memento, Garden Green
Papers: BasicGray, Basic Black, Whisper White, Country Club DSP (Green Plaid)
Accessories:  Stamparatus

A free downloadable tutorial available here


Saturday, March 21, 2020

Well Dressed Masculine card with Tutorial

I promised myself that during this COVID-19 pandemic, while I was self isolating, I make full use of the SAB stamp sets before the end of March, when SAB is over.


Last evening it was the stamp set "Well Dressed" that I used to make some Masculine birthday cards.
The 3 cards I made are pictured below:

The cards will be posted over the next 3 days.


The first card has a colour scheme of Night of Navy and Whisper White.  It was the first card I made and I was experimenting with the placement of the elements.


It has a Night of Navy card base, layered with Whisper White.  The DSP strip in the center is from the Country Club DSP.  The plaid pattern fits so perfectly with the tie. The picture doesn't show it very well, but the Whisper White layer is matted with Smokey Slate Card Stock and then added to the card base.

The stamparatus was used to stamp the images and I was happy I did as for some reason my Night of Navy was not stamping very well despite the fact I had reinked the ink pad.

The tie was die cut with the Nesting Label die and added to the card front with dimensionals.  I tried centering it on the card, but it just didn't look right, so it was off set to the left with the sentiment
centered to the right.

The hat, watch and shoe were fussy cut and placed as in the picture above- the hat and watch using dimensionals.

Supplies Used:
Stamps:  Well Dressed
Ink:  Night of Navy
Papers: Night of Navy, Whisper White, Country Club DSP, Smokey Slate
Accessories: Nesting Label dies, Ornate Frames, Dimensionals, Stamparatus


A free printable PDF tutorial is available here

Monday, March 18, 2019

All Adorned - a Case

As of today it is officially Spring although the temperature outside doesn't feel like it.  Last night the temperature was -13 degrees C.  Not only is it Spring, it is also St. Patrick's Day, a day to celebrate all things Irish.

We're also nearing the end of Sale-a-bration.

Today's card features one of the later stamp offers - All Adorned.  This stamp set was created to show case the Stamparatus.  See the Stampin' Up video below


Below is the card I created:


It's a 5" square  card with a Thick White Cardstock base, layered first with Early Espresso and then Granny Apple Green embossed with the Dot to Dot embossing folder.  The central art piece is adhered to this.

Art Piece:
Using the stamparatus, the corner stamp was used to stamp the 4 corners of a 3 3/4 by 3 3/4" piece of Blushing Bride cardstock using Blushing Bride ink. A tiny heart, was stamped in Granny Apple Green  in the space between the corner stamp.

In the center is a die cut from Eastern Medallion Thinlet Dies.  In the center of this, one of the larger images was stamped with Granny Apply Green, followed by a second image in Early Espresso


This piece was adhered to the stamped Blushing Bride piece using dimensionals.

Early Espresso was used to mat the art piece after which it was attached to an embossed piece of Granny apple Green .card stock.  This in turn is matted with Early Espresso which was added to the card base.

Rather than use the stamparatus to stamp the little heart between the corners I placed the stamp on an acrylic block and stamped the hearts between the corner pieces

After matting this piece with Early Espresso, it is adhered to the card front with dimensionals.

Supplies Used:
Stamp:  All Adorned
Inks:  Early Espresso, Granny Apple Green, Blushing Bride
Papers:  Thick Whisper White, Whisper White, Granny Apple Green, Early Espresso
Accessories:  Eastern Medallion Thinlet dies, Dot to Dot embossing folder, Classic Label Punch, Stamparatus, Dimensionals.

Friday, March 15, 2019

His Master's Voice

When I finished this card, featuring the Happy Tails stamp set with its coordinating punch, I was reminded of the old RCA commercial of the record player with the large horn and the dog listening at his master's voice coming from the player- thus the title of this post.

My intent for making this card was to create circle texture by embossing the with the embossing mats and then stamping near the raised areas.  As is usually the case, the card became so much more.

This card was a 'create as you go' card because I had no clear plan as to this card's outcome.


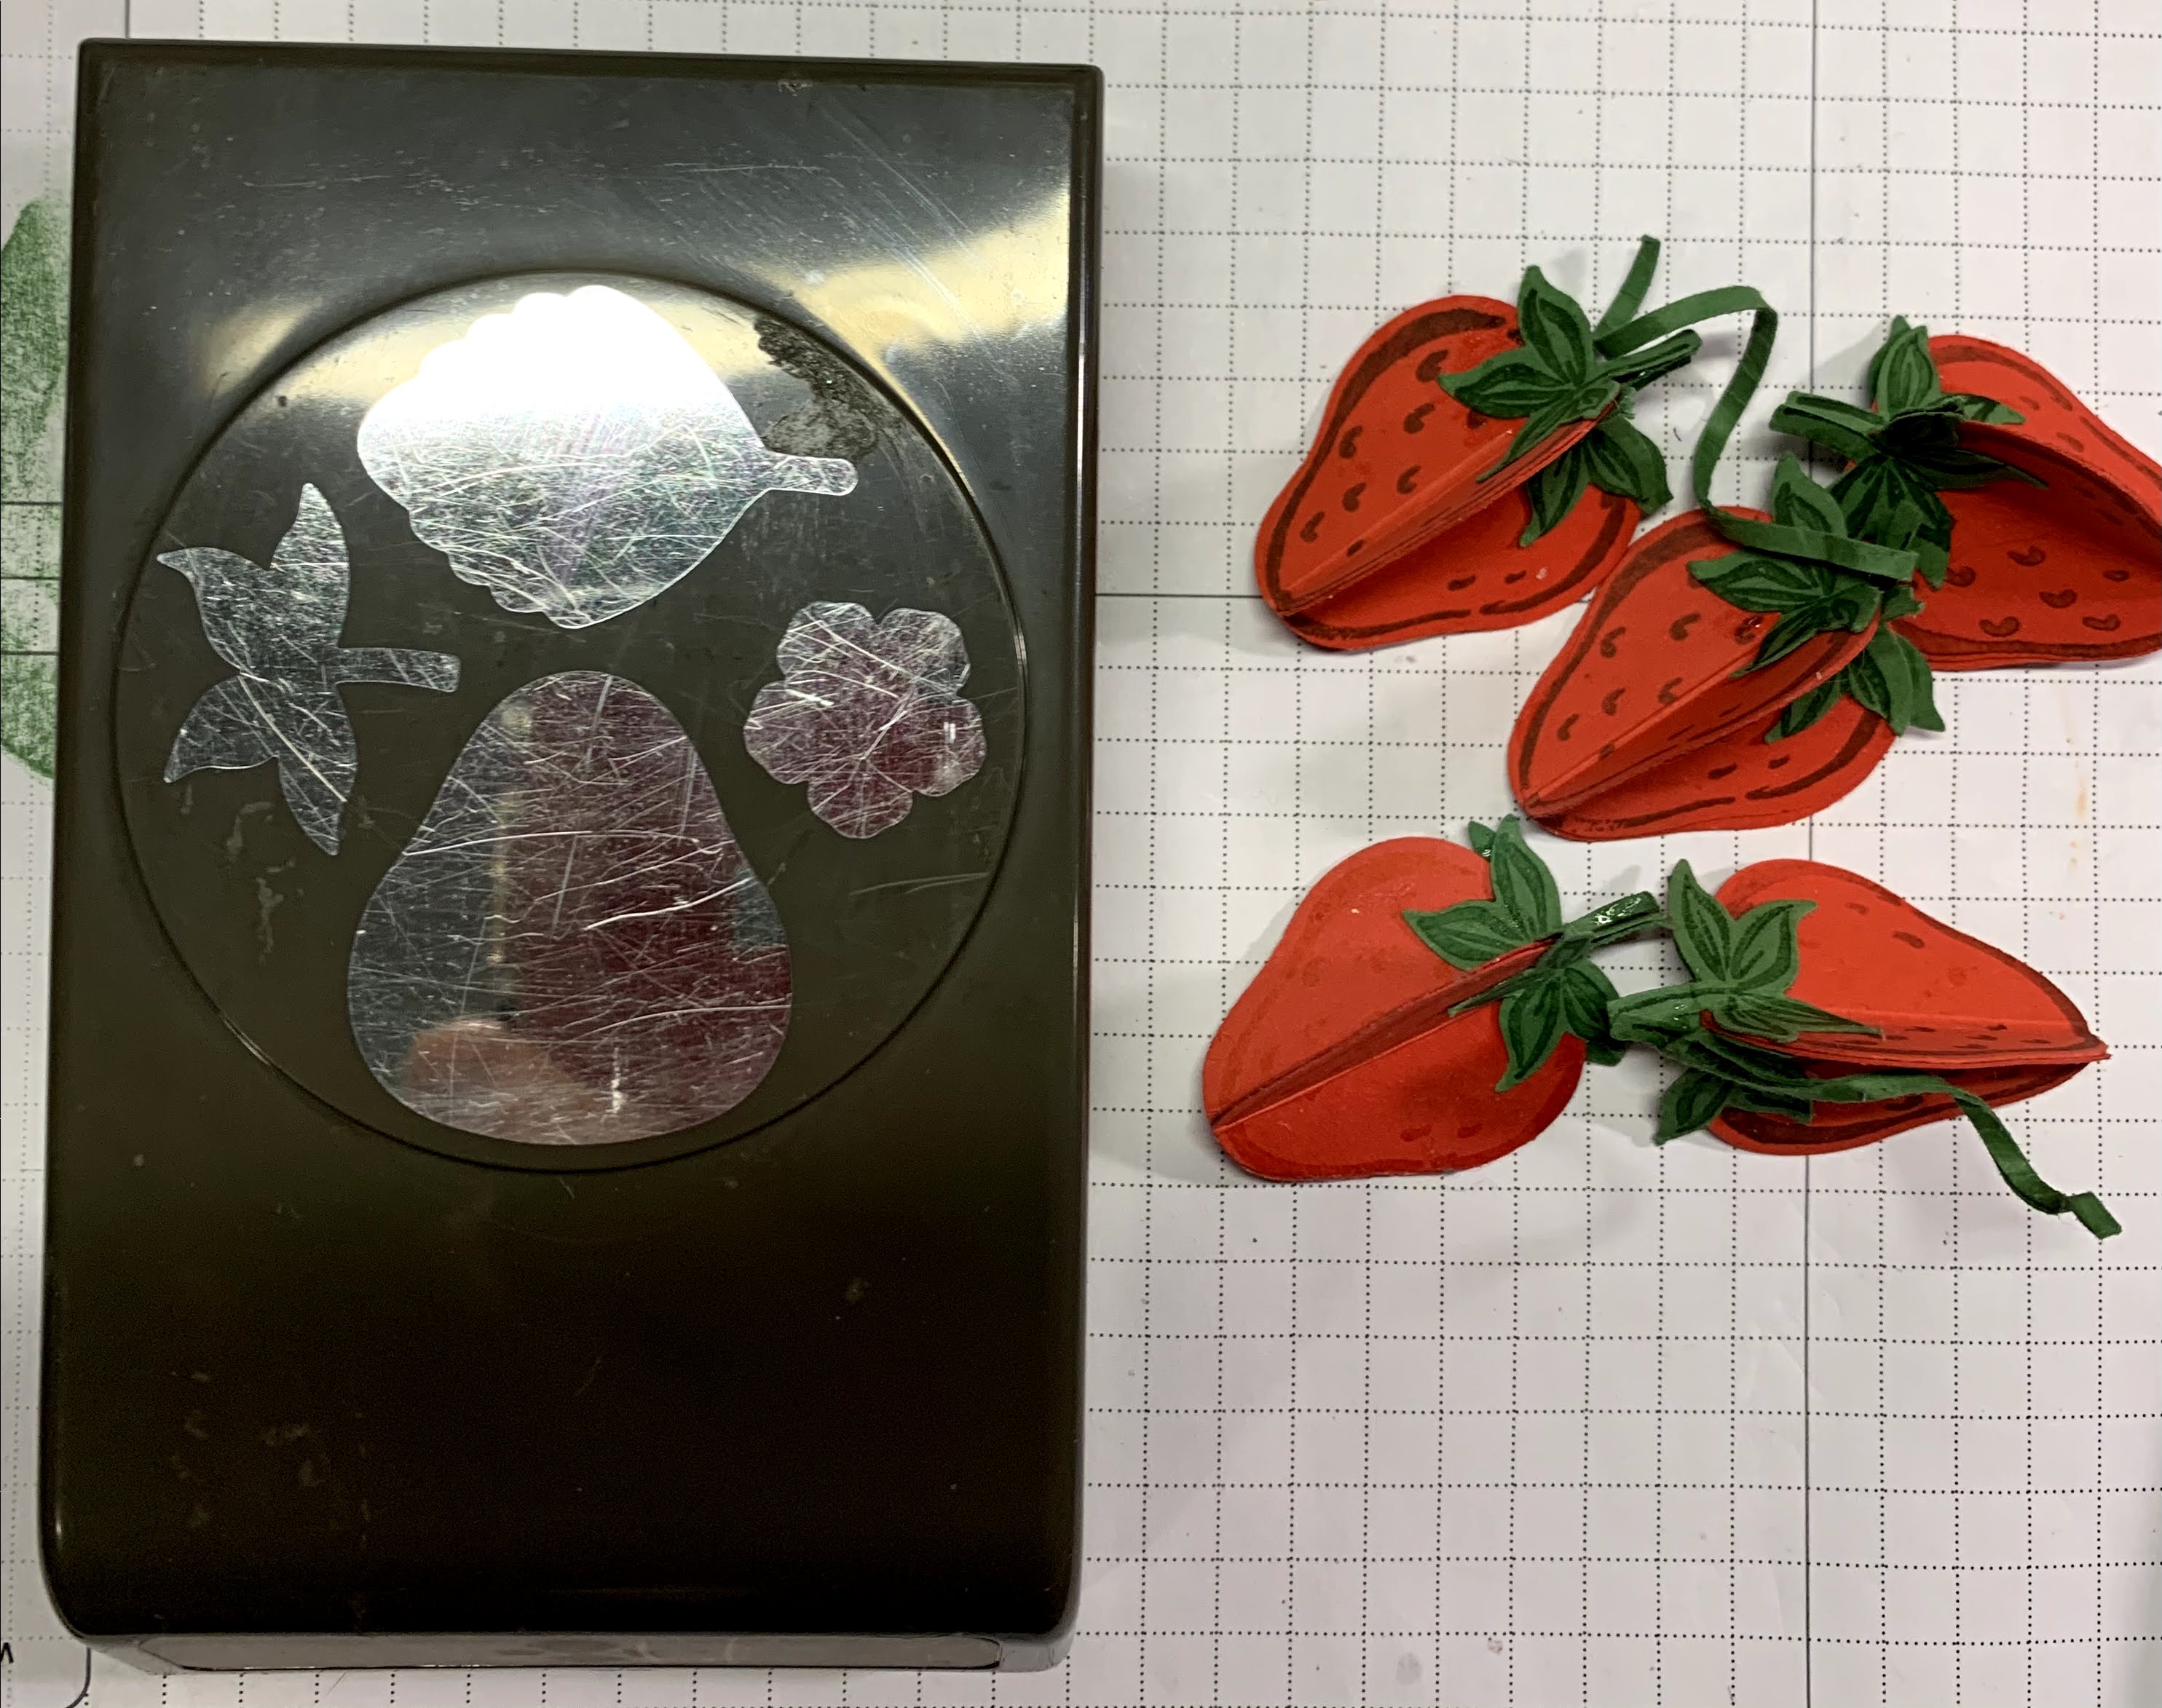
I started by stamping and punching three dogs.  A good number. three!

The stamparatus was used to stamp the dogs, two of which were made to look like my grand puppies - the 3rd a fire house dog.  The middle dog was coloured with watercolour pencils and a blender pen. After punching then with the dog punch, they were set aside while I finished the rest of the card.  At this point I still had no idea how I was going to finish this card.

Using the layering circle framelits and the embossing mats, dry embossed circles were created on a piece of Very Vanilla card stock.  The embossed and debossed sides were equally attractive, but selected the embossed side for this card.  Then, using the two circle stamps from the "Swirly Frame" stamp set, Soft Suede circles were stamped just inside the embossed areas.  A larger circle framelit was used to die cut these circles.


As I laid the dogs in the circle, as idea started to form.  Some how the old RCA commercial came to mind = and the rest is history.

The card base of Soft Suede layered with vertically scored Crumb Cake card stock and a 2" strip of Animal Expedition DSP to the left was made. 

Before adhering the embossed/stamped circle, I stamped "ruff ruff" in the middle and outside circles.
The three dogs were then added using dimensionals, looking like they were listening attentively.


Two 3/4" circles were punched from a piece of card stock randomly stamped with paw prints and placed in the upper right of the card.


The sentiment, from the same stamp set, was added.  I rounded the corners with the corner rounder punch.

Supplied Used: 
Stamps:  Happy Tails, Swirly Frames
Inks:  Soft Suede, Black Memento, Watercolour pencils (Crushed Curry and Early Espresso)
Papers:  Soft Suede, Crumb Cake, Animal Expedition DSP, Very Vanilla, Whisper White
Accessories:  Stamparatus, Embossing Mats, Layering Circle Framelits, Dog punch, 3/4" circle punch, Dimensionals


Wednesday, March 13, 2019

New Home

Today I pulled out the Pop up Home stamp set with its coordinating die.  I did not however attempt the pop up house on the card inside.  I'll leave that for a later date.

I used the stamp set and the stamparatus to create the following card:


The image of the house was stamped and coloured with watercolour pencils and an aqua painter on a separate piece of whisper White card stock.  It was then cut out and set aside.

On a 3 3/4 by 5" piece of Whisper White, the stamparatus was used to stamp a fence that looks like it extends across the paper, but only part of a fence was stamped what would be to the left and the right of the house, The fence was coloured with Stampin' Blends.

A pebble path was stamped to extend from the house and then the grass stamp from "Sheltering Tree" stamp set was used to randomly stamp grass around the fence posts  and other areas.  The larger grass stamp was also used to fill in grassy areas in the fore ground and back ground

Branches were stamped on both sides of the house and again coloured with Stampin' Blends.

The house was adhered to the card front on the created scene.  Once adhered, the sentiment was added near the bottom of the house, and a window box with flowers with small dimensionals on the lower window.

Supplies Used:
Stamps:  Pop Up Home, Sheltering Tree
Inks:  Black Memento, Stampin Blends, Watercolor Pencils
Papers:  Bermuda Bay, Crumb Cake, Whisper White
Accessories:  Pop Up Home Framelits, Dimensionals, Aqua painter

Monday, January 7, 2019

Birthday in a Circle - Hand Stamped Sentiment #305

This sketch with Hand Stamped Sentiments #205 immediately inspired me to pick up my Stamparatus  and create this card.


I don't usually make birthday cards using Basic Black , but I loved the contrast of the black with the Highland Heather which I used to color the flowers in the art piece.  It also contrasts nicely with the mainly Highland Heather pattern of the Botanical Butterfly DSP which I use on the top of the card front behind the art piece.

Using a template in my Stamparatus, I stamped the small flower from the Lovely Lattice stamp in a circle. 

 I then coloured each flower with Stampin' Blends (Highland Heather both light and dark, and Granny Apple Green both light and dark, with Daffodil Delight and a fine tip black pen for the flower center).  Tiny green pearls were added to the center of each flower.

The square art piece was then die cut with a layering circle framelit and matted with a Highland Heather scallop circle to form the art piece.

 The sentiment in the center, from "Beautiful Bouquet", was stamped in Highland Heather and then die cut with a layering circle framelit,  It was matted with a  Highland Heather scallop circle and the two circles were adhered together using dimensionals and  then adhered to the center.


Using the new duo butterfly punch, I punched a butterfly from the Botanical Butterfly DSP,  After applying some clear Wink of Stella glitter on the wings I added I to the art piece.  Look carefully because the butterfly camouflages' well

A row of light green pearls were placed under the sentiment and a number of the pearls were randomly placed on the card front.

Supplies Used:
Stamps:  Lovely Lattice, Beautiful Bouquet
Inks:  Black Memento, Highland Heather, Stampin' Blends (Highland Heather, Granny Apple Green, Daffodil Delight)
Papers:  Basic Black, Whisper White, Highland Heather, Botanical Butterfly DSP
Accessories:  Duo Butterfly punch, Small pale green pearls (non SU), Dimensionals, Layering Circles Framelits, Clear Wink of Stella


Tuesday, December 18, 2018

Hey Love, Hey Valentine - an Occasions catalogue sneak peak

I know!  You don't have to take my temperature!  I am well aware that we are a week away from Christmas and here I am making a Valentine's Day card!

Frankly, it's not so crazy, as classes start early in the New Year and I am getting a head start on making class samples. Plus you're getting a sneak peak at one of the stamps in the Occasions catalogue, as well as some of the new DSP.

I made this card using a template on the Stamparatus enabling me to stamp this little Valentine's Day character in a circle. And let me say that the new cling stamps work just as marvellously with the Stamparatus as with the stampin' blocks.


After stamping the bird in a circle, I die cut the 4" square with a circle framelit and matted it with a Scallop circle in Lovely Lipstick card stock.  Each image was coloured with  a Stampin' Blend (Daffodil Delight, Pumpkin Pie, and Lovely Lipstick).  Some red glitter was added to each of the little hearts held in the little bird's beak.  Once the glitter was dry, I added the sentiment, which I flagged at both ends, in the circle center using dimensionals.  A small real red ribbon was adhered to the lower end.


The 5 by 5" Lovely Lipstick card base is matted with Whisper White, upon which I added a strip of "All My Love" DSP which has some Red Glimmer Glitter paper added to the op and bottom.

The art piece is added to the card front using dimensionals.

Supplies Used:
Stamp:  Hey Love
Inks:  Black Memento, Stampin' Blends
Papers:  Lovely Lipstick, Whisper White, All My Love DSP, Red Glitter 
Accessories:  Stamparatus, Circle framelits, Scallop Circle Framelits, Dimensionals, Red Glitter, 1/8" Real Red satin ribbon.

Wednesday, October 3, 2018

Santa Pop & Twist card

It's been a while since I made a Pop & Twist card.  Tonight I thought I'd make up for lost time.
Actually I didn't think I would have the energy to make anything tonight as I was absolutely exhausted from my trip to Toronto.
The traffic was heavy in both direction, compounded by heavy rain and fog.  The way home was absolutely horrendous because not only was it raining and foggy, I hit rush hour traffic.

But I surprised myself with a burst of creativity.

Here's what I came up with:

The card front features Santa making a list and he has placed his official seal on the transactions.  I rounded the art piece's corners and matted it with Cherry Cobbler card stock also with its corners rounded. It was adhered to the card front matted with Santa's Workshop DSP.  At the bottom is a 1" belly band which holds the card closed.


The card opens in a pop, twist manner ( thus the name for the technique) to reveal 4 panels in the middle, and an image at the top and a place to write a sentiment in the bottom.

This is a close up of the two panels on the left. All images were stamped using the stamparatus and coloured with Stampin' Up's new blends. The snowflakes were die cut using the Blizzard Thinlets.


This is a close up of the two right panels and below is a close  up of the top of the inside of the card.


Both the top and bottom of the card have the Santa's workshop DSP adhered to them.  On the top I used the stitched oval framelet to die cut the Santa in the chair image directly from the DSP, and then matted it with a slightly large Cherry Cobbler oval.

On the bottom I placed a blank oval for a sentiment.

Supplies Used:
Stamp:  Signs of Santa
Inks:  Black Memento, Blends 
Papers:  Cherry Cobbler, Whisper White, Santa's Workshop DSP, Glimmer paper, 
Accessories:  Blizzard Thinlets, Corner Rounded punch, Dazzling diamonds, Stitched Oval Framelits, Layering Oval Framelits, Stamparatus.


Saturday, September 29, 2018

A Colorful Fall Tree SUO Challenges #208

Fall arrived (officially) on Sept. 22, and everywhere there is evidence of this.  Not only are the days getting shorter, they are also cooler (especially at night) and  the leaves on the trees are changing color. What gorgeous shades of reds, oranges, yellows, burgundies intermixed with green!!

This is one of my favourite times of year.

I was out and about doing errands this afternoon when I noticed a tree that looked just like the large tree stamp in "Rooted in Nature" - in full fall colors.  This inspired me to make this card and to submit it to the SUO challenge "Nature/Fall"

Using the Stamparatus, I used the color layering technique to give this tree it's autumn colors.  I learned this technique from Patty Bennett.

In this technique, markers of various colors are randomly applied to the stamp with the imaged stamped after each application.  The stamp is not cleaned between colors of markers. Colors are layered to the tree until you are happy with the way it looks. 


 Colors I used:  Old Olive, Mossy Meadow, Real Red, Cajun Craze, Daffodil Delight and Early Espresso.  The sky was washed with Balmy Blue and an aqua painter.

To finish the card front I used the Eclipse technique to add the word "FALL" over the image using the retired Large Letters Framelit dies.  On the right side of the word I added a "Leave Trinket" which I had painted with the new Copper Shimmer paint.


The Whisper White  art piece was layered onto a Cajun Craze layer and then a Balmy Blue card base.

Supplies Used:
Stamp:  Rooted in Nature
Inks:  SU Markers:  Old Olive, Mossy Meadow, Real Red, Cajun Craze, Daffodil Delight and Early Espresso, Balmy Blue
Papers:  Whisper White, Cajun Craze, Balmy Blue
Accessories:  Large letter Franelits, Foam tape, Leave Trinklets, Copper Shimmer Paint, Stamparatus


Tuesday, September 11, 2018

Merry Christmas in Winter Woods - Stamp, Ink, Paper Challenge #167

This is my first time entering a challenge at Stamp, Ink, Paper.

The challenge this week is to use a large sentiment on my card.  Since I was making cards using the Winter Woods stamp set for a display board for my Open House, I used this card and added one of the new Merry Christmas Thinlet dies on it.


I used the color layering technique to color the trees and I just love the effect.  To do this the Stamparatus is required, as well as a number of different colors of green and brown SU markers. Thanks to Patty Bennett for showing me this technique.


Once the trees were colored, I die cut the word "Merry" from the Christmas Thinlet die collection in gold foil paper and adhered it over top of the trees.  The smaller word "Christmas" is from "Holly Jolly Greetings".  It was gold embossed  and  die cut using a framelit included with the Merry Christmas thinlets.


This 3 3/4 by 5" Whisper White art piece was adhered to a 4 by 5 1/4" piece of Gold Foil card stock, and then added to a Mossy Meadow base.

Supplies Used:
Stamps:  Winter Woods, Holly Jolly Greetings
Inks:  SU Markers:  Mint Macaron, Pear Pizzazz, Old Olive, Mossy Meadow, Cajun Craze, Soft Suede, Early Espresso, Versa Mark
Papers:  Mossy Meadow, Gold Foil, Whisper White
Accessories:  Stamparatus, Merry Christmas Thinlet dies, Gold Embossing Powder

Monday, August 27, 2018

Circle Stamping - Happy Birthday Gorgeous

A word of warning about circle stamping with the Stamparatus and a template --- it is addictive.  More and more I am looking at my stamp sets to see which small stamps can be used for this technique.
So far, the best stamp set so far, with the most versatile smaller stamps is the "Happy Birthday Gorgeous" stamp set.

I wanted to give this card an Autumn flair, so I used Daffodil Delight and Pumpkin Pie as my 2 main colours.

Using a template for a 3 by 3" square Whisper White card stock, I stamped the flowers in Black Memento, with the colours alternating between Daffodil Delight and Pumpkin Pie.

In between the flowers I stamped a stem of sorts (? name) in Soft Suede, and after that a spiral stem in Crumb Cake ink.

The leaf was stamped by hand in Old Olive.

In the center I placed a 1 1/4" circle in Pumpkin Pie with the sentiment stamped on a 1" Whisper White circle.  The two were adhered together using dimensionals.

Small rhinestones were added to the centers of each flower and above and below the sentiment; glitter added to the Soft Suede stems.

The Whisper White art piece was matted with a 3 1/4" piece of Daffodil Delight, and then3 1/2 Whisper White before adhering to a 4 1/4 by 8" Pumpkin Pie base.

Supplies Used:
Stamps:  Happy Birthday Gorgeous, Hand Picked
Inks:  Black Memento, Daffodil Delight, Pumpkin Pie, Soft Suede, Crumb Cake, Old Olive
Papers:  Whisper White, Pumpkin Pie, Daffodil Delight
Accessories:  Template for a 3" square card stock, Stamparatus, small rhinestones, Dazzling details, Dimensionals. 1/8" white organza ribbon.

Tuesday, August 21, 2018

Strawberries in a Circle - The Paper Players Challenge #406

The challenge this week at the Paper Players is a clean and simple one focusing around the topic of fruits  and vegetables.

I love strawberries, and Ontario strawberries picked right from the field still warm from the sun, are some of the best in the world (but I'm a bit prejudiced).  So, it was natural that I would select a strawberry for this card.


Using a template in the Stamparatus I stamped the strawberry from the stamp set "Fruit Bowl" in a circle - the berry Real Red; the topper in Granny Apple Green - on  a Whisper White square.  The square was matted with Real Red card stock and then added to the card front.

The card base of Real Red was matted with Whisper White card stock with a 1/2" strip of retired Tutti Fruiti DSP at the top and bottom

The sentiment was stamped with Black Memento on a strip of Whisper White notched at both ends and after matting with Real Red card stock, was added to the circle using dimensionals.

Just for interest - did you notice the little pear?

Supplies Used:
Stamp:  Fruit Bowl
Ink:  Black Memento, Real Red, Granny Apple Green
Papers:  Real Red, Whisper White, Tuttu Fruiti DSP
Accessories:  Stamparatus, Dimensionals.


Thursday, August 9, 2018

Floral Wreath - Circle Stamping with Stamparatus

Pinterest is full of examples of wreath and/or circle stamping using a template with the Stamparatus.  It took a few practice attempts, but I finally managed to make a wreath.
But first I had to make the template.
Again, there are many examples of how to make templates, and once I figured out the principles I was able to make my own. Making a template will be part of a separate post


This is a 5 by 5" square card with an Elegant Eggplant base.

The wreath was built on a 4 by 4" piece of Whisper White card stock, using the following stamps: Abstract Impressions, Enjoy Life, Varied Vases, and Love What You Do. Smaller stamps seem to work best.

The larger flowers were double stamped with Flirty Flamingo and Highland Heather from the Abstract Impressions stamp set.

The smaller flower is stamped in Highland Heather and is from Varied Vases; the butterflies from "Enjoy Life"; and the leaf stamped in Granny Apple Green from the stamp set "Love What You Do"

Small rhinestones were placed in the center of the larger flowers.

The sentiment in the center is from "Enjoy Life", stamped in Black Memento, punched with a 2" circle punch which is matted with a 2 1/4" circle punched in Highland Heather. On top of the sentiment I placed a black bird stamped and fussy cut from the Enjoy Life stamp set.

A bow make with white organza ribbon is attached to the lower right. of the wreath.

The 4 by 4" focal piece is matted with Highland Heather card stock, and adhered to a Whisper White layer with dimensionals.  This is added to an Elegant Eggplant base.

Supplies Used:
Stamps:  Enjoy Life, Love What You Do, Abstract Impressions, Varied Vases
Inks:  Flirty Flamingo, Highland Heather, Granny Apple Green, Black Memento
Papers:  Elegant Eggplant, Whisper White, Highland Heather
Accessories:  Stamparatus, Template, 2" circle punch, 2 1/2" circle punch, rhinestones, 1/4" white organza ribbon, dimensionals

Wednesday, July 4, 2018

Abstract Impressions Note Cards

With this stamp set, the Stamparatus is invaluable.  With 4 stamping surfaces it was very easy to make 4 note cards.


Thank You : stamped first with Black Memento
Flowers:  Pool Party and Balmy Blue
Leaves:  Pear pizzazz and Old Olive

The image was die cut with the square framelits, matted with Balmy Blue and added to the front of a note card.  I made 4 of these for a set.

Supplies Used:
Stamp:  Abstract Impression
Inks:  Black Memento, Pool Party, Balmy Blue, Pear Pizzazz, Old Olive
Papers:  Whisper White Note Cards, Whisper White, Balmy Blue
Accessories:  Stamparatus, Square framelits


Saturday, April 14, 2018

Cupcake Birthday

I still remember Sheila demonstrating techniques with this stamp set at On Stage, and that memory returns whenever I use this set.

But, unfortunately all good things come to an end.  This set and its coordinating framelits, are on the retirement list.   So, one last card - for the road.


Cupcake:
Icing:
Using the Stamparatus, the icing was stamped first with Pink Pirouette (retiring colour), Sweet Sugarplum (also retiring) and finally Rich Razzelberry. Sprinkles of candy were stamped with Rich Razzelberry.

Cone:
This was stamped in Crumb Cake and Early Espresso

Both the cupcake icing and cone were die cut using the Cupcake Cut outs Framelits and added to a Whisper White Stitched Circle die cut - the icing with dimensionals.  The stitched circle was matted with a Sweet Sugarplum scallop circle the two of which were adhered together using dimensionals. The sentiment, stamped in Rich Razzelberry on Whisper White, was made into a banner and added to the side of the cone with some mini dimensionals.


The card front is comprised of a 4 1/4 by 11 thick Whisper White top fold card.  Before adding the strip of Party Time DSP (retiring) to the left side, some texture was stamped in Rich Razzelberry ink using the dot stamp from Timely Texture (also retiring)  A strip of Burlap ribbon as well as metallic edge Berry Burst ribbon added over and on the edge of the DSP help to unite the colours in the card.

The focal image was added to the card front using dimensionals. Adhesive backed Tutti-Fruitti sequins were adhered at random providing some sparkle and colour.


Supplies Used: 
Stamps:  Sweet Cupcake, Timeless Texture
Inks:  Pink Pirouette, Sweet Sugarplum, Rich Razzelberry, Crumb Cake, Early Espresso
Papers:  Thick Whisper White, Whisper White, Sweet Sugarplum, Party Time DSP
Accessories:  Cupcake Cut outs Framelits, Stitched Circle Framelits, Layering Circle Framelits, Burlap ribbon, 1/4" metallic edge Berry Burst ribbon, adhesive backed Tutti-Fruitti sequins, Dimensionals, Stamparatus

Tuesday, April 10, 2018

Watercolor Wings - Just for You

Yes the retirement list is out, and one of the stamps on the list is one on my favourites - "Water Color Wings" on Pg. 134 as well as the accompanying "Bold Butterfly Framelits" on Pg. 213.  I do so hate to see them go, so today I am making a card with this favourite of mine


The Stamparatus makes triple stamping so much easier, so of course I used this new tool to stamp the butterfly.  I stamped it in now time!

Colors for the butterfly, in the order stamped:  Powder Pink, Berry Burst, Tranquil Tide
Sentiment stamped in Tranquil Tide.

The butterfly was die cut with the retiring Bold Butterfly Framelit, and adhered by the body of the butterfly only, to a delicate doillie which  was placed on top of a Lots of Labels framelit which I embossed with the Striped Embossing Folder.

Some glitter enamel dots were added to the bottom and top butterfly wings.

The base card is Berry Burst, layered with Whisper White and then Fresh Florals Specialty DSP (Berry Burst).  Some 1/4" Metallic Edge Berry Burst was added to the left side of the card , wrapping it around the Whisper white and DSP layers.  A bow was added at the top.

Supplies Used:
Stamp:  Water Color Wings
Inks:  Powder Pink, Berry Burst, Tranquil Tide
Papers:  Berry Burst, Whisper White, Fresh Florals DSP
Accessories:  Bold Butterfly Framelits, Labels Framelit, Stripes Embossing Folder, Glitter Enamel Dots, Stamparatus, Doillie