Showing posts with label Christmas. Show all posts

Thursday, November 2, 2023

Camel in Silhouette

 I love the simplicity and elegance of this card thais is partially cased from a card I saw on Pinterest. It is easy duplicated and quickly made.

The main techniques used include masking, sponging with blender brushes, die cutting, and heat embossing.

First I created a mask by die cutting a circle using the 2 3/4" Deckled Circle die on  a 4 by 5 1/4” piece of card-stock or window sheet. After placing this mask over a 3 1/2 by 5” piece of Basic White card stock I  used blender brushes to create the background. Ink colours used include Balmy Blue, Night of Navy, Daffodil Delight, and Pumpkin Pie. Stars were added to the sky using White acrylic paint and a tooth pick.

The camel was die cut from Basic Black card stock using the corresponding Night Divine Die and added to the left of the circle using dimensionals. To complete the scene I added a gold foil star.

The sentiment under the sponged circle, from the Brightest Glow Stamp set, was embossed with black embossing powder

The card base is a 5 1/4 by 8 1/2” piece of thick Basic White card stock layered with gold foil. The gold foil is matted with Black card stock and then added to card base using dimensionals.

Hint: die cut the camel and animals from the center of the Basic Black mat before adhering it to the gold foil. (I added the animals to the inside of the card)

Supplies Used:

Stamps:  Night Divine, Brightest Glow

Inks: Balmy Blue, Night of Navy, Daffodil Delight, Pumpkin Pie, Versa Mark

Papers: Thick Basic White. Basic White, Basic Black, Gold foil

Accessories:    Night Divine Dies, White Acrylic paint, Black Embossing powder, dimensionals

Friday, September 29, 2023

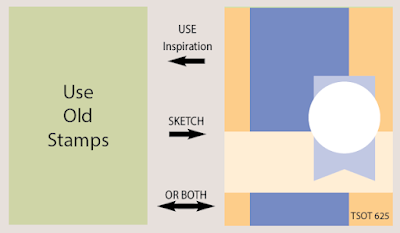
So Very Merry Angel - Peace, and Joy - Try Stampin on Tuesday #625

 It's been a while since I've done a challenge.  The summer has been very busy with gardening and house renovations- the latter in my craft area.  My whole room was in total disarray.  Now that I have my craft area partially put together I have managed to participate in some challenges.

For the challenge at Try Stampin' on Tuesday #525, I decided to use one of my new stamp sets, not an old one, using the sketch to create a Christmas card.


The image of the angel was embossed with black embossing powder on vellum cardstock and coloured it with Stampin' blends on the wrong side.
It was die cut with a layering circle die and adhered to a larger white glimmer circle die cut.  This was adhered  using dimensionals to a 3 3/4 by 2 1/4" piece of Boho Blue cardstock notched at one end.


The card base is a  top fold A2 Basic white card. The first layer is a 5 3/8 by 4 1/8" piece of O Holy Night DSP (stars). Layered on that, bit more to the left side, is a 2 3/4 by 5 3/8" of the reverse side of that DSP.  Across the bottom , on the horizontal plane, I added a 1 1/2 by 4 1/8" piece of white glimmer paper.

The image piece was added to the right side of the card front using dimensionals.  

A sentiment, embossed with black embossing powder on vellum, was fussy cut, adhered to white glimmer paper, and added above the image using dimensionals.

Adhesive backed sparkle gems were added randomly to the card front, 

Supplies Used: 
Stamp:  So Very Merry
Inks:  Versa Mark, Stampin' Blends (Lemon  Lolly, Night of Navy, Fresh Freesia, Flirty Flamingo, Blackberry Bliss, Shaded Spruce
Papers:  Basic White, White glimmer, Vellum cardstock, O Holy Night DSP, Boho Blue
Accessories:  Black embossing powder, Layering Circle dies, Adhesive backed sparkle gems, dimensionals


Saturday, August 5, 2023

Very Merry - Hand Stamped Sentient #419

 This card was made for the sketch challenge at Hand Stamped Sentiment. I used one of the new On Line Exclusives "So Very Merry" for this challenge.


The image of the Gingerbread House was embossed with black embossing powder on Vellum card stock.  The sentiment, from the same stamp set, was also embossed with the same powder.
The image was then coloured with Stamp'n Blends on the wrong side using the following colours:  Pecan Pie, Poppy Parade, Daffodil Delight, Shaded Spruce, Balmy Blue.
The completed image was die cut using the circle die from the Stylish Shaped dies set.  I die cut a second identical circle in Basic White and adhered the two together.

The card base is Basic White.  
The art piece is a 3 3/4 by 5" piece of Basic white embossed with an embossing folder. In the upper right corner, I added a triangle cut from the" One Horse Open Sleigh DSP.  Two 3/4" diagonal strips of left over from the same DSP was added below the triangle. To add interest, I added some 1/8" gold trim on top of these two strips. 
This piece was matted with a slightly larger piece of Night of Navy card stock.

After adding some twine behind the image piece, it was adhered to the card front using dimensionals.  
To finish the card, I added 3 Adhesive backed sparkle gems.

Supplies Used:
Stamp:  So Very Merry
Inks:  Versa Mark, Stampin' Blends, Balmy Blue
Papers: Basic White, Night of Navy, One Horse Open Sleigh DSP, Vellum
Accessories:  Black Embossing Powder, Adhesive Backed Sparkle Gems, Stylish Shaped Dies, twine, 1/8" gold trim, Embossing Folder.


Sunday, November 6, 2022

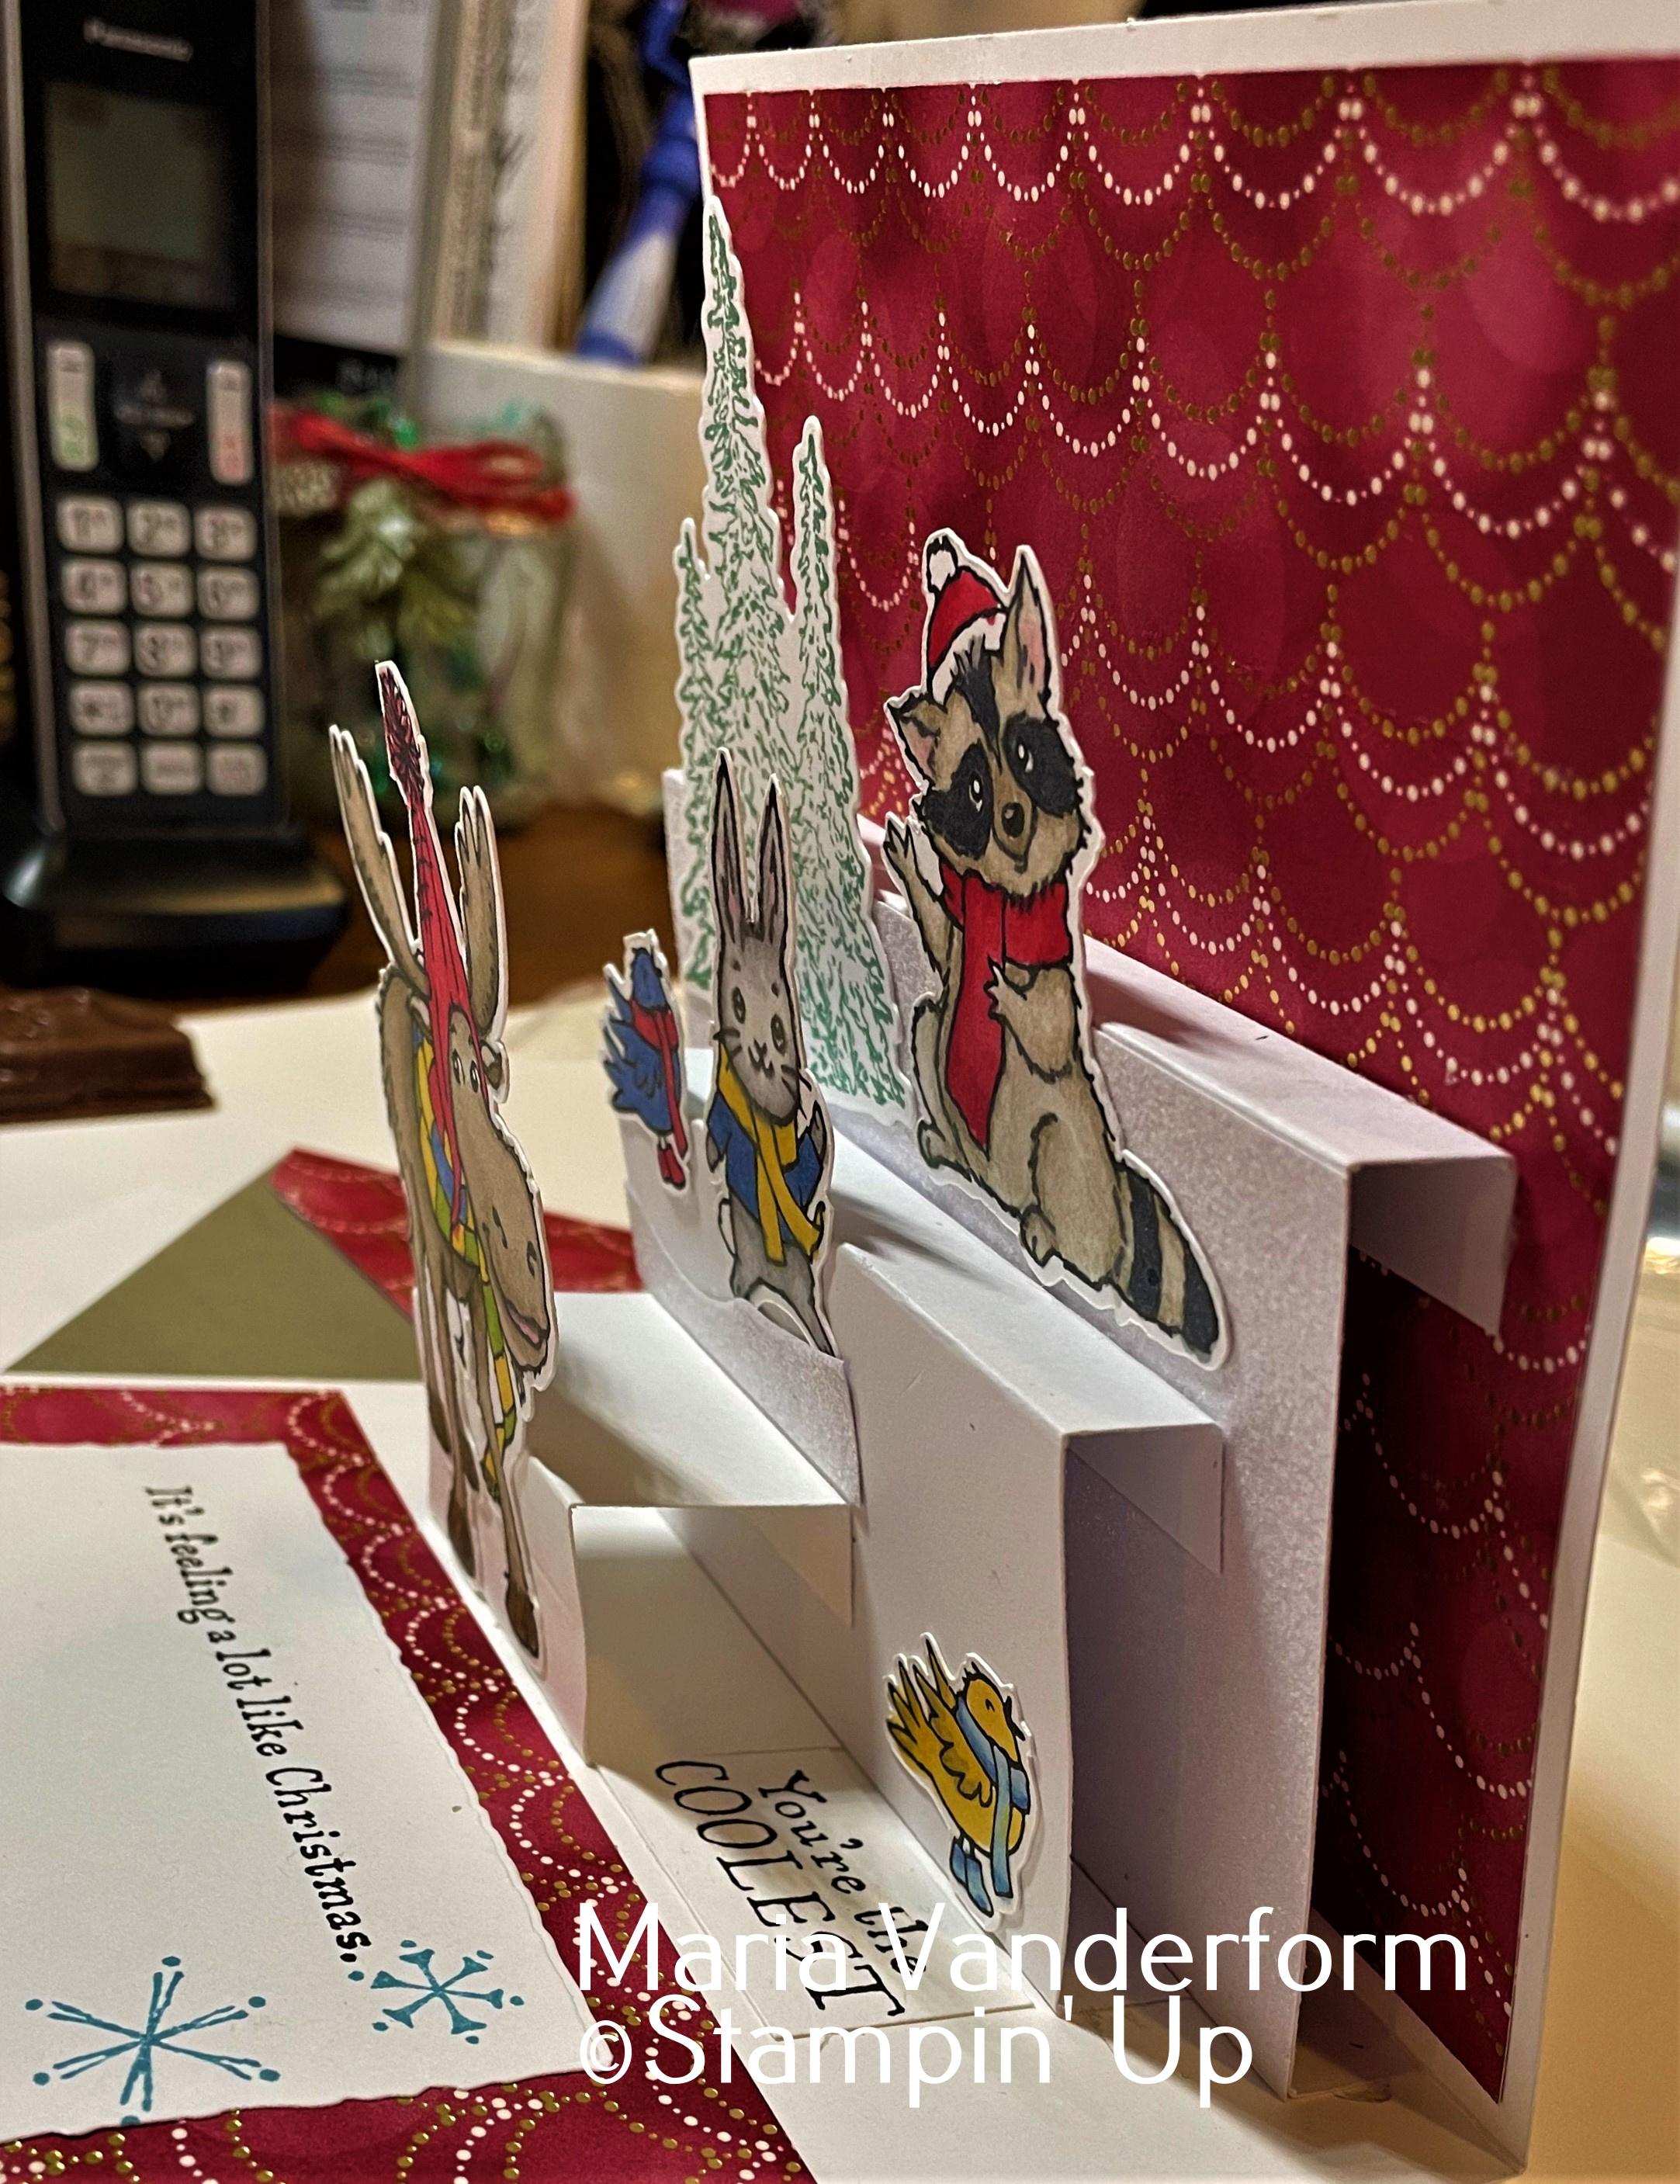
Regal Reindeer Christmas Pop Up

 This card is one of a series of Pop Up cards I made for the Hand of Man Art and Craft show which was held the end of October, 2022. It is a larger card, 5 1/2 by 5 1/2".  The envelope was hand made using the Envelope Punching Board.


The Designer Paper used in this card is the Lights Aglow DSP, a piece of which was added to the front.

On the Basic white art piece, the image of the triple trees was stamped using Garden Green ink. The sentiment was stamped adjacent to the trees.

On a separate piece of Basic White cardstock the images of the reindeer and little bunny were stamped using Black Memento ink.  They were then coloured using Stampin' blends and die cut.

They were then added to the art piece in front of the stamped trees.  Light smoky slate Stampin' blend was applied to the ground under the feet of the reindeer and  below the little bunny.


The pop up mechanisms are revealed when the card is opened.


There are 3 pop up mechanism each one a different size.
Pop up 1:  4 1/2 by 4 1/2" scored at 1/2, 3, 3 1/2, and 4"
Pop up 2: 3 1/2 by 3 1/2" scored at 1/2, 2 1/2, and 3"
Pop up 3: 1 1/2 by 3 1/2" scored at 1, 2, and 3"

The images adhered to the various layers are from both the Regal Reindeer, and All Bundles Up.  All were coloured with Stampin' Blends and either die cut or hand cut.


The racoon and trees were added to the top tier; the bunny and bird to the second; and the moose to the one at the bottom. Another bird was added to the bottom of the second tier.
Supplies Used:
Stamps:  Regal Reindeer, All Bundled Up
Inks:  Black Memento, Stampin Blends, Shaded Spruce, Balmy Blue
Papers:  Basic White, Lights Aglow DSP, Dazzling diamond glitter 
Accessories:  Reindeer dies, 


Friday, November 4, 2022

Fitting Florets Z fold Christmas card

 The Fitting Florets bundle and coordinating DSP can be used to create elegant cards/projects for the Holiday season.  A couple of days ago I created a birthday card using the same bundle; today its a Christmas card.  This bundle is an early release from the January mini catalogue.


To create the Z fold card, a piece of 81/2 by 5 1/2" piece of Soft succulent card stock was scored at 2 1/8 and 4 1/4" .  The card is folded in half at the 4 1/4" score line and then folded back on itself to create the Z fold.

Fitting Florets DSP ( 4 by 5 1/4") is added to the inside and then two pieces of the same pattern on the front two sections (2 by 4 ")


Two of the frames were die cut using Basic White card stock.  The outer half of the larger one was added on the first front section over the fold. On the center portion was stamped the sentiment (Framed & Festive stamp set) using Evening Evergreen ink and then it was added to the inside of the already attached frame. Because this doesn't fit into the frame perfectly, a second frame was die cut and added to the inside.

Two stems were die cut in basic White; two leaves in Soft Succulent.  All were added to the outside of the adhered frames.  A bow made using the polka dot ribbon was added in the middle of the frame..

The center of the second die cut frame was added to the inside center to allow for saying.

To finish the card, three Soft Succulent matte Decorative dots were added to the card front.


Supplies Used:

Stamps:  Framed & Festive, Framed Florets

Inks:  Black Memento, Evening Evergreen

Papers:  Basic White, Soft Succulent, Fitting Florets DSP

Accessories:  Framed Florets Dies, Polka dot ribbon,

Below is another sample using this new bundle. This time the card is to celebrate a  birthday.


Thursday, October 27, 2022

Snowflake Floating Element Technique - a tutorial

 This technique has been all over Pinterest for a while, but I've just noticed it. Where have I been?  That's a rhetorical question really because obviously I have been busy getting prepared for the Christmas craft show.

To make up for the time I have missed, I made a card using the Floating Element Technique (I really needed to get ready for my show tomorrow)

The Floating element technique involves adhering the same size strips of paper (cardstock, vellum, window sheet or acetate from stamps)  equidistant from each other, then die cutting with a shape die, and adding this to a card front using dimensionals.


Supplies Used:

Stamp:  Joyful Flurry, Inspired Thoughts

Ink:  Versa Mark

Papers:
  • Basic White 4 1/4 by 5 1/2" (card base)
  • Basic White 3 3/4 by 5" (inside)
  • Soft Succulent - 2 pieces 4 by 5 1/4" - one for card front; other for inside
  • Soft Succulent - die cut with stitched rectangle die - for sentiment
  • Texture Chic DSP 3 3/4 by 5" - layer on Soft Succulent
  • Texture Chic DSP 1/4" by 5" - inside
  • White flocked paper - die cut large snowflake
  • White flocked paper - mat for die cut sentiment
  • White flocked paper - die cut two small snowflakes
  • White flocked paper - 1/8 by 5" for inside
  • Silver glitter card stock cut in 1/4" by 4" strips (10) 
  • 3 by 3" piece of window sheet
Accessories:
  • Layering Circle dies
  • Snowflake dies
  • Rhinestones
  • White embossing powder
  • Liquid adhesive (Tombo)
  • Rectangle stitched dies
  • Dimensionals
Putting card together:
  1. Die cut snowflakes and sentiment die cut.
  2. Cut 10 strips of silver glitter card stock
  3. Adhere these strips to the window sheet leaving equidistant spaces between them
  4. Using a circle die, die cut the window sheet with the strips attached. Adhere the larger die cut snowflake to the center, and add aa larger rhinestone to the center.


  1. Add small stampin dimensionals to the back of this die cut circle (ensure they are placed behind strips so they don't show through the cracks). Do not remove the protective covers yet.
  2. Stamp the sentiment with Versa mark ink on the Soft Succulent die cut , and emboss with white embossing powder.  Mat this piece with White flock
  3. Adhere DSP to the Soft Succulent card stock, and adhere this to the Basic White card front.
  4. Remove protective covers from dimensionals behind die cut circle and adhere to center of card front.  It is floating on the card surface.


  1. Adhere sentiment below circle.
  2. Adhere two smaller snowflakes together and add to the card front to the right above the sentiment.  
  3. Add rhinestones to the sentiment panel and to the center of the snowflakes in the DSP.
  4. On the inside, mat the Whisper White piece with Soft Succulent card stock.  Add the strip of DSP with the strip of white flocking next to it to the left side of this layer.


  1. Adhere to the inside of the card
  2. Adhere DSP to the envelope flap.                                                                                                                                                                                                                           


Sunday, October 2, 2022

To Friends Near and Far - Leaves of Holly - a catalogue case

 Sometimes by casing a card from the catalogue it gets your creative juices flowing. Not that I needed it - its just I am a bit overwhelmed getting ready for the Hand of Man craft show the end of the month. 

The card I cased is on Page 24 of the Holiday catalogue.


Here are a few techniques I used on this card:

1. To create the background of the Basic White art piece, a Holly leaf was die cut in Sahara Sand card stock and this was used as a stencil applying Sahara sand ink with a blender brush randomly over the surface. 

2. The Textural element was embossed with gold embossing powder.  The element was laid directly onto a Versa Mark ink pad, gold embossing powder applied and heat set.


3.  Ribbon  treatment: The edge of the 1/2" Natural Woven Ribbon was trimmed off causing the edges to fray.  The unfrayed edge was coloured with a dark Old Olive stampin' blend.


4.  The Holly leaves and the Holly berry consist of 2 layers - a lighter base and a darker one with more definitive features on top.

5.  The Iridescent foil snowflakes are a carry over from last year, and are applied using tombo glue and a sponge.

Supplies Used:

Stamps: Leaves of Holly, Christmas to Remember

Inks:  Sahara Sand, Versa Mark, Stampin' Blend (Old Olive Dark)

Papers: 

  • Cherry Cobbler (card base) 4 1/4 by 5 1/2"
  • Boughs of Holly DSP 4 1/4 by 5 1/2" - adhere to card front
  • Basic White card stock  4 1/2 by 3" - art piece
  • Sahara Sand - die cut one Holly Leaf
  • Old Olive - die cut base of Holly leaf
  • Mossy Meadow - die cut more detailed Holly leaf 
  • Real Red - die cut berry
  • Cherry Cobbler - die cut more detailed die
  • Crumb Cake - scrap - to emboss sentiment
Accessories:
  • Gold embossing powder
  • 1/2" Natural Woven Ribbon
  • Holly Berry dies
  • Textural elements
  • Wonderful Snowflakes
  • Red Toile tidings glitter enamel dots (retired)


Tuesday, September 20, 2022

A Swinging Gnome - cards that move - a CASE

 I cased this card from Susan Campfield, but used different DSP.  I just love interactive cards and this one brings a smile to your face. 

The card is interactive as the legs swing back and forth like the pendulum of a clock.  I tried making a short video showing the legs moving, but I  couldn't capture the motion well enough.


Supplies Used:
Stamp:  Kindest Gnome
Ink:  Real Red
Papers:  Real Red, Basic White, Santa Express DSP
Accessories:  Real Red Rhinestones, Gnome dies, Dimensionals, Fabulous Frames dies.


Sunday, September 4, 2022

Christmas Barn & Dies - A Moonlight sleigh ride - a tutorial

 Once again I challenged myself to create at least 3 different cards using the Christmas Barn and its coordinating dies.

For the first card, I used the new masking papers and the blender brushes to create this night scene.  Anyone for a sleigh ride?


The top fold A2 card base is Night of Navy cardstock, layered with Basic White card stock. The scene is created on a 3 3/4 by 5" piece of Basic white card stock.

1. Use a 1 1/4" circle punch to punch a circle out of masking paper, and adhere the masking paper to the upper right of the art piece.  This will become the moon.
2.  Using a blender brush, apply the following shades of blue to the upper 2/3rds of the art piece:  Pool Party, Balmy Blue, Pacific Point, Orchid Oasis and Night of Navy.  Lightly apply some Pool Party to the lower 1/3.
3.  Stamp the trees using Orchid Oasis ink, stamping off to create depth and distance.
4.  Stamp the horse and sleigh using Black Memento ink, and colour with an Orchid Oasis stamp'n blend.  Add some more shadow marks under the horse and sleigh.
5.  Remove the mask from over the moon and with a finger dauber, lightly add some Daffodil Delight around the edges of the moon and into the night sky.
6.  Using the star dies, die cut some stars .
7.  Adhere a strip of silver foil behind the art piece to make the stars shine.
8.  Stamp the sentiment using Night of Navy ink.
9.  Add puff paint to the fore ground and around the horse and sleigh.  Add dazzling diamonds to this wet paint and then heat with a heat tool until paint puffs up.
10.  Adhere art piece of a 4 by 5 1/4" piece of Basic White card stock


Supplies Used:
Stamp:  Christmas Barn
Inks:  Black Memento, Pool Party, Balmy Blue, Pacific Point, Orchid Oasis, Night of Navy, Daffodil Delight, Orchid Oasis Stampn' Blend
Papers:  Night of Navy, Basic White, Silver Foil
Accessories:  Masking Paper, 1 1/4" circle punch, Puff Paint, Dazzling Diamonds, Heat tool, Barn dies


Monday, August 8, 2022

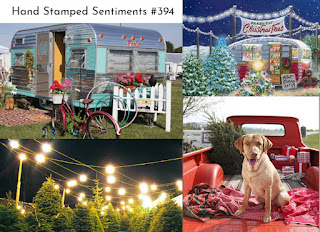
Vintage Trailer for the Inspiration Challenge at Hand Stamped Sentiments #394

 I have always wanted to go camping but it was never in a trailer, always in a tent. Making this card for the Inspiration Challenge at Hand Stamped Sentiments #394 brought back some of those memories.

Making a vintage trailer using the Sale a Bration (SAB) Tree lot dies was easier than I thought. For this card, which is a partial case from the card in the SAB catalogue, I used only 5 of the dies. The trees are from the Peaceful Deer stamp set.


The trailer, is placed against a back drop of White glimmer paper and a sky sponged with Starry Sky ink. The stars were made using white acrylic paint and the fine end of a paint brush.

The poles holding up the lights, were die cut from Soft Suede card stock; the light strings in Basic white.  The light strings were coloured with Shaded Spruce Stampin Blend, and the lights with various colours of blends.  Some clear Wink of Stella applied to the lights made them look like they were sparkling. 


The trailer was parked, using dimensionals, underneath the lights.


This vintage looking trailer is constructed of Real Red and gold foil card stock. There are white curtains in the window and a Garden Green wreath with a ribbon die cut from scraps of Mint Macaron handing on the door.  The wheel tire is coloured with a black marker; as is the hitch.
Some vellum card stock coloured with a So Saffron marker is added to the wrong side of the windows.

The sentiment, from Christmas Memories, is embossed with gold embossing powder .

Supplies Used:
Stamps:  Dancing Deer, Christmas Memories
Inks:  Various colours of Stampin' Blends for the lights, Starry Sky, So Saffron, Versa Mark., Basic Black marker
Papers:  Basic White, Real Red, Gold Foil, scraps of Garden Green, Mint Macaron, White Glitter paper, Soft Suede, Vellum card stock.
Accessories: Tree Lot dies (SAB), Gold Embossing powder, Clear Wink of Stella, White acrylic paint, dimensionals.

Sunday, July 24, 2022

Ghome Be Merry - Paper Craft Crew Challenge Horizontal sketch Challenge #479

 The temperature has been extremely hot for the last week or so.  I had to cancel my outdoor class and bring it indoors and today I am "hiding" in the basement making some Christmas cards.  Just seeing snowflakes, snow on the ground, snowmen, and penguins has a visual cooling effect. Crazy maybe, but it does work!

Gnomes have been popular for the Holiday season for a number of years now, and this year is no exception.  The "Kindest Ghomes" bundle and DSP, is absolutely adorable and work so well together.  Most of the images of the Gnomes and toadstool houses can be  cut directly from the DSP using the coordinating dies. Which is what I did for this card.

I made this card for the horizontal sketch challenge at the Paper Craft Crew Challenges #479


The card I made is a monochromatic blue, having used the following colours: Night of Navy, Pacific Point, Balmy Blue, and Pool Party.

The card base is Pacific Point card stock, layered with Basic White embossed with the Winter Snow embossing folder.  At the left end of this embossed layer is a 2" strip of Storybook Gnomes DSP (Pacific Point blue with white snowflakes).


The 4 by 3" focal image piece was sponged using the Stampin' Up blender brushes.  Starting with Pool Party, I gradually layered on Balmy blue, Pacific Point, and finally Night of Navy ink leaving the saturation lighter in the center and darker around the periphery. Snowflakes were added using white acrylic paint and the tip of a small paint brush.

Wonderful Snowflake embellishments were carried over from last year and this was a perfect time to use one.  I added one towards the left side of the background, and then added the toadstool house (shades of blue)on top of it using dimensionals.  The gnome was added to the right and slight in front of this house.  A bunny, fussy cut from the DSP was added to the left of the house.


Some liquid applique and glitter was added below the added elements to 'ground' them.

The sentiment is from "Christmas to Remember".  I think one word says it all.

To finish the card, some Clear Wink of Stella was added to some of the Toadstool elements, the attire of the Gnome and the bunny.


Supplies Used:

Stamps:  Kindest Gnomes, Christmas to Remember

Inks:  Black Memento, Pool Party, Balmy Blue, Pacific Point, Night of Navy

Papers: Pacific Point, Basic White, Storybook Gnome DSP

Accessories:  Winter Snow Embossing Folder, Wonderful Snowflake embellishment, Clear Wink of Stella, Liquid Applique, Dazzling diamonds, Gnome dies.

Tuesday, November 2, 2021

Bird in a Wreath for Christmas - Global Design Project #316

 The challenge this week is to CASE a card by Designer Stesha Blookhart from the USA. 

        CASE means to Copy  and Selectively Edit

Looking at her design, this is the card I made, incorporating a lot of her elements but changing some of them to make the card my own.


On the Thick Basic white card stock card base is layered some Heartwarming Hugs DSP torn at both short ends.

The focal image was built upon a die cut Basic white circle brushed with Balmy Blue ink.  

Two layers of wreath die cut with the Seasonal Swirl die - one in Evening Evergreen and the second in Soft succulent- were adhered together and then added to the die cut circle.


The following were added to the wreath 5 stamped and die cut pine cones and a total of 15 die cut  Ivy leaves .  Three Ivy leaves were adhered to one pine cone and each unit was added to the wreath.  Matte adhesive dots (red) were added to each of the pine cone/ivy units simulating berries.

The sentiment panel was added across the wreath, and a bird, from Birds and Branches was perched on top of the panel.  The bird was stamped in Smokey Slate and coloured with Real Red, Basic Gray, and Daffodil Delight stampin' Blends.

To finish, a bow make with double linen thread was added at the bottom of the wreath.


Supplies Used:

Stamps:  Sparkle of the Season, Birds & Branches

Inks:  Soft suede (pine cones), Evening Evergreen (sentiment), Blends ( Real Red, Daffodil Delight, Smokey Slate, Basic Gray (bird)), Balmy Blue (circle background)

Papers:  Thick Basic white, Basic White, Heartwarming Hugs DSP, Evening Evergreen, Soft Succulent

Accessories:  Seasonal Swirl dies, Birds & Branches dies, Linen thread, Matte Decorative Dots, Dimensionals, Glue dots

Monday, November 1, 2021

Happy Christmas - Sunday Stamps SSC 269

 I used the Holly Holiday stamp set for the challenge at Sunday Stamps. For this challenge a minimum of 3 colours must be used for the selected image, plus one neutral.

I used Daffodil Delight, the second yellow/gray, and the Granny Apple green.  My neutral is Basic Gray.


The card base is Thick Basic White, layered with In Good Taste DSP (solid gray tones). 
The center part of the Basic White layer, the art piece, was sponged lightly with Smokey Slate ink using a blender brush.  This provided the back drop for the Yellow Bird.


A branch, from the stamp set "Birds & Branches" was stamped un Smokey Slate ink across the lower 1/3 of the art piece. 
On a separate piece of Basic White card stock, the bird , 2 Holly and Ivies, as well as an extra wing were stamped using Basic Gray ink.  The bird, and extra wing,  was coloured with Daffodil Delight,& Daffodil Delight combined with Gray.  


The Ivy was coloured with Granny Apple Green Stampin' blend but the berries were left uncoloured.  All were fussy cut    The extra wing was added  over the existing wing on the bird for a 3D effect and the Ivies below a branch that was stamped in Basic Gray( Birds & Branches ).


An extra Ivy cluster was stamped below the branch and coloured before the other two fussy cut clusters were added.    

The sentiment was stamped above the bird,

T finish the card, 3 Genial Gems were added randomly and glitter was appd on some parts of the bird and around the Ivy leaves.


Supplies Used:
Stamps:  Happy Holidays, Birds & Branches
Inks:  Basic Gray, Daffodil Delight, Granny Apple Green Stampin/' Blends
Papers:  Thick Basic White, Basic White, In Good Taste DSP   
Accessories:  Dimensionals, Glitter, Genial Gems, White paint pen, Bender brush