Showing posts with label Oval framelits. Show all posts

Friday, November 10, 2017

Cowabanga!! Happy Birthday Dude

The Ninja Turtles were popular a decade or so ago, but there are still young boys who are fascinated by these mighty and fierce warriors.

I was asked to make a birthday card for a young boy who was fascinated with the "Blue Ninja Turtle".  Well, it's been a while since I researched anything related to the Ninja Turtles, after all my children are adults and its not something my Grand children are "into". So I had a task ahead of me. 

Fortunately the internet is full of very helpful information related to this topic.  I wanted to make sure I got the colouring of the "Blue Ninja Turtle" as accurate as possible.

Here's what I came up with:


I found a cut out of the body parts a Ninja Turtle on one of the Ninja Turtle sites as well as some pictures of the "Turtles".  So it was easy enough to colour the body, arms and legs as accurately as possible.

After colouring the parts, I cut them out and adhered the arms and legs to the body with brads- so yes, the arms and legs do move. Before adding them I sponged all edges with Basic Gray ink. Some Crystal Effects applied to the eyes made them come to life .  The completed "Blue" Turtle was added to a Daffodil Delight oval with dimensionals. A band of Pacific Point was adhered around the outside of this oval.

Again I used the internet to find smaller versions of the 4 turtles, copied and pasted them and printed them onto Whisper White card stock. Cowabanga I had made my own DSP which, after trimming, I matted with Pacific Point card stock and then  adhered this to  the card front. All edges again were sponged with Basic Gray ink.

The card base is Garden Green card stock, layered with Daffodil Delight.

The sentiment was stamped from "Happy Happenings" on Whisper White, matted with Pacific Point and added to the lower card front with dimensionals.

What's a birthday card without balloons?

So, I punched 3 balloons using the Balloon Builder punch - one large, and two smaller ones (in Pacific Point and Daffodil Delight). I embossed them with the polka dot embossing folder before adding them to the card front.

Here's the inside of the card:

So, Happy Birthday Little Dude!!

Supplies Used:
Stamp:  Happy Happening (Retired)
Inks:  Black Memento, Basic Gray, Stampin' Blend markers, Pacific Point and Basic Black marker, White gel pen
Papers:  Garden Green, Daffodil Delight, Pacific Point, Crumb Cake, Whisper White
Accessories:  Ninja Turtle body parts template, Crystal Effects, Balloon Builder punch, Polka Dot embossing folder (retired). Oval framelits.


Tuesday, January 19, 2016

Horse Birthday - Addicted to Stamps #118

This is the first time I have posted with Addicted to Stamps Challenge , whose theme this week is to make a Masculine card.
I had made some cards with a horse theme for a client who wanted a horse card for a friend of her's who was having a birthday soon.
This is one of the cards:


Stamps: Horse (Inkadinkadoo stamps), Guy Greetings
Inks: Black Memento, Soft Suede, Watercolor pencils
Papers: Soft Suede , Very Vanilla, SU DSP (retired), Whisper White
Accessories: Blender pen, Oval framelits, Apothecary Accents framelits, Paper pricking tool and template, 1 1/4" Burlap ribbon notched at one end, Early Espresso/Whisper White Baker's twine, dimensionals, glue dots

The image was stamped with Black Memento ink, and coloured with watercolor pencils, then blended with a blender pen.  It was die cut with the Ovals framelit and mounted on a Soft Suede framelit which was die cut using the Apothecary die.  This die piece was pierced around the edges using a template and paper piercer.

The base card is Soft Suede, layered with Very Vanilla, and then DSP (retired).

A piece of Burlap ribbon was adhered to the front using double sided tape.  One end was notched and extended slightly over the card edge.

The Apothecary image piece was adhered to the front using dimensionals, and a bow made with Early Espresso/white Baker twine was attached to the left side of the image using a glue dot.
The sentiment was stamped with Black Memento on Whisper White cardstock and matted with Soft Suede.  It was attached to the bottom of the apothecary die using dimensionals.

All paper edges were sponged with Soft Suede ink.

Friday, January 16, 2015

Happy Birthday - Wood You Be Mine

I've been playing with this stamp set all day, and I made 3 Valentine Day cards using the "Wood You Be Mine" stamp set.  But I thought the stamp set would make a wonderful Masculine Birthday Card.  And I was right!  Here's what I came up with.

All the images were stamped with Black Memento ink, and coloured with Blendabilities.  They were then cut out.  The woodsman was attached to a Whisper White oval die cut, the edges sponged with Island Indigo.

The basic card  is Island Indigo, layered with Whisper White.  In the center is a strip of Adventure Bound DSP pack layered with Island Indigo.  The oval was added to the card front centered over the DSP.

The sentiment "Happy Birthday" was stamped on the saw using the stamp-a-ma-jig, and added to the top of the card.

The other cut out items were added at the bottom right and left.

Built for Free Using: My Stampin Blog


Saturday, August 16, 2014

Christmas Bauble

I love the way this Christmas ornament turned out.  When I saw the picture of it in the catalogue I wasn't sure whether or not to buy it.  But in the end I did, and I am happy.

Here is the card:


I stamped the image twice, but coloured only the center circle of the second one. The first one was coloured entirely with blendabilities.  I punched out the middle circle of the second bauble using the 1" circle punch, and attached it to the first coloured bauble using a dimensional.

Stamps: Christmas Bauble, More Merry Messages
Inks: Black Memento, Lost Lagoon, Blendabilities
Papers: Marina Mist, Whisper white, Nordic Noel DSP, Silver Glimmer paper
Accessories:  Oval framelits, Lucky Stars Embossing folder, Stylish Stripes Embossing folder, Lost Lagoon ribbon, Dazzling diamonds, Silver glass glitter, large pearl, dimensionals, 1" circle punch.

Friday, June 27, 2014

Swallowtail Anniversary- Out of the box with Framelits

I've been busy the last few days getting ready for a craft show on Sunday.  It's a big weekend, as it's Canada's birthday so there should be lots of tourists around - well, hopefully anyway.

This is one of the cards I made for the occasion.  It features the Swallowtail stamp partially extended outside the framelit.  I used the tutorial from Splitcoaststampers here


Part of the image was stamped on a piece of Whisper White cardstock using Memento ink.  I then used an oval framelit and laid it over the image to determine where I would like to die cut it.  Then, following the tutorial, I cut out the image of the butterfly that would extend outside the oval die cut, and then die cut the oval. The oval was matted first with a Coastal Cabana oval, and then an oval die cut using Silver glimmer paper.
I coloured the image of the Swallowtail using Coastal Cabana blendabilities.

Stamps: Swallowtail, A Word for You (retired)
Inks: Black memento, Coastal Cabana blendabilities, Coastal Cabana ink
Papers: Coastal Cabana, Whisper White, Silver Glimmer
Accessories: Just Saying' framelits, Oval framelits, Modern Mosaic folder, dimensionals

Monday, April 8, 2013

Best of Flowers Mother's Day Card - Unscripted Sketches #205 & Pals Paper Arts Color Challenge

Now that Easter is over, and Spring is supposedly on its way, Mother's Day now looms over the horizon.  So today I decided to combine 2 challenges and create a Mother's Day Card. I used the sketch from Unscripted Sketches here  with the colour challenge with Pals Paper Arts here

SK174 US205

CeleryBashfulMarina

I thought the above 3 colours combined would make a fresh looking Mother's Day card.
This 5 by 5" card has a base card stock of Bashful Blue, layered with Whisper White card stock whose edges were sponged with Certainly Celery ink.  Upon this white layer, three rows of rick rack in Marina Mist and Bashful blue was layered horizonatally.  I put the two colours together because the Tasteful Trim die couldn't make a larger rick rack as indicated in the sketch - so I put 2 together.  Then I attached a piece of Marina Mist seam binding vertically on the left side and attached it underneath the Whisper White layer.  A bow was attached at the top.

The focal image was stamped with Black Stazon ink onto Whisper White card stock, and coloured with markers (Bashful Blue, Marina Mist, and Certainly Celery).  The image was die cut using the Ovals Framelits, and pricking was done around the edges using a template, mat pack and paper piercer.  A larger oval framelit was die cut in Certainly Celery, and the focal image was attached to this using dimensionals. This unit was attached to the card front. 

The Bashful blue flower was highlighted with a white gel pen, and Crystal Effects was put on the blue roses.

The sentiment, from Teeny Tiny wishes, was punched with the Word Window punch, and layered with a Modern Word Label punched in Certainly Celery.

A row of 3 rhinestoes was attached to the upper right corner. 

Here's a summary of the materials/supplies used:

Stamps: Best of Flowers, Teeny Tiny Wishes
Inks: Black Stazon, SU markers (Marina Mist, Bashful blue, Certainly Celery), Certainly Celery
Papers: Bashful Blue, whisper White, Marina Mist, Certainly Celery
Accessories: Tasteful Trim die, 3/8" Marina Mist Seam Binding, Ovals Framelits, Pricking template, Mat Pack & Paper Piercer, Word Window punch, Modern Word Label Punch, Crystal Effects, White Gel Pen, Rhinestones, dimensionals.

Hope you enjoyed the card.  Thanks for stopping by!
Comments are appreciated.
If you would like updates, follow me by E-mail, Blog, and on Facebook and my Pinterest board.

Sunday, March 17, 2013

Get Well Soon - Sunny Challenges & Creations 075/13

I am thrilled to have been asked to be a guest designer at Sunny Challenges & Creations here for the months of March and April.  Today is my first post.
There is no sketch, just the topic "Get Well", so I made a card with very soft colors using a stamp set I haven't used in a long time "Thoughts & Prayers"

I used Baja Breeze and Old Olive markers to ink up the stamp and then stamped it onto Whisper White card stock.  Then I die cut it using the new Ovals framelits.  I just love them and use them whenever I can.  Before mounting on a Baja Breeze scalloped oval, I used the new pricking oval template to pierce around the outside edges, then attached it using dimensionals.  To complete my image I placed tiny pearls in the center of each flower.  The sentiment is from the same stamp set and is stamped with Baja Breeze ink.  There were other words under the sentiment on the stamp, but I just covered them with scotch tape, inked my stamp, removed the tape and then just stamped the sentiment I wanted. The words were punched out using the Modern Word Label punch.  A second Word Label was punched in Baja Breeze, cut in half length wise and attached to the bottom and top of the Whisper White one.  This gives it the appearance of layering and provides some contrast to the white background.
The card base is Baja Breeze cardstock, layered with Honeycomb embossed Whisper White cardstock.  The designer paper is from the Print Poetry Designer Paper stack.  A piece of 5/8" Baja Breeze seam binding was attached over the seam of the DSP, the image was attached to the card with dimensionals, and then a bow was placed at the top.  The card is complete except for a few more pearls - a strip under the sentiment, and some large ones at the upper right side.  Can you guess that I love bling?
Here's a list of materials/supplies used to make this card:

Stamp: Thoughts & Prayers
Ink: Baja Breeze, SU markers (Baja Breeze, Old Olive)
Papers: Baja Breeze, Whisper White, Print Poetry DSP
Accessories: Ovals framelits, Honeycomb folder, Modern Word Label punch, Mat pack and paper piercer, 5/8" Baja Breeze seam binding, pearls, large pearls, Scallop oval die #2

Friday, March 8, 2013

Bleaching Technique - Card 2 - Feeling Sentimental

I've been continuing to experiment with bleach stamping and have learned a few things.  First of all, don't be generous with the bleach.  After applying bleach to the stamp, stamp off a few times and then stamp the final image.  You'll get more detail that way. Secondly, use the stamp-a-ma-jig to overstamp the bleached image.
Here's the second card for class:

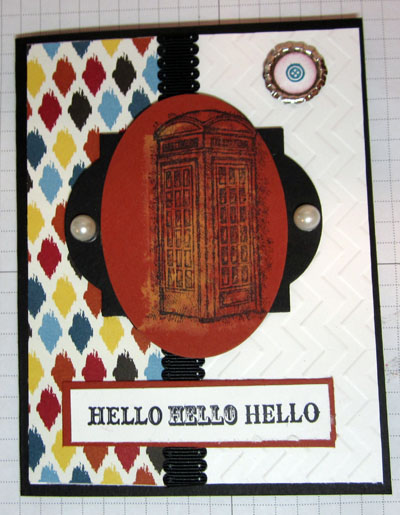
This time I bleach stamped the image onto Cajun Craze cardstock and over stamped with Black Stazon ink.  I then die cut the image with the Oval framelit and mounted it onto a black windows framelit.  The designer paper is from the spring catalogue - Parker's DSP, and the sentiment is from a retired stamp set "Happy Greetings"

Stamps: Feeling Sentimental, Happy Greetings (retired), Itty Bitties
Inks: Black Stazon, Cajun Craze
Papers: Basic Black, Whisper White, Parker's DSP, Cajun Craze
Accessories: Chevron folder, Bleach, Black dotted scalloped ribbon, silver soda pop tops, Windows framelit, Oval framelit, large pearls, dimensionals