Showing posts with label Layering Oval Framelits. Show all posts

Friday, November 1, 2019

Merry Moose Christmas - Hand Stamped Sentiments #325

Winter came in with a Halloween Howl, with snow falling in many places.  The snowfall here was not much but the temperature sure did drop!  Halloween was ruined for so many children due to the inclement weather.  I hate the thought of winter coming.

However, I decided to make a winter scene featuring the Moose for the sketch challenge with Hand Stamped Sentiments #325


I started by creating the focal point of the card.

 On a piece of Whisper White card stock, I stamped the larger pine tree with Shaded Spruce ink.  Then using  an Oval die the image was die cut partially leaving half the tree on the outside of the oval.  This outer half was fussy cut to free it from the rest of the card stock around it.  A smaller tree was stamped on the opposite side of the now die cut oval (on the inside) and stamped off twice.


The sky was coloured by blending Balmy Blue and Pacific Point watercolor pencils with an aqua painter  The snow flakes were stamped using Whisper White ink.

The snow on the ground was made more realistic by the use of Puff paint and Stampin glitter.


The Moose was stamped on a separate piece of Whisper White card stock and punched with the Moose punch.  It was added to the prepared die cut Oval using dimensionals.  Footprints were stamped on the ground beneath the Moose.

The Whisper White oval was matted with a slightly larger Shaded Spruce oval, which was added to a rectangular piece of Wrapped in Plaid DSP.  This was added to a piece of Whisper White embossed with the Woodlands embossing folder.


Supplies Used:
Stamp:  Merry Moose
Inks:  Shaded Spruce, Soft Suede, Black Memento, Balmy Blue and Pacific Point watercolour pencils, Whisper White
Papers:  Cherry Cobbler, Whisper White, Shaded Spruce, Wrapped in Plaid DSP
Accessories:  Layering Oval Dies, Woodlands embossing folder, Puff Paint, Stampin' Up Glitter, Aqua Painter, Dimensionals

Wednesday, February 20, 2019

Let's Ride

I was thrilled to see the stamp set featuring horses in the Occasions catalogue.

Seeing the horses took me back to an earlier time when my children were young.  My daughter was 'horse crazy'.  She would read books about that animal, and draw them and she was absolutely thrilled when I arranged for riding lessons.

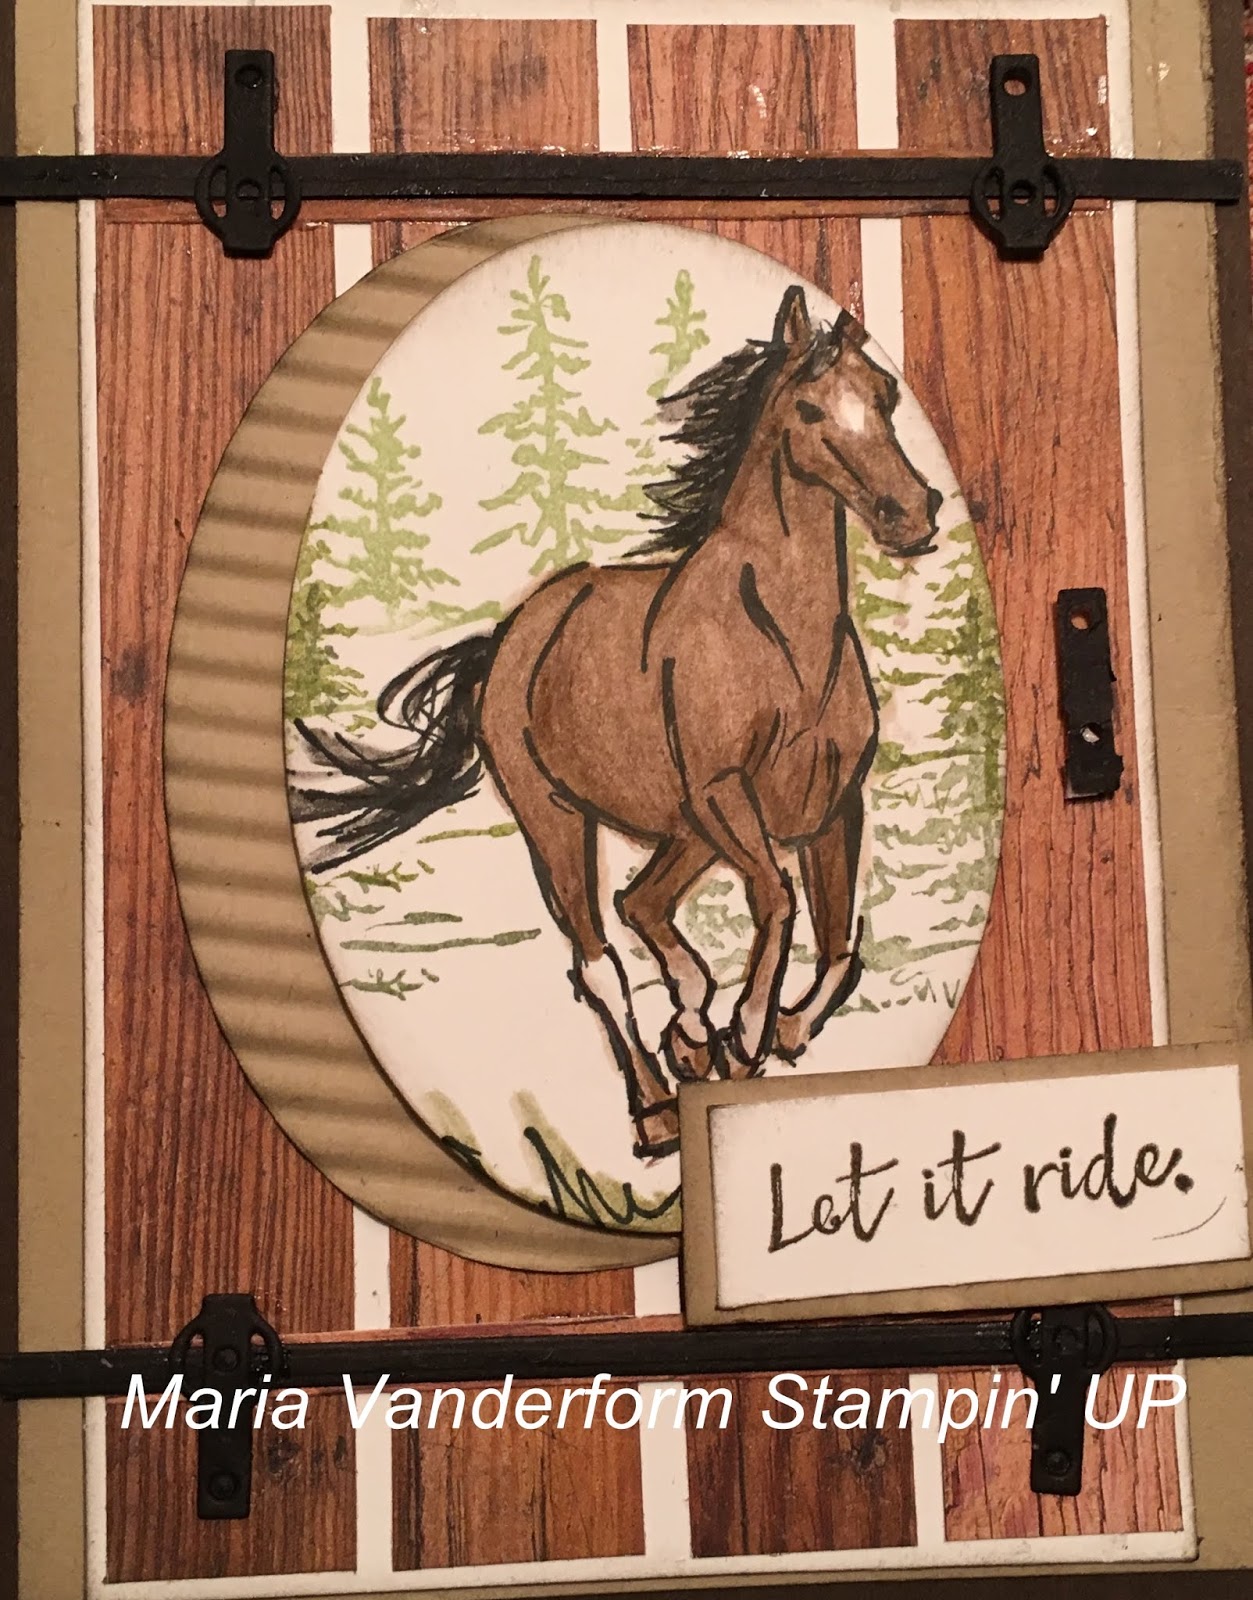
Her special horse was brown with a white star on his head and white socks - and so does the horse on my card today.

The horse was coloured with watercolour pencils and a blender pen, with some areas 'touched up' with a Stampin' Blend.  It was masked so that the trees could be stamped in the background.

An Oval framelit die cut the completed image, which was layered with a crimpled Crumb Cake oval.  The two ovals were off set from each other to give the illusion of movement.


Dimensional were used to adhere this focal image to a 'sliding barn door' background.  This background was created by adhering four 3/4 by 5" pieces of the Wood DSP to a piece of Whisper White card stock and this in turn was adhered to a 4 1/4 by 5 1/4" Crumb Cake layer and then to an Early Espresso card base.

Using the Sliding Barn franelits, the hardware for the bard doors was die cut in Basic Black and adhered to the card front as shown.  The door doesn't actually move, but it looks like it does.


Supplies Used:
Stamp:  Let it Ride
Inks:  Black Memento, Watercolour pencils, Old Olive, Mossy Meadow, Soft Suede
Papers:  Early Espresso, Whisper White, Crumb Cake, Wood DSP
Accessories:  Layering Oval Framelits, Crimper, Sliding Barn Framelits, Dimensionals, Blender Pen

Saturday, February 16, 2019

Home to Roost - Enjoy the Simple Moments

Another stamp set free with a $60 order is  "Home to Roost" , starring Roo the rooster (I just made that name up)

This rooster looks ready to tackle the world, and the bright colours of his plumage definitely make a statement.

He was coloured with a variety of Stampin' blends, then die cut with a Stitched Oval framelit.  Behind the stitched framelit is a slightly larger Grapefruit Grove foil oval (you probably recognized this Halographic foil).

Because Roo is a little bit country, the Buffalo Check stamp was used to create the Cajun Craze plaid DSP at the card front bottom.  A strip of the foil is placed at the top of the plaid piece.

Peeking out above the plaid piece is some wheat greenery. This was stamped in Old Olive on a piece of Whisper White and then die cut with the Rectangle framelits.

All this on a Cajun Craze cardstock base layered with Whisper White.  "Enjoy the simple moments"

Supplies Used:
Stamps:  Home to Roost, Buffalo Check
Inks:  Black Memento, Cajun Craze, Old Olive, Stampin' Blends (Real Red, Cherry Cobbler, Cajun Craze, Soft Suede, Crumb Cake, Bermuda Bay)
Papers:  Cajun Craze, Whisper White, Grapefruit Grove foil paper
Accessories:  Stitched Oval Framelit, Layering Oval Framelit, Stitched Rectangle Framelit, Stamparatus

Sunday, January 27, 2019

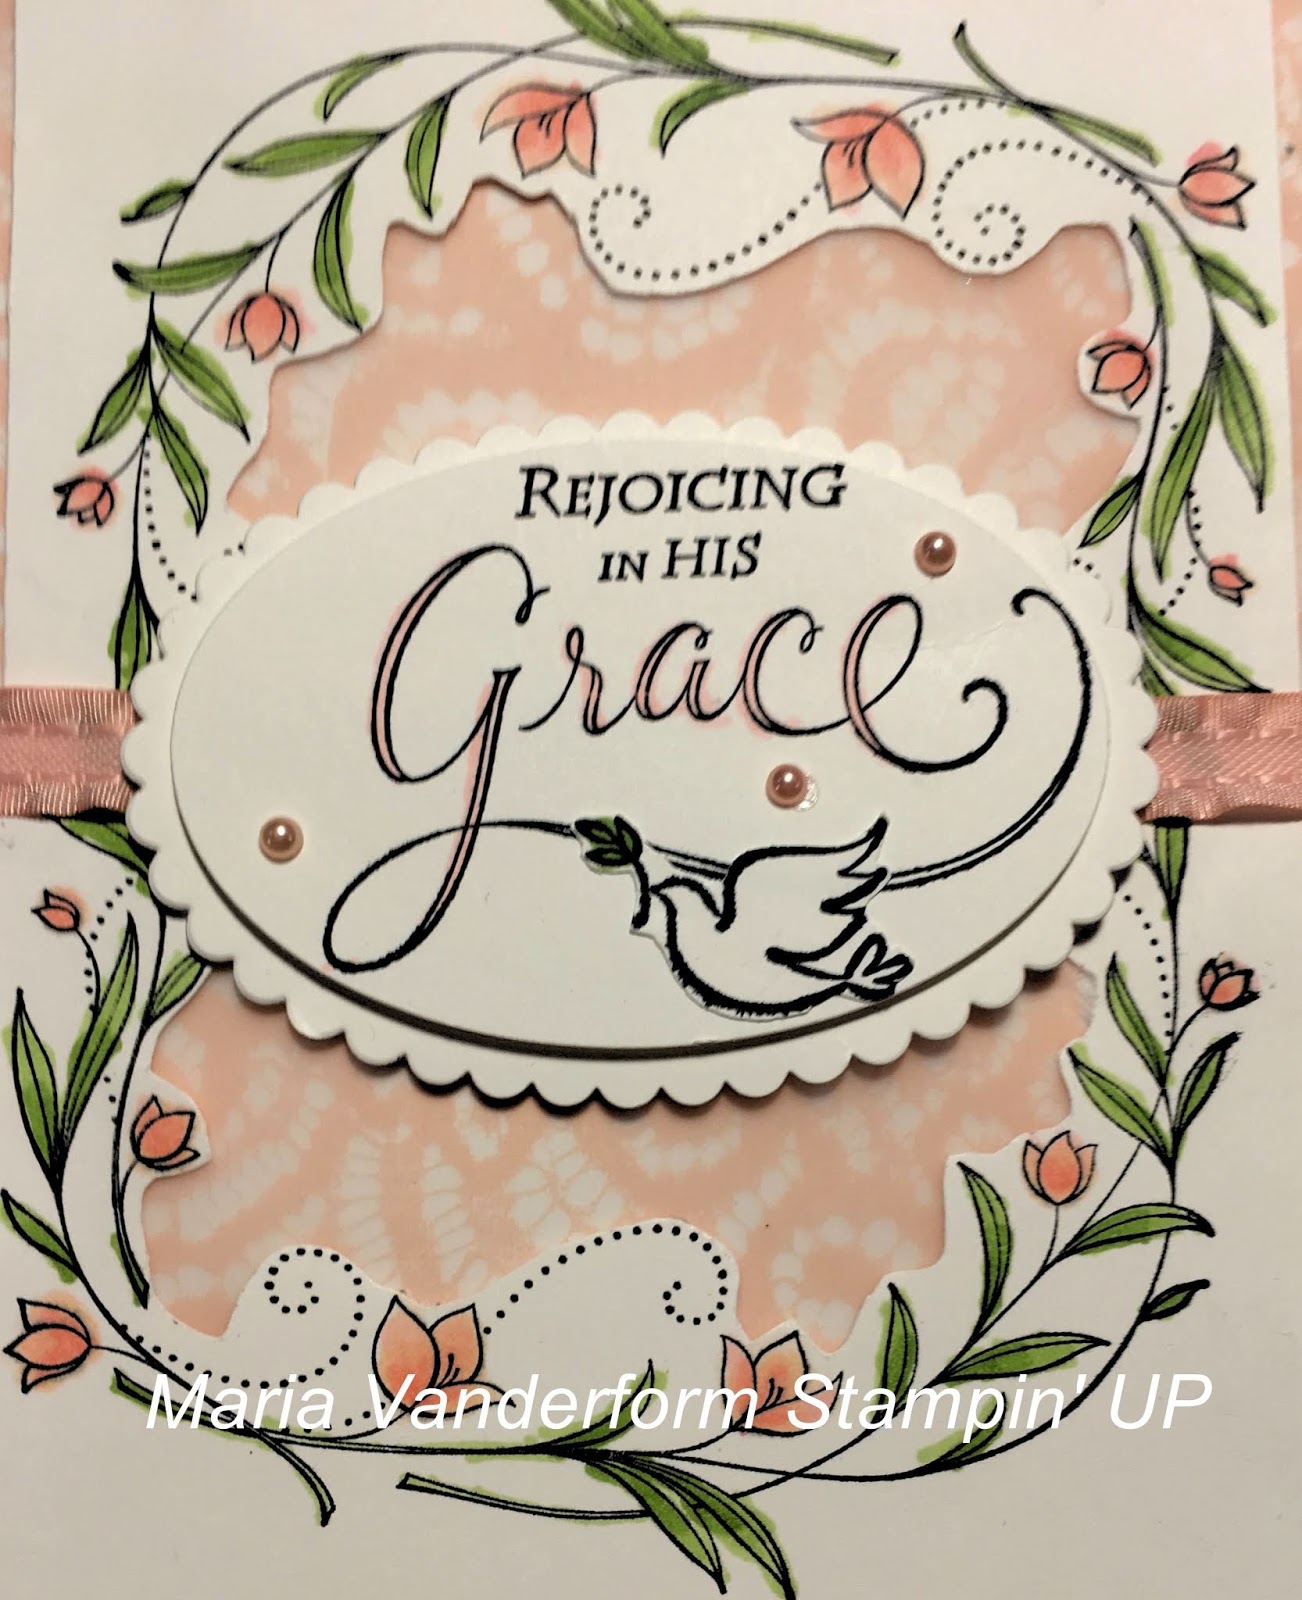
His Grace - a Case

What a snowfall we had last night!  And more is expected tomorrow.  Certainly not the kind of weather that would put one in an Easter frame of mind.

The following card I cased from Jan Brown a UK demonstrator.  I made a few changes but not many as I really liked the look of her card.

For accurate placement, I used the stamparatus to create  a somewhat oval wreath. This was done by stamping one image upside down and the other one right side up, the two meeting in the middle.

After colouring the leaves and flowers, I cut the art piece in half with my trimmer so that I cut fussy cut the card stock out of the middle.  Some Powder Pink ruffled ribbon was placed strategically to hide this 'cut'.

The pink Vellum sheet from the Romance DSP was placed behind the front piece and it showed very nicely through the cut out area.  This was added to a top fold thick Whisper White card stock base.


The sentiment was die cut with the layering oval framelit and matted with a scallop oval piece,  and then added with dimensionals to the card front.  The dove was stamped , fussy cut and adhered just under the sentiment.  Some pink artisan pearls were added randomly around the sentiment.


Supplies Used:
Stamp:  His Grace
Inks:  Black Memento, Stampin' Blends (Petal Pink light and Dark, Flirty Flamingo dark, Old Olive light and dark)
Papers:  Thick Whisper White, Whisper White, Romance DSP (vellum)
Accessories:  Layering Oval Framelits, Artisan pearls, Powder Pink ruffled ribbon, Dimensionals, Stamparatus

Friday, January 25, 2019

Easter Greetings

Yes it is only January, but when you do classes one works ahead.  So....on to Easter!

The stamp set "Fable Friends" has some cute characters that can be used for Easter, new baby, or even children's birthday.  My card today focuses on Easter.


Meet Mother Goose wearing an outfit in Highland Heather. The outfit is actually 3D as the image was stamped nd coloured twice and the second image had the outfit fussy cut and then added on the original image using dimensionals.


The clouds in the sky are from "Let the Good Times Roll" and are second generation stamping using Balmy Blue ink.  The full strength ink was too overpowering.

Laying Oval Framelits were used to die cut the image with the scallop oval cut in Gorgeous Grape. The two layers were adhered together using dimensionals and then added to the card front.

The card base is Highland Heather, layered with Whisper White embossed with the Tin Tile Embossing folder.  A strip of the new Gingham Gala DSP (smaller pattern) is added towards the left side.  Two pieces of the SAB organza ribbon are placed on the left side of this strip - one in Highland Heather, and the other in Mango Melody - the latter picking up the colours of the beak and feet of the goose.  Bows in their respective colours are added at the top.

The sentiment, stamped in Highland Heather, is punched with the Everyday Label punch.  It was reinserted into the punch a couple of times to get it to the size I wanted.

Supplies Used:
Stamps:  Fable Friends, Let the Good Times Roll
Inks:  Black Memento, Highland Heather, Balmy Blue, Granny Apple Green, Stampin' Blends (Highland Heather light and dark, Mango Melody light and Pumpkin Pie dark, Soft Seafoam dark)
Papers:  Highland Heather, Whisper White, Gorgeous Grape, Gingham Gala
Accessories:  Layering Oval Framelits, SAB Organza Ribbon in Highland Heather and Mango Melody, Everyday Label Punch, Dimensionals, Tin Tile Embossing Folder, Glue dots


Tuesday, January 22, 2019

Wishing You Well - Yellow Lasting Lily

Sometimes you need a card to give to someone who is struggling, but doesn't need a sympathy card.  This card is perfect for that.

I love yellow lilies, but I like some purple or berry colour in the throat and edges of the bloom, so I tried to create that with sponging.

This card was a little more work because after stamping and colouring the flower, stem and leaves, I fussy cut them.  I wanted to use the ovals as a background with the flowers emerging above and below,

The card base is Mossy Meadow, layered with Very Vanilla.  On the left side I adhered a 2 by 5" strip of "Tea Time" DSP.  The colours in the DSP coordinate with the colours of the Lily beautifully.
On each side of the DSP I adhered some of the yellow organza ribbon, another SAB product.

An oval was die cut in Very Vanilla using the layering oval framelits.  It was matted with a slightly larger scallop oval.  The two ovals were adhered together using dimensionals.

On a separate piece of Whisper White the Lily blooms were stamped using Pineapple Punch; the stem and leaves in Mossy Meadow.  I used the stamparatus just in case I needed to add more colour to the images.  Amazingly I was able to get the colour I wanted in just one go around.  Each flower part was fussy cut and set aside.  I sponged the edges , base, and throat of the flower with Rich Razzelberry ink; the stem and leaves with Mossy Meadow ink and a finger dauber.  They were then adhered over the oval as indicated in the picture.  A bow was made in the same organza ribbon as on the card front and adhered just below the larger bloom with a glue dot.


The sentiment is from this stamp set and is neutral enough to be used for a variety of occasions not necessarily sympathy.

To finish the card I added 3 gold faceted gems on the upper right.

Supplies Used:
Stamp:  Lasting Lily
Inks:  Pineapple Punch, Rich Razzelberry, Mossy Meadow
Papers:  Mossy Meadow, Very Vanilla, Whisper White
Accessories:  Layering Ovals, Dimensionals, Daffodil Delight Organza Ribbon, Gold Faceted Gems

Friday, December 7, 2018

Postcard Pals Thank You

I'm going out of town this weekend to spend Christmas with the family - weather permitting.  Snow is in the forecast tomorrow night and I'll have to assess Sunday morning whether or not it is safe to drive. Never the less I thought I would get a head start on thank you cards.

This card is based on a sketch challenge I gave to my team members. Sometimes having an example to go by makes it easier.

The tranquil Tide cardstock base is layered with Whisper White card stock embossed with the Subtle Texture Embossing Folder.  See below.


Along the bottom I adhered a strip of Tranquil Texture DSP and placed a piece of 1/8" ribbon on the top edge of that.

The image, from "Postcard Pals" was initially colored with watercolor pencils and a blender pen, but then I touched it up with some Stampin' Blends.  I love the combination of the two media.  The image was die cut with an oval framelit and matted with a Tranquil Tide scallop oval. This was added to a piece of Tranquil Texture DSP (dot pattern) which I matted with Tranquil Tide card stock, which was then added the card front with dimensionals.


The sentiment is from "Another Thank you" and is mounted on a piece of Tranquil Tide cardstock flagged at both ends.  Dimensionals adhere this to the bottom of the image.

Supplies Used:
Stamps:  Postcard Pals, Another Thank You
Inks:  Black Memento, Watercolor Pencils, Stampin' Blends
Papers:
  • Tranquil Tide 4 1/4 by 5 1/2" (card base)
  • Whisper White 4 by 5 1/4"  (mat for card base)
  • Tranquil Texture DSP (dot pattern) 3 by 4"
  • Tranquil Tide card stock 3 1/4 by 4 1/4" (mat for DSP)
  • Tranquil Texture DSP (other pattern) 2 by 3 7/8"
  • Whisper White oval 3 3/8"
  • Tranquil Tide scallop oval 3 1/2"
  • Scrap of Whisper White for sentiment
  • Tranquil Tide 1/2 by 2" flagged at both ends for sentiment
Accessories: Subtle Texture embossing folder, 1/8" Bermuda Bay ribbon, Dimensionals, Layering oval framelits, Share What you Love Artisan pearls


Wednesday, October 3, 2018

Santa Pop & Twist card

It's been a while since I made a Pop & Twist card.  Tonight I thought I'd make up for lost time.
Actually I didn't think I would have the energy to make anything tonight as I was absolutely exhausted from my trip to Toronto.
The traffic was heavy in both direction, compounded by heavy rain and fog.  The way home was absolutely horrendous because not only was it raining and foggy, I hit rush hour traffic.

But I surprised myself with a burst of creativity.

Here's what I came up with:

The card front features Santa making a list and he has placed his official seal on the transactions.  I rounded the art piece's corners and matted it with Cherry Cobbler card stock also with its corners rounded. It was adhered to the card front matted with Santa's Workshop DSP.  At the bottom is a 1" belly band which holds the card closed.


The card opens in a pop, twist manner ( thus the name for the technique) to reveal 4 panels in the middle, and an image at the top and a place to write a sentiment in the bottom.

This is a close up of the two panels on the left. All images were stamped using the stamparatus and coloured with Stampin' Up's new blends. The snowflakes were die cut using the Blizzard Thinlets.


This is a close up of the two right panels and below is a close  up of the top of the inside of the card.


Both the top and bottom of the card have the Santa's workshop DSP adhered to them.  On the top I used the stitched oval framelet to die cut the Santa in the chair image directly from the DSP, and then matted it with a slightly large Cherry Cobbler oval.

On the bottom I placed a blank oval for a sentiment.

Supplies Used:
Stamp:  Signs of Santa
Inks:  Black Memento, Blends 
Papers:  Cherry Cobbler, Whisper White, Santa's Workshop DSP, Glimmer paper, 
Accessories:  Blizzard Thinlets, Corner Rounded punch, Dazzling diamonds, Stitched Oval Framelits, Layering Oval Framelits, Stamparatus.


Friday, May 25, 2018

Happy Anniversary Cake Soiree using Eclipse Technique

I'm really happy with the way this anniversary card turned out.

I opted to use a silver and white color scheme for this elegant card with just a hint of color on the flowers on the cake. Using the eclipse technique contributed to the elegance of this card.


The basic card is a top fold Thick Whisper White, layered with Silver Foil and then Whisper White embossed with the Sequins embossing folder.

Before adhering the embossed Whisper White layer to the Silver Foil layer, it was die cut with 2 sizes of oval framelits.  I did the same thing using Silver Foil.  The cake was built on the die cut oval, which was adhered to the silver foil layer.  The silver foil frame was added to the card front using foam adhesive strips (eclipse technique).  The embellishment at the upper right was made by silver embossing and die cutting one of the flowers and two leaves and adhering them with dimensionals.


Here's a side view of the eclipsed oval frame.


Sentiment is from "Best Birds"

Supplies Used:
Stamps:  Cake Soiree, Best Birds
Inks:  Versa Mark, Markers (Sea side foam, powder pink)
Papers:  Thick Whisper White, Silver Foil, Whisper White
Accessories:  Silver embossing powder, Sweet Cake Framelits, Layering Oval Framelits, Scattered Sequins embossing folder, Dimensionals


Sunday, May 20, 2018

A shaker with Roots in Nature & Woodlands Embossing Folder

This has been my week for making shaker cards.

Today I thought I would combine the Woodlands embossing folder and Rooted In Nature stamp set and framelits to make another shaker card.


After embossing some Whisper White card stock with the Woodlands embossing folder and sponging it lightly with Basic Gray ink an aperture was die cut using the Layering Oval framelit.  A larger oval window sheet was adhered to the  wrong side of the opening and some 3/8" mini chevron Old Olive ribbon adhered to the left front.

Foam tape was applied around this opening as well as on the card stock edges and the shaker elements added to the center.

The basic Always Artichoke card stock base was layered with Whisper White card stock upon which the image of the tree from Rooted in Nature was stamped using Mossy Meadow ink.


After the two layers were adhered together, I stamped, embossed, and die cut some leaves as embellishments for the right side. Clear Wink of Stella was applied to the leaves (one of which was stamped and die cut in vellum), and a bow of Linen Thread added to the leaf stems.  Part of the sentiment was also added under the leaves, with the final part placed on the inside of the card.


Supplies Used:
Stamp:  Rooted in Nature
Inks:  Mossy Meadow, Basic Gray, Old Olive
Papers:  Always Artichoke, Whisper White, Vellum
Accessories:  Woodlands embossing Folder, Nature's Roots Framelits, Linen Thread, 3/8" mini chevron Old Olive ribbon, Shaker sequins(non SU), Window Sheet, Layering Oval Framelits, Foam tape


Tuesday, May 15, 2018

Love What You Do - Another Catalogue Sneak Peak

Friends are so important in life so I just love the sentiment that is part of the "Love What You Do" stamp set- which goes  like this:

I'm lucky
to have a 
friend
like you

The sentiment was a perfect focal point in a shaker element for this card - a shaker made using glitter tulle rather than window sheet.

The base card of Mint Macaron card stock, is layered with Love What you Do DSP with an oval aperture die cut in it. This was covered on both sides with Glitter Tulle using tear and tape adhesive with Fancy Frost Sequins shaker elements in between the tulle.

The sentiment, black embossed on a separate piece of Whisper White on a stamped off Mint Macaron background, was positioned under the die cut aperture.


To provide a more distinctive delineation between the shaker and the DSP, I added a Basic Black border around the shaker element.

Before adhering the 2 layers together, some 3/8" metallic edge Berry Burst ribbon was added to the left side of the shaker element.  An embellishment was added over the ribbon.

On a separate piece of Whisper White card stock I stamped and colored a flower and 3 flower elements - then fussy cut them and adhered them to a small oval die cut.  This was added to the edge of the shaker element using dimensionals.  The ribbon bow was added to the base of the flowers.  Clear Wink of Stella was added to each of the blooms.

One advantage of using tulle instead of the traditional window sheet is that the resultant card is much thinner and lighter.

Supplies Used:
Stamp:  Love What You Do
Inks:  Mint Macaron, Versa Mark, Black Memento, Dimensionals.
Papers:  Mint Macaron, Basic Black, Love What You Do DSP, Whisper White
Accessories: Layering Oval Framelits, Glitter Tulle (non SU), Fancy Frost Sequins (retired) shaker elements, 3/8" metallic edged Berry Burst ribbon. Black Embossing Powder, Dimensionals, Clear Wink of Stella


Tuesday, May 1, 2018

You Move Me - a Pop Up Butterfly Card - in Retiring Colors

Somehow 2 years go by too fast, and the following  In-Colors are about to retire the end of this month:  Emerald Envy, Dapper Denim, Sweet Sugarplum, Flirty Flamingo, and Peek-a-boo Peach.

Fortunately one of these colors is going to remain as a new member of  one of the color families.

In this pop up Birthday Day card,  I use all of these In-Colors  - plus I bring back a retired DSP to help coordinate them.(Playful Palette DSP)


The card base is Basic Black card stock, layered with Whisper White, and then the Playful Palette DSP.

On the card front I adhere a window frame die cut in Basic Black with some Vellum adhered behind it (this prevents the images from getting lost in the pattern of the DSP) 

All images were stamped using the Stamparatus and die cut using the Move Me Thinlets. At the top of the window is a cluster of  tropical flowers stamped in Flirty Flamingo ink with Basic Black centers.  The leaf was stamped with Emerald Envy ink.  I stamped the Hummingbird using Emerald Envy and Dapper Denim ink.  A tiny Peek-a- boo Peach butterfly is seen hovering at the base of the window.

This focal piece is added to the card front using dimensionals.  Below is a close up.


The sentiment, stamped in Dapper Denim, using the Beautiful Bouquet stamp set, was die cut using the layering oval framelits and added to the window sill with dimensionals.

Opening the card reveals a string of 5 double die cut butterflies adhered in such a way as to pop open and closed in an accordion manner.


Each butterfly consists of a Basic Black base and a more intricate inner layer die cut in each of the In-Colors. These layers are adhered together only at their bodies.

The paired butterflies are adhered together at their upper wing tip of the Basic Black butterfly only (I used glue dots but other adhesives could be used as well.  Only the two butterflies at each end are adhered to the inside of each side of the card - and then only by half the back wing, and at an angle.  This leaves the rest of the butterflies floating free.

Each half of the inside of the card is first layered with Whisper White card stock, and then I added a  window frame which I die cut using the DSP ( the reverse side although I used the original pattern for the sill.  I attached the butterflies to the window frame on each side.


Supplies Used:
Stamps:  You Move Me, Beautiful Bouquet
Inks:  Black Memento, Sweet Sugarplum, Emerald Envy, Peek-a-boo Peach, Dapper Denim, Flirty Flamingo
Papers:  Basic Black, Whisper White, Sweet Sugarplum, Emerald Envy, Peek-a-boo Peach, Dapper Denim, Flirty Flamingo, Vellum, Playful Palette DSP
Accessories:  Move Me Thinlet Dies, Layering Oval Framelits, Dimensionals, Glue Dots, Window frame Thinlet Die


Sunday, March 25, 2018

Friends Fur-ever

I love my Stamparatus so much!  It  makes my stamping so much more precise!  Not that it wasn't precise before, but now the worry about a number of things are gone.  Like - is the stamping straight, what if the image doesn't stamp well?

I used the Stamparatus to stamp the image from "We Must Celebrate", a stamp set from the Occasions Catalogue, then coloured the image with watercolor pencils and an aqua painter.  I was most upset to see that the Blendabilities are unorderable until the end of May, so it's back to the basics of colouring- for now anyway.

The image was stamped onto a 4 3/4" by 3" piece of Whisper White cardstock, and as I mentioned, the image was coloured with watercolor pencils and a blender pen.
Before adhering it to a 5 by 3 1/4" piece of Soft Suede cardstock, the rabbit was die cut using 2 sizes of oval framelits (Eclipse technique).  The focal piece was then adhered to the Soft Suede layer, and the "O" added to the aperture with foam tape.  The bunny was adhered to the inside using some tombo glue

The card front is Whisper White card stock, layered with Crumb Cake embossed with the Cable Knit Embossing Folder.  Some Soft Suede DSP cut at an angle was adhered to the lower left of the embossed crumb cake layer, and a 1/4" strip of /Crumb Cake card stock adhered to the edge of this DSP overlapping it slightly with the crumb cake layer.

The focal point was added to the card front using dimensionals.

Supplies Used:
Stamp:  We Must Celebrate
Inks:  Black Memento, Watercolor Pencils
Papers:  Whisper White, Soft Suede, Soft Suede DSP, Crumb Cake
Accessories:  Cable knit Embossing Folder, Blender pen, Dimensionals, Layering Oval Framelits, Stamparatus.

Tuesday, January 30, 2018

Seasonal Shadow Boxes - Spring

I made these frames from a tutorial I purchased from Craft Project Central and were designed by Buffy Cooper.

These Shadow Boxes feature all 4 seasons- but today's post features only Spring.  They are very easy to make and my plan is use these as a class project..

All shadow boxes are made using the Colorful Seasons Bundle, the Color Theory DSP,  and the Color Theory Memories & More Card Pack. I added a few other embellishments as well.

Above are the Spring and Summer shadow boxes, but today's post features the Spring Shadow Box.

The tutorial includes a tutorial on how to create a Shadow Box frame but I also found a great tutorial on You Tube here

The Shadow Box Frame is made using Berry Burst card stock (8 1/2 by 11") and decorated with the Color Theory DSP die cut with an Oval Framelit.  The insert and sentiment is from the Color Theory Memories & More Card Pack.

The flowers were made by stamping with Berry Burst ink, two of each of the flowers from the Colorful Seasons stamp set and die cutting them with the coordinating die set.  The flowers were shaped and after adhering two similar flowers together some acrylic lacquer was applied.

The larger flower in the upper and lower corner is from the Flower Shop stamp set.  I have put together a tutorial on how to colour and shape these flowers here .  The leaves were made using the Leaf Punch.


Supplies Used:
Stamps:  Colorful Seasons, Flower Shop
Inks:  Berry Burst, Daffodil Delight, Rich Razzelberry, Olf Olive
Papers:  Berry Burst, Color Theory DSP, Thick Whisper White, Old Olive
Accessories:  Coor Theory Memeories & More Card Pack, Crystal Lacquer (non SU), Dazzling Diamonds, Leaf Punch, Layering Season Framelits, Scoring Tool. Layering Oval Framelits

The Summer Shadow box will by posted separately.

Friday, October 27, 2017

Sugarplum Dreams - ballerina

For the next 3 days I am a vendor at the Hand of Man in Peterborough, Ont.  If any of you live in the area, please stop by and visit me.

Last night I made some last minute Christmas cards, using the Sugarplum Dreams stamp set. This shaker card in silver and gold,  is a card any little girl (or big girl) would love.


Because this card has a lot of metallic elements it was really hard to get a well exposed picture.  I made 2 versions of this card - one in silver and one in gold. This one has silver foil elements.

I started with Thick Whisper White card stock and layered the front first with silver foil and then with Year of Cheer DSP.

After adhering the Silver foil and DSP layers together, I die cut an oval in the upper part of the card, large enough to fit the shaker element.  I have had these shaker domes forever and today decided to use one for an easy peasy shaker card..

Inside the shaker is a picture of a ballerina, which I coloured with the new Stampin' Blend markers.  I used the Pool Party markers, but the colour does not show well in this picture.   Around the dancer I stamped some background images in Pool Party ink.  I then die cut the image a bit larger than the oval dome, added shaker elements, and adhered the dome over the image.  Then I added glue dots to the rim of the dome and inserted the now shaker through the die cut aperture.  Now I added this layer to the card front.

To make the foil ring around the shaker, I die cut two sizes of ovals in silver foils and adhered the resultant layer to the card front.

The sprits of pine are die cut from the Pinecone Thinlets; the sentiment from Versatile Christmas.

Supplies Used:
Stamps:  Sugarplum Dreams, Versatile Christmas
Inks:  Black Memento, Stampin' Blend markers, Pool Party
Papers:  Thick Whisper White, Whisper White, Silver Foil, Year of Cheer DSP
Accessories:  Layering Oval Thinlets, Pinecone Thinlet dies, Silver embossing powder, Shaker elements (non SU),  Oval shaker dome (non SU)


Thursday, September 21, 2017

Detailed Gate meets Santa Paws

Hopefully this will not be my last card I make using the Detailed Gate thinlet die. I just love combining it with different stamp sets.  This time I used the Card Front Builder Thinlet dies, Lovely as a Tree stamp set as well as Santa Paws.
For this card I trimmed off the elaborate scroll work on the top of the gate, cut the gate in the middle so it would open, and wrapped the gate edges around the back of the art piece.


The sky elements were die cut with the Card Front Builder thinlet die on a piece of Whisper White card stock,  and to bring out the lights from the moon and stars I adhered a piece of gold foil behind the art piece.

Sponging is one of my favourite techniques, and I used it to bring out the colours of the sky and the landscape.  I first sponged around the moon with Daffodil Delight, bringing the colour down through the sky.  Then I used Night of Navy to sponge the rest of the sky, blending this with Basic Gray and Always Artichoke towards the bottom of the art piece.

Using Basic Gray, I stamped the Lovely as a Tree stamp at the horizon.

Below that I die cut an oval into the art piece.  Behind that oval I attached the images of Santa Paws of the 3 singing cats using dimensionals.


The sentiment was punched with the Word Label punch and attached to the outer gate; a red bow on the other gate.

Supplies Used:
Stamps:  Santa Paws, Lovely as a Tree
Inks:  Night of Navy, Daffodil Delight, Basic Gray, Always Artichoke, SU Markers, Black Memento
Papers:  Whisper White, Basic Gray, Gold Foil
Accessories:  Layering Oval Thinlets, Detailed Gate Thinlet, Word Label punch, 1/4" Real Red Ribbon (retired), dimensionals, Card Front Builder thinlets,

Wednesday, July 26, 2017

Happy Birthday with Naturally Eclectic DSP - Craft Project Central #73

I'm hoping to get a free month's subscription to Craft Project Central.  If I'm lucky enough this card will be randomly selected to be one of the winners and I get to select one month of my choice of the projects at this site.  Keep your fingers crossed for me.

This month's card challenge here is "Creating Pretty Cards #73" and it's a sketch challenge.


On a Whisper White card top folding card base layered with Night of Midnight card stock, I layered various sizes and patterns of the Naturally Eclectic DSP.  These pieces were layered so that there was 1/8" between each piece, allowing the Night of Navy to peek through.

The sentiment, from "Special Celebrations" was stamped with Tranquil Tide ink onto Whisper White card stock, die cut with the layering oval framelits, and matted with a Scallop oval die cut in Tranquil Tide.  These two ovals were adhered together and then added to the card front with dimensionals.

1/4" Island Ink ombre ribbon tied into a bow was added to the left side of the image piece using a glue dot.

No card is complete without bling, so 3 glimmer enamel dots were placed under the sentiment.ratio

Supplies Used:
Stamp:  Special Celebration
Inks:  Tranquil Tide
Papers:  Night of Midnight, Whisper White, Naturally Eclectic DSP, Tranquil Tide
Accessories:  Layering Oval Framelits, 1/4" Island Indigo ombre ribbon, Glimmer Enamel Dots, Dimensionals, glue dot.


Sunday, July 16, 2017

You've Got Style Create with Connie & Mary # 466

The ladies in the stamp set "You've Got Style" just make me chuckle, so it was inevitable that I would use one of them for a sketch challenge.  The sketch I used was the inspirational one with CCM #466 here


CCMC466


The image was stamped with Black Memento and coloured with markers and a blender pen.  Some Wink of Stella was applied to her jewellery.

The layering oval framelits was used to die cut this dancing lady, and a larger Bermuda Bay scalloped oval was die cut as a mat.  But, instead of placing the image over the mat, I shifted the image over to one end of the scallop edge.

The sentiment was die cut with the stitched circle framelit and also matted with a scallop Bermuda Bay die cut. Before adding this to the card front, I wound some gold metallic thread around my fingers and adhered it under the sentiment piece with a dimensional.  I must admit that  I'm not good at this, especially now that my hand is in a splint following thumb surgery.

The basic Bermuda Bay A2 card was layered with Whisper White card stock embossed with the Ruffles embossing folder.  Just below the middle, I added a 3/4" strip of Bermuda Bay cardstock to which is attached a piece of Delightful Dijon (retired) punched with the new ribbon border punch.

The focal image is attached to the card front using dimensionals, as is the sentiment circle.

Three pearls were added to the upper right.

Supplies Used: 
Stamps:  You've Got Style
Inks:  Black Memento, Markers (Bermuda Bay, Delightful Dijon (retired), Powder Pink
Papers:  Bermuda Bay, Whisper White, Delightful Dijon
Accessories:  Clear Wink of Stella, Layering Oval Framelits, Round Stitched Franelits, Gold metallic thread, Ribbon border punch, dimensionals, Pearls, Ruffles embossing folder

Friday, March 24, 2017

Pop & Twist Lift Me Up Birthday

Pop & Twist, or is it Twist & Pop....
What's in a name?
This card was made as a swap card in a technique swap.


A Pop & Twist card has a unique "twisting" mechanism that "pops" when the card is opened. It absolutely delights recipients when the unexpected elements are exposed.
As my son stated when I opened the card "Well that was unexpected, but absolutely delightful!"

The card base is Basic Gray card stock, which is 4 by 12", scored at 6" for make a 4 by 6" card.

This picture shows the card front and a belly band which keeps the card closed.


The card front is layered first with Whisper White, followed by the SAB Carried Away DSP.

The Art Piece is Whisper White matted with Night of Navy card stock.

On the background of sunshine and sea birds(from High Tide) I placed two hot air balloons around clouds.

The largest hot air balloon is die cut using Night of Navy card stock, with different die cut pieces of Carried Away DSP adhered behind it.

The smaller balloon is first stamped with Calypso Coral ink and then die cut with the Up & Away Thinlet dies.

All cardstock and die cut images are sponged with Basic Gray ink (except the smaller balloon)


Open the card, and this is what is revealed - 4 pop up decorated panels.

I decorated them using Layering Oval framelits, die cut images using Up & Away Thinlet dies, sentiments and bird images from "High Tide" on a Whisper White background and Carried Away DSP.


This is a close up of the inside upper panel of the card.


The lower panel is similar to the upper panel.


The two right panels of the pop mechanism.


The two left panels.


Close up of belly band showing die cut hot air balloon, a cloud, a punched balloon and the sentiment.

The belly band is closed at the back with Velcro


Supplies Used:
Stamps: Lift Me Up, High Tide, Balloon Celebration
Inks: Black Memento, Basic Gray, Calypso Coral, Mint Macaron, Crushed Curry, Peek-a-boo Peach, Markers (Basic Black, Basic Gray)
Papers: Basic Gray, Whisper White, Calypso Coral, Night of Navy, Carried Away DSP, Mint Macaron Glimmer Paper
Accessories: Balloon Builder Punch, Up & Away Thinlet dies, Timeless Type Junior Alphabet dies, scoring tool, Velcro (non SU). Layering Oval Framelits.