Showing posts with label By the Bay. Show all posts

Sunday, July 19, 2020

Outdoor Class Under the Lilac Tree

Yesterday, July 18, 2020 I held my first class since cancelling them in March due to the pandemic - but I held it outside and the number of students was capped at 2.

What an enjoyable class.  I think we were all glad to see actual people.  It was so hard not to hug everyone.  A virtual hug just doesn't do it!!

I decided to hold the class outside for precautionary reasons.  It was a lot of work as all surfaces and supplies that would be used had to be disinfected. Students were asked to bring masks in case they needed to enter the house for any reason, and each student was given a small bottle of hand sanitizer.  The students sat across from each other rather than side by side as research shows that this reduces the spread of any potential viruses.  There have been no cases of COVID here in Peterborough for at least a month, but one needs to stay alert.  To ensure the class was as contactless as possible, students were asked to bring their own supplies, from adhesives to trimmer to stamparatus.

It turned out to be a very hot and humid day, so the tent really helped.  Every once in a while a lovely breeze  blew the papers around a bit, but no one minded. A cardinal tweeted over head, and children could be heard playing in the next yard. Air conditioners turned on and off but we were so intent on creating we heard none of the latter.

What was the focus of the class?

A special request was made to create a card featuring a sunset over water, so that was part of the class.  However the main focus was the Blossoms and Blooms stamp set.  Below are the two cards that were made using the Blossoms and Blooms bundle.


And because it was so hot it was important to stay hydrated.


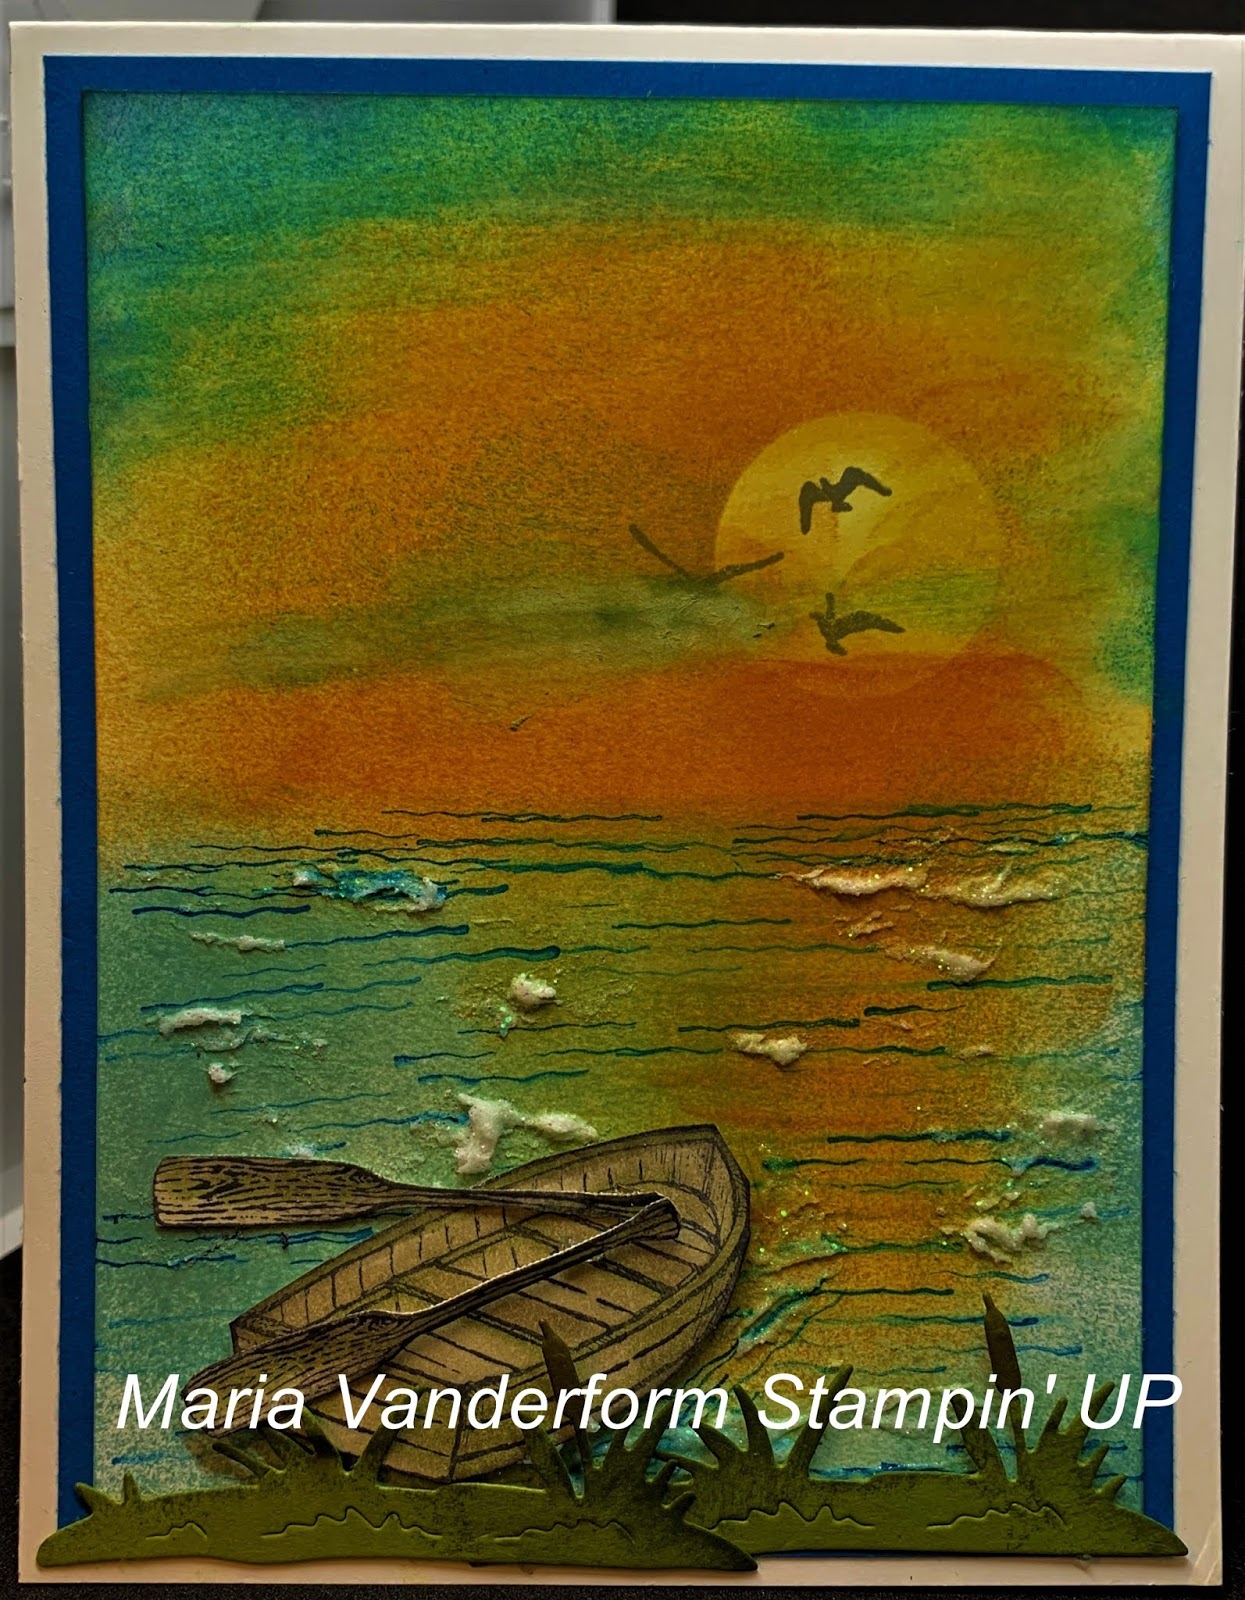
The 3rd card featured a sunset over water, and the By the Bay stamp set was used.  This was the first time these gals had ever used the sponge brayer, and they were surprised at how much fun it was.  I demonstrated how to made the sunset and then they created their own.  Instead of the boat, they chose to use the dock.
They found that this card was quite easy to make if they did not try to CASE my card, but free style their own, They were shown how to make white caps on the waves using texture paste.


 At the end of the class, each student was given a decorated copper tin with a thank you note in it, as well as a package of embellishments and 2 rolls of ribbon. You can see the packages on the edge of the table. Below is a close up:


There are requests for another outdoor class.

Wednesday, February 5, 2020

Another By the Dock card

It's always nice to use up die cuts, punchies,etc left over from earlier projects.  Yesterday I decided not to include the row boat and oars I had already coloured and die cut, on a card I made featuring the dock, because I felt by including them would make the card look cluttered.  You'll find the card here

Not wanting to let these die cuts sit in a drawer, I made the card below:


Using a brayer, I lightly added Balmy Blue and a bit of Pacific Point ink to a piece of Whisper White card stock embossed with the Seaside embossing folder.  This folder has unfortunately retired, but I think is perfect for depicting waves on the water.

On a separate piece of Whisper White card stock, the shoreline was stamped twice, coloured and die cut.  Some greenery which included a cattail was also die cut twice.  The cattail only was coloured with a Bronz stampin blend.

Both of these were adhered to the bottom of the embossed front piece, with the die cut greenery in front of and underneath the shore line die cut.

Dimensionals were used to add the boat as well as each of the oars.

Three sea gulls were stamped and die cut and placed randomly in the air.

Hint: I found it easier to use the stamparatus for this as the images are so small.  I die cut the images first, then placed the card stock with the negative images in the stamparatus.  The stamp was matched up with the die cut opening , the die cut was placed in the die cut opening, and the image stamped directly on to the die cut.


To finish the card, a die cut jumping frog with Shimmer Crystal Effects added to it, was added jumping off the boat.

Some Mossy Meadow baker's twine was wrapped around the bottom of the card after which it was matted with a piece of green plaid from the Country Club DSP.  This was added to some Whisper White and this onto the Basic Gray card stock base.

Supplies Used:
Stamp: By the Bay
Inks:  Black Memento, Stampin' Blends (Light and dark Crumb Cake, Soft Suede, Smoky Slate, Light Sahara Sand, Old Olive, Bronze), Balmy Blue, Pacific Point
Papers:  Whisper White, Country Club DSP, Basic Gray, Garden Green
Accessories: Seaside Embossing Folder (retired), Dockside dies, Brayer, Mossy Meadow baker's twine, Dimensionals, Stamparatus, Shimmer Crystal Effects.

Friday, March 1, 2019

Happy Anniversary - A View of the Bay

If you're like me, you have a variety of punchies, die cuts and/or stamped images left over from previous projects.  And, every once in a while, these "left overs" are incorporated in the design of a new project.

That's what happened with this card.

I had stamped and coloured the image of the man and the woman, the man having his arm around her shoulders.  Facing away from me I wondered what they were looking at. A blank card didn't seem too exciting.  Glancing up I saw the image from "By the Bay" a SAB stamp set - one that was left over from a previous project- lying on my work space.

Idea!!! Below is the card I came up with.

A window frame was made using two sizes of the stitched rectangle framelits and Soft Suede card stock. After adhering a window sheet behind the frame, the scene with the sand pipers along the shore was added.  The light from the camera in the upper right looks like the sun shining through the window.


The images of the two individuals were coloured with the stampin' blends and then fussy cut. They were positioned in front of the window and adhered to the card front using dimensionals.

Above the window a cluster of brightly coloured flowers were added.


The card base is Fresh Fig card stock, layered with first the barn board pattern from the Floral Romance DSP and then with the floral patterned paper.

The anniversary sentiment, stamped on Whisper White card stock and matted with Fresh Fig, was added just below the happy couple with  dimensionals.

Supplies Used:
Stamps:  To Have and to Hold, By the Bay
Inks:  Black Memento, Stampin' Blends, Watercolour pencils
Papers:  Fresh Fig, Whisper White, Floral Romance DSP, Soft Suede
Accessories:  Stitched Rectangle Framelits, Window Sheets, Dimensionals, Stamparatus.


Sunday, February 24, 2019

Sandpipers By the Bay

Yesterday I posted a card featuring the scenic building on a cliff here

Today's card, still using the "By the Bay"  (SAB) stamp set, features the sand pipers on the shore.


Using Watercolor Pencils and an Aqua Painter a lightly coloured background wash was created on a piece of Whisper White card stock.

The Sand Pipers were stamped three times at various levels on this background, and were lightly coloured with a Basic Gray watercolour pencil.  Some blending was done using the Aqua Painter.

Three separate panels were die cut using the Stitched Rectangle Framelits and matted with Basic Gray card stock.

These were adhered to a panel stamped with the cliff side image of the larger stamp.  Instead of adhering them in a straight line, they were added with the two outer panels lower than the middle one.

After matting this panel with Basic Gray card stock, it was adhered to the Whisper White card front. The lower 1/3 portion of this piece was embossed with the Seaside Embossing Folder and the upper stamped with the sea birds from "High Tide".

A metal embellishment of a crab was added above the left panel.

All edges were sponged with Basic Gray card stock.


Supplies Used:
Stamps:  By the Bay, High Tide
Inks:  Black memento, Basic Gray, Watercolour Pencils
Papers:  Basic Gray, Whisper White
Accessories:  Stitched Rectangle Framelits, Seaside Embossing Folder, Dimensionals, Aqua painter.

Saturday, February 23, 2019

By the Bay - a Master piece

When I saw this stamp set in the SAB catalogue I was not interested at all and I only got it after I ran out of options.

Boy, did I change my mind once I started working with it!

Here's what I call "My Master piece"

The scene on the Bay was coloured with watercolour pencils and an aqua painter.  I found it hard to see all the different elements to colour, so I used the sock matching approach.

When matching socks after doing laundry, I start with the socks I know match, tackling the rest last.  In this image, I coloured what I knew to be i.e water, building, wall, etc gradually identifying other images until I had coloured everything. Clear Wink of Stella was applied to the water.

A light colour washing of the sky and my  master piece was done.  After sponging the edges with Basic Gray ink, it was matted with Basic Gray and then Grapefruit Grove foil paper.  This was added to the card front using dimensionals.

The basic card is Basic Gray card stock, layered with Sahara Sand card stock (retired) which was embossed with the Subtle Texture Embossing Folder. On top of that on the edges was added a frame of Grapefruit Grove foil which was made using 2 sizes of Stitched Rectangle Framelits.

Supplies Used:
Stamp:  By The Bay (SAB)
Inks:  Black Memento, Watercolour Pencils, Basic Gray
Papers:  Whisper White, Basic Gray, Grapefruit Grove Foil, Sahara Sand (retired)
Accessories:  Stitched Rectangle Framelits, Subtler Texture Embossing folder, Dimensionals, Aqua painter,  Clear Wink of Stella