Showing posts with label Daisy punch. Show all posts

Thursday, April 9, 2020

A New Beginning - Try Stampin' on Tuesday #451

We all wish for a new beginning, especially at times like this, when a virus is destroying the world as we know it.

In addition, the calendar says Spring, but one look out the window makes that a lie!  The snow, although light, is most unwelcome.

Regardless, I wanted to reflect Spring and a new beginning, by creating 3D Daisies, on the card I made for the sketch challenge at Try Stampin' on Tuesday #451.  The sketch is a throwback to Sketch #98 


This card, with a Mint Macaron base, if 5 by 5" and is layered with Whisper White and then 2 pieces of the new Ornate Garden DSP.

The larger piece has a Mint Macaron background with gold embossing; the smaller piece has Daisies all over it - thus my inspiration.


The Dollie die is non SU, and what attracted me to this die is the small Daisy-like flowers in the center of each scallop edge.  On the Doillie are added 3 Daisies - one large and 2 small.

The Large Daisy is made from Whisper White card stock using the Daisy punch.  Daffodil Delight ink is applied to the petals of  the two punched flowers and some Soft Suede in the center.  Each flower is shaped using a stylus, adhered together alternating petals, and a Perennial Floral Center added to each flower.


The small Daisies are made using the small Daisy punch, where the two punched flowers are treated the same way as the large Daisy.

A flower is not complete without a leaf.  So, each flower has a leaf punched using  the Leaf Punch.The Old Olive leaves are sponged with Old Olive ink, shaped and added to each Daisy.


Both completed Daisies are adhered to the Doillie as depicted in the picture.

To finish the card, Gilded Gems are added randomly to the sentiment and card base.

Supplies Used:
Stamp:  Morning Star (sentiment)
Inks: Black Memento, Daffodil Delight, Soft suede, Crumb Cake, Old Olive
Papers:  Mint Macaron, Whisper White, Ornate Garden DSP, Old Olive
Accessories:  Daisy Punch, Small Daisy Punch, Leaf Punch, Perennial Floral Centers, Gilded Gems, Doillie (non SU)


Monday, June 17, 2019

Garden Lane Triple Fold Out Card

This Fun Fold card, with 5 folds, is a neat way to show off beautiful DSP

Below the card is closed


Opened all the way revealing the folds and adhered DSP. A sentiment can be stamped on and/or a personal message written on the Whisper White piece.

 Measurements:

  • Garden Green card stock 5 1/2 by 4 1/4" - card base
  • Soft Sea Foam card stock embossed with the Basket weave Embossing Folder - adhere to card base
  • Garden Green card stock 11 by 4 1/4" scored at 1 1/2, 3, 5 1/2 and 8" and then accordion folded.  Burnish folds well and then adhere the following to this piece.
          • DSP 4 by 2 3/4" pattern 1 of Garden Lane DSP
          • Whisper White 4 by 2 1/4" for sentiment
          • DSP 4 by 2 1/4" pattern 2
          • DSP 4 by 1 1/4" pattern 3
  • Garden Green 2 5/8 by 2 5/8"
  • DSP 2 1/8 by 2 1/8 pattern 4
  • Scraps of Whisper White and Daffodil Delight for flower
Accessories:
  • Daisy Punch
  • Medium Daisy Punch
  • Basket Weave Embossing Folder
Sentiment from Butterfly Wishes.

Flower:


  • Punch 2 Whisper White flowers using the Daisy Punch
  • Punch 2 Whisper White flowers using the Medium Daisy Punch
  • Punch 1 Daffodil Delight flower using the Medium Daisy Punch
Shape petals of large Daisies so the petals fold down.  Adhere two together alternating petals
Shape one of the smaller Daisies so the petals face downward, and the other so they face upward.  Adhere two together alternating petals
Curl Daffodil Delight flower into a tight ball and adhere to center of flower
Punch 2 Leaves using Petal Punch- shape and add to flower base and adhere completed flower to 2 5/8" square.


Friday, April 19, 2019

Daisy Lane - New Annual Catalogue Sneak Peak

I was fortunate to spend a week in beautiful British Columbia and attend Stampin' Up On Stage in Vancouver on April 13.  Attending On Stage is always a lot of fun and one always leaves with a lot of 'goodies'.
After registering, we all received a beautiful green cloth bag with a leaf embroidered on it.  Inside was some file folders, a memo book and a stamp set.

Yes, that is the new catalogue in the above picture.

So, to end the suspense, here's a card I  made with one of the new stamp sets called "Daisy Delight"


Do you recognize anything?
Yes, it's a flower punched with the Daisy punch.
The Daisy flower was stamped three times using Crushed Curry ink and  punched with the Daisy punch.  To make the flower look more vibrant, I sponged each petal front and back with more Crushed Curry ink, then added colour to the centre using an aqua painter and Early Espresso and Pumpkin Pie ink. After the flower was dry, each petal was curled up with a bone folder. The flower was assembled by adhering each flower together alternating the petals.


See the center of the flower?  These self adhesive 3D flower centers are another new item in the upcoming catalogue.

The stem and leaves of the flower was stamped using Old Olive ink and then fussy cut.  Again, I sponged the edges before adhering them to a  Night of Navy panel which was die cut with the stitched rectangle die.

After adding the 3D flower, a thick Baker's twine bow was added and the sentiment , stamped in Call Me Clover ink was included.

The Night of Navy panel was matted with Call Me Clover card stock, and the unit added to the card front using dimensionals.

The base card is Call Me Clover layered with Whisper White .  On the Whisper White layer the large leaf was stamped randomly using Call Me Clover ink.


Supplies Used:
Stamp:  Daisy Lane
Inks:  Call Me Clover, Old Olive, Crushed Curry, Early Espresso, Pumpkin Pie
Papers:  Call Me Clover, Whisper White, Night of Navy
Accessories:  Perennial Essence Floral Centers, Mint Macaron Thick Baker's Twine, Stitched Rectangle Framelits, Daisy Punch, Dimensionals, Aqua painter


Wednesday, July 26, 2017

For You - Fab Friday #117

What a summer we're having - little sunshine and lots of rain.  Despite that my flowers are blooming.  This morning I noticed that my coneflowers were blooming. That got me thinking about the Daisy punch.  Could I use it to make a Coneflower?
Well I played and played with it and I found I could.
I incorporated this coneflower into the sketch challenge with Fab Friday #117 here


The Tranquil Tide card base is layered with Whisper White and  then Naturally Eclectic DSP.

Inside the 2 1/2" Whisper White circle I placed the coneflower I created using the Daisy punch, along with  2 leaves I cut freehand along the fold of Garden Green card stock. This was matted with a 2 1/2" circle punched in Tranquil Tide card stock.

How did I made the coneflower? And the leaves?

One Daisy was punched in Berry Burst card stock  This flower was cut in half, the petals sponged with Berry Burst ink and curled under with a bone folder.  The two halves were placed on top of each other alternating petals.  When the flower was complete it didn't look right, so I removed one of the petals and - walla- the coneflower was created.  When making the center of the coneflower,  I stamped the two flower centers from the Daisy Delight stamp set - the first using crumb cake, and the other on top of this using Calypso Coral. This was punched out with the 1/2" circle punch. But the center of the coneflower in my garden was fuller and more colorful, so out came my flower soft, something I have not used for a while. I chose the Heather mix and added a bit of yellow and after the glue was set this center was added to the top of the cone flower.


On a folded piece of Garden Green card stock, I cut 2 leaves on the fold, sponged the edges,and adhered them to the circle near the flower.

The focal circle was adhered to the card front using dimensionals; a second smaller circle contained the sentiment from "Best Wishes" was added just to the right below the larger circle.


A 1/8" strip of Tranquil Tide was placed on the lower part of the main circle, proceeding behind the smaller circle extending slightly beyond its other side.  On this circle I placed 3 Glimmer Enamel dots because no card is complete without glimmer.

Supplies Used:
Stamps:  Daisy Delight, Best Wishes
Inks:  Tranquil Tide, Crumb Cake, Calypso Coral, Always Artichoke
Papers:  Tranquil Tide, Whisper White, Naturally Eclectic DSP, Berry Burst, Garden Green
Accessories:  1/2" circle punch, 2 1/4" circle punch 2 1/2" circle punch, Daisy punch, Flower Soft (Heather plus Yellow) non SU, Glitter Enamel dots, Dimensionals


Saturday, July 8, 2017

Pocket Card swap cards

The Swap of the Month with my Yahoo group ORSA is a card fold. The swap involves making 3 identical cards and I will get 3 different cards back.
Inspired by a past Paper Pumpkin kit I make 3 pocket cards with inserts. A template is provided below.

The base is Wisteria Wonder as I was planning on using the Daisy Delight DSP and that is one of the colors in the paper.  I used one of the cards from the Paper pumpkin kit as a template. The notch was made using a large oval punch.

On the front I adhered 2 patterns of the DSP with a piece of Lemon Lime Twist ombre ribbon over the seam. On top of the DSP I adhered a 1/8" strip of Wisteria Wonder.

I just love flowers, and a Daisy flower is no exception.  Two daisies were stamped using Wisteria Wonder ink.  For each flower, two Daisies were punched with the Daisy punch.


Before adhering them together, the petals were shaped using a bone folder and then pressed down in the center.  This makes the petals curve up and then down. The two were adhered together alternating petals.

I stamped a third Daisy, which I cut in half and added to the insert.

The centers, which were first stamped with Daffodil Delight and then Crumb Cake, were punched with the 1/2" circle punch and added to the flower center with a dimensional.  A gold faceted gem as adhered on top of that.


For each Daisy two leaves were stamped and cut out by hand.  They were first stamped with Pear Pizzazz with the outline stamped in Old Olive.  Before adding them to the Daisy, the edges were sponged with Old Olive and scored down the center. I punched a 1 3/4" scallop circle in Wisteria Wonder to be the base for the flower.  The flower was built on this scallop circle which was then adhered to the card front.

The sentiment, stamped in Black Memento, is from the same stamp set.

To complete the outside, I added a smaller gold faceted gem on either side of the notched edge.


The Insert:

This is a 4 by 5 1/8" piece of Whisper White whose edges have been rounded with the corner rounder punch.
Along the bottom is stamped a row of Daffodil Delight daisies.
At the top, visible from the notch are stamped 2 smaller daisies in Wisteria Wonder.  The first is a solid image stamped with second generation stamped.  On top of that is a Daisy stamped with the outline stamp on a separate piece of Whisper White.  It was cut out and adhered to the top of the stamped Daisy.
In between the Daisies I stamped some tiny Daffodil Delight coils and 4 tiny Daisies underneath.

The remainder of the sentiment is stamped about half way down with half of the cut out Daisy adhered on the side just below it.

I added some gold Dazzling Details to the centers of the smaller Daisies and the half Daisy on the insert.


Supplies Used:
Stamps:  Daisy Delight
Inks:  Black Memento, Wisteria Wonder, Daffodil Delight, Pear Pizzazz, Old Olive
Papers:  Wisteria Wonder, Whisper White, Daisy Delight DSP
Accessories:  Daisy Punch, 1/2" circle punch, Gold faceted gem, Gold Dazzling Detail (retired), 1 3/4" scallop circle punch, dimensionals

Template


Tuesday, May 30, 2017

Friend - a team meeting swap card

My team meeting was last night, and this is my swap card.  It uses the new Daisy punch and the Daisy DSP with thick Whisper White card stock and window sheet.

I used the Thick Whisper  White card stock for the base of this card (I don't know the name of this card style, so I'll call it a window card because that's the term my son used when he saw the card)

The card base was made by cutting a piece of thick Whisper White at 41/4 by 11 inched, scoring it at 5 1/2" and then cutting it at 7".   From the 4" piece cut a 1 1/2" piece to put at the bottom.

A 4 1/4 by 3 1/2" piece of window sheet was used to connect the top and bottom card parts.

Daisy Delight DSP matted with Wisteria Wonder card stock was added to the top and bottom panels.

The Daisy flower was made by stamping two Daisy images with Wisteria Wonder ink and then punching them out using the Daisy punch. Some Daffodil Delight ink was also added to the center of each Daisy flower.  After curling the petals up, the flowers were adhered together off setting the petals and a gold faceted gem placed in the center of the flower.
For each flower two leaves were stamped and then fussy cut.
The flower and leaves were adhered to a 1 1/4" circle and then adhered to the card front.  I placed another 1 1/4" circle on the inside of the card

Using the new "Lovely Words Thinlet Die" the word "friend" was die cut and then adhered directly to the window sheet.

Supplies Used:
Stamp: Daisy Delight
Inks: Wisteria Wonder, Daffodil Delight, Old Olive
Papers: Thick Whisper White, Daisy Delight DSP, Whisper White, Pear Pizzazz
Accessories: Daisy punch, 1 1/4" circle punch, Window sheet, dimension, gold faceted gem, Lovely Word Thinlet Die

Monday, May 15, 2017

In-Color Note cards in a Paper Purse

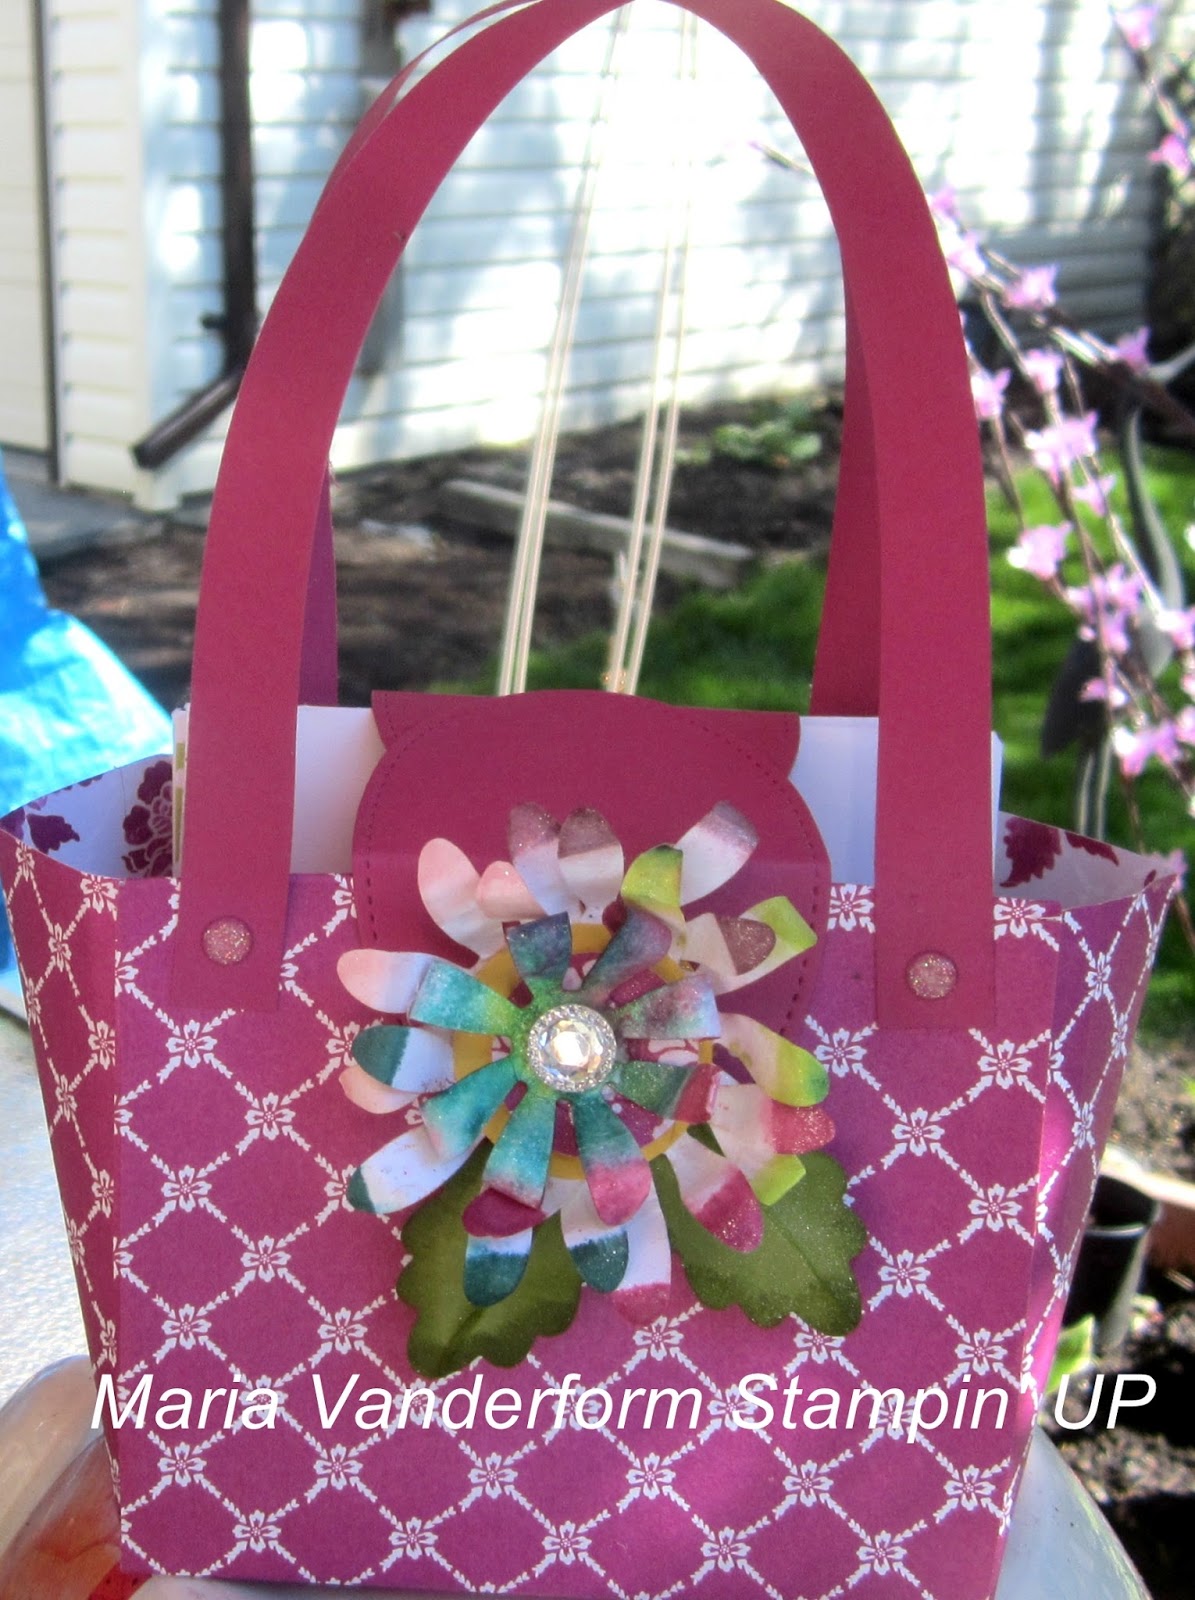
My team is holding an Open House to launch the new Annual Catalogue. So, for this occasion, I made five 4 by 4" note cards and hand made envelopes using the envelope punch board as well as a paper purse to put them in.


Above are all 5 note cards.  Below that are close ups of  two of them.  I used the new Fresh Florals DSP, the Daisy punch and the Daisy Delight stamp set.  In the center of each flower is a small Chocolate brown scallop circle in the center of  which is either a faceted clear gem or a glitter enamel dot.

A purse was made using a 12 by 12" piece of the Berry Burst color of the Floral Designer DSP


The flowers that were punched out were not wasted.  They were made into an embellishment for the front of the purse. See close up below.


The purse latch was made by die cutting 2 large stitched ovals , both of which were folded in half.  On the front half I added 2 small magnets; the back was adhered with tombo.

Supplies Used:
Stamp:  Daisy Delight
Inks: Berry Burst, Fresh Fig, Lemon Lime Twist, Powder Pink, and Tranquil Tide
Papers:Whisper White, Fresh Floral DSP, Berry Burst card stock, Pear Pizzazz
Accessories: Daisy Punch, Clear and Gold Faceted Gems, Glitter enamel dots, 1" circle punch, Stitched Oval Framelits, small magnets (non SU), Envelope punch board.


Tuesday, May 9, 2017

Floral Delight - Try Stampin on Tuesday or Not #321

While I am enjoying the spring weather, I am missing flowers growing in my garden.  It has been too cool for the plants to emerge from the ground.

Making paper flowers is a good substitute for working with real plants and encourages the use of my creative side.

For the sketch challenge with Try Stampin on Tuesday or Not this week, I challenged myself to make some 3D flowers for this sketch - not so 3D that the card wouldn't fit into an envelope or the card wouldn't  fit through that dreaded "slot" at the post office.


I must admit I selected the DSP first and colored the flowers to coordinate with that. The Blooms & Bliss DSP is just beautiful and am sad to see it retire by June. I used a 3 3/4 by 5 piece of the DSP which was adhered to a 4 by 5 1/4" Whisper White cardstock layer.

The art piece is a 3 by 3 3/4" piece of Whisper White embossed with the decorative dots embossing folder.  This I matted with Sahara Sand card stock before adhering it to the card front.

Instead of placing circles on the art panel, I made 2 different styles of paper flowers.

The two smaller flowers were made by punching 2 whisper White daisies, coloring them with an Island Indigo marker and then spritzed each flower lightly to blend the colors.  When the flowers were dry enough I shaped both flowers and adhered them together alternating the petals.  Two small stamens were die cut using the Botanical Builder framelits, shaped using a stylus, and added to the center of each flower. Some liquid pearls in the center and the flower itself is complete.  I punched two leaves for each flower and glued them to the flower bottom.

For the flower in the center I used the Pansy punch, again punching 2 flowers, coloring and spritzing them, and when partially dry shaped the petals by literally squeezing each petal between thumb and forefinger. After adhering them together alternating petals, two black stamens (die cut using the Botanical builder framelit) were inserted into the center. Two leaves were glued to the underside.

All three flowers were spritzed with a glimmer spray and then adhered to the art panel using tombo glue. A close up of the flowers is below.


Supplies Used:
Stamps: Teeny Tiny Wishes
Inks: Island Indigo, Old Olive
Papers: Island Indigo, Whisper White, Sahara Sand, Blooms & Bliss DSP, Old Olive, Mint Macaron, Basic Black
Accessories: Decorative Dots embossing folder, Botanical Builder framelits, Daisy punch, Pansy Punch, Liquid Pearls (non SU), flower forming tools, spritzer (with water)

Now it's your turn to create something using this sketch, then upload it to the Try Stampin' on Tuesday or Not blog site or their Facebook page
The challenge runs for 2 weeks.
Looking forward to seeing your work.


Sunday, April 30, 2017

Powder Pink Chrysathemum-like Daisy

Flower number 2 using the Daisy Punch, but this time using  Powder Pink ink.  Wow!! I'm having so much fun!
I'd love to be outside in the garden, but it's very cold and its raining.  My son was playing football today and had to wear mittens and a toque.
So, I'm staying indoors and making flowers instead.


For this flower I punch 4 Whisper White petals inking them with Powder Pink ink.  After spritzing them, and shaping them, they were adhered together alternating petals.

Three Basic Black stamens, die cut using the Botanical Builder framelits, were adhered together and then adhered to the center of  the flower.

Then, using tweezers, each layer of petals was curled up resulting in the flower you see above.