Showing posts with label Window card. Show all posts

Thursday, May 11, 2017

Belle & Friends Tulle Window Card

Using Tulle instead of window sheets to make both window and shaker cards was inspired by watching some videos by Jennifer McGuire.
It was actually quite easy to use tulle, which I was able to obtain rather inexpensively.  I will also be using the tulle to wrap and decorate packages for my craft shows, so this is just one more idea for this product.
For today's purpose I used plain white tulle, although there is tulle which has glitter embedded in it.
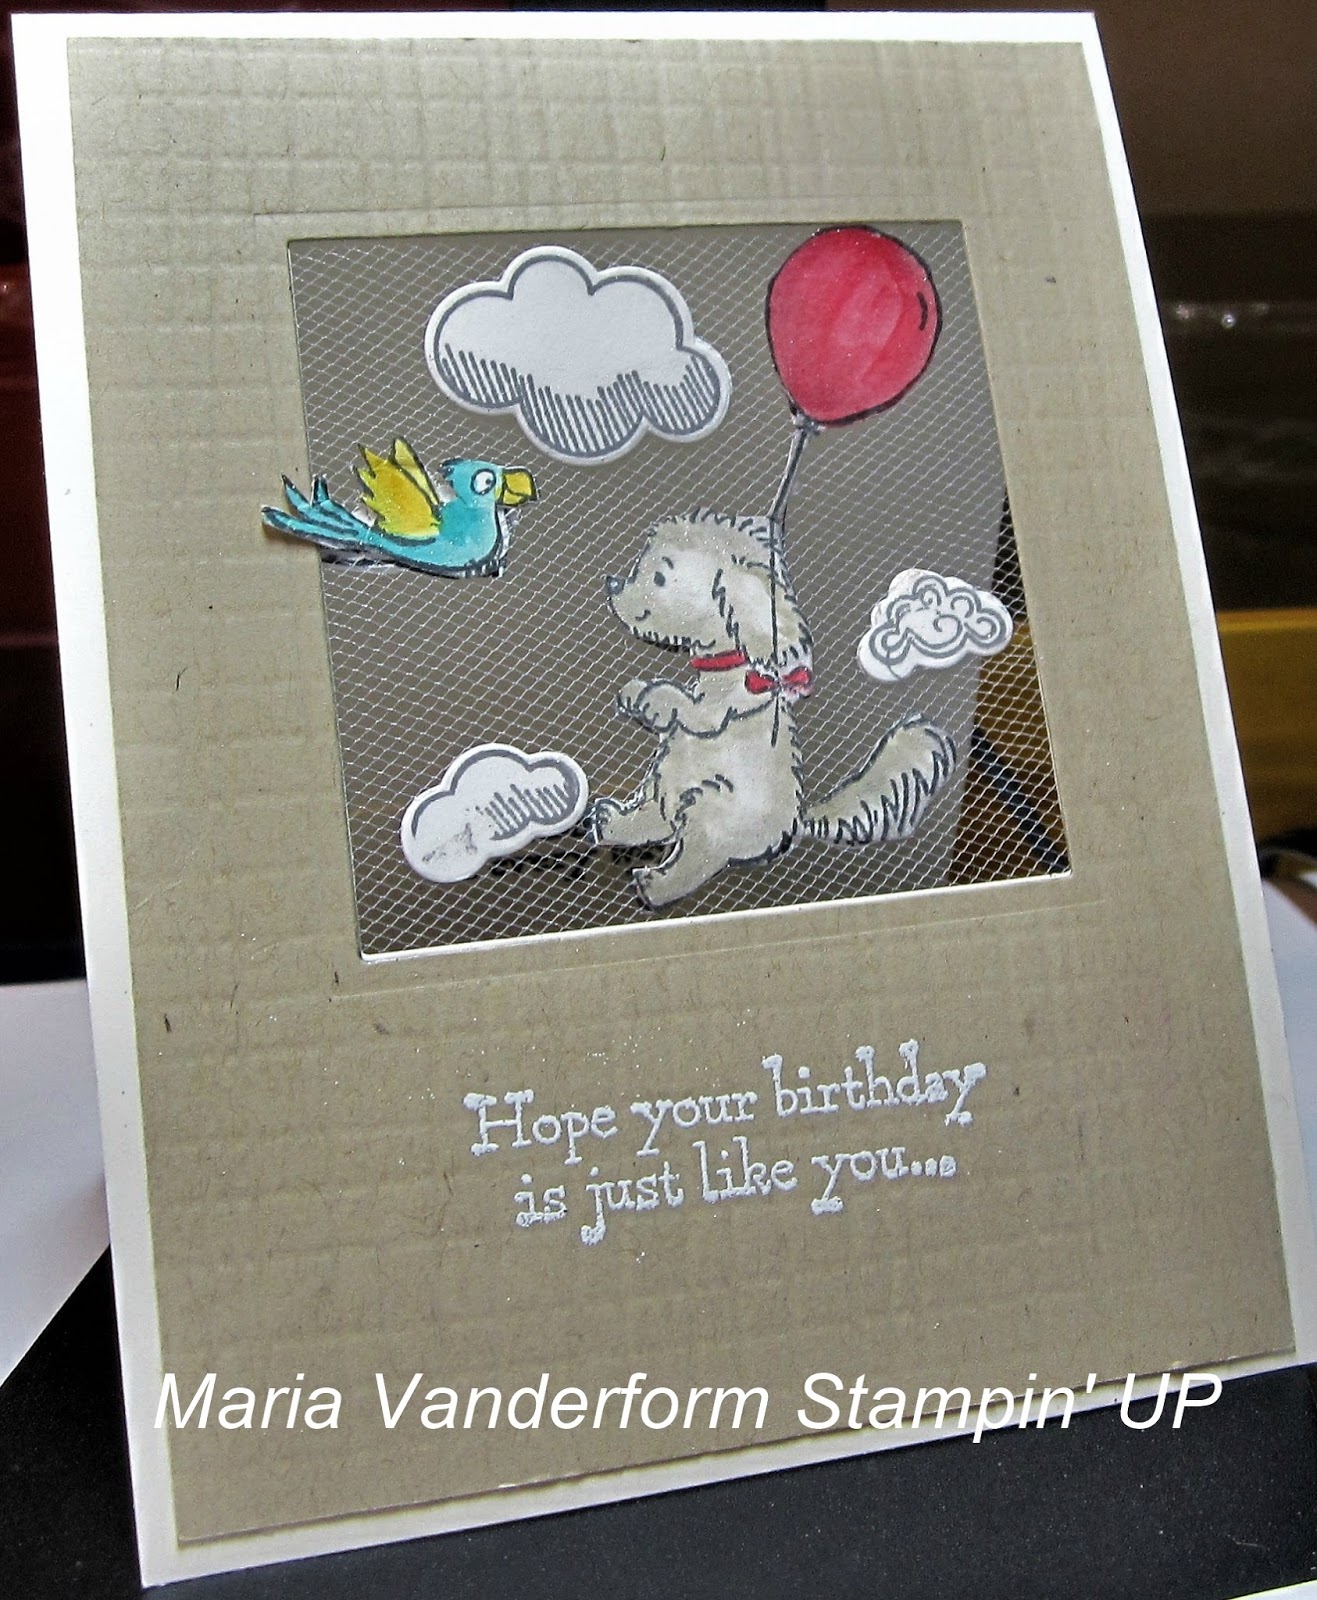

A 4 by 5 1/4" piece of Crumb Cake card stock was temporarily adhered to a 4 1/4 by 11" Very Vanilla base.  The square stitched framelit was used to die cut an opening in the two layers.

A piece of tulle was cut slightly larger than the opening of the window.

The two layers were separated, and tear & tape adhesive was applied around the openings and edges on the wrong side of the Crumb Cake piece only. After removing all the tape covers, the tulle was added over the opening, making sure there was no slack in the tulle.

This crumb cake layer is now added to the card front.


The images from "Belle & Friends" were stamped on White Glimmer Paper and colored with ink pads and a Clear Wink of Stella brush.  This gives such a lovely glitter effect.

They were fussy cut, and I mean fussy cut!!  I had surgery to my right thumb a week ago,  and I have a difficult time holding scissors.  I managed, but some of the edges are a bit rough.  I stamped and cut out a second set of images to place on the other side of the tulle. These were not colored.

The clouds were stamped using the "Lift Me Up" stamp set and die cut using the coordinating stamp set. A second set of clouds were die cut without stamping as well.

After applying adhesive to the back of each image, they were attached to the tulle window as shown in the card.  The uncoloured images and clouds were adhered on the other side of the tulle so that they would not stick to the inside of the card. Below is a close up of the tulle window.  The images look like they are floating!


The sentiment, from "Pretty Kitty" was embossed with white embossing powder.

Supplies Used:
Stamps: Belle & Friend, Pretty Kitty, Up in the Air
Inks: Black Memento, Basic Gray, Crumb Cake, Real Red, Bermuda Bay, Crushed Curry, Versa Mark
 Papers: Very Vanilla, Crumb Cake, White Shimmer
Accessories: Stitched square framelits, white embossing powder, tulle (white) non SU. Up and Away Thinlet dies.

This window card can be made using Window Sheet as well.


Friday, August 14, 2015

Thankful for You - Sketch Frenzy Friday

Now that my craft shows are slowing down a bit I am finding more time to participate in challenges.  Certainly I haven't done one with SFF for quite a while, but today I'm doing the sketch and making a card.


I made a Thanksgiving card that has a window in it and a frame around the window.

  • The base card is Soft Suede, layered with first Whisper White cardstock and then Into the Woods DSP.  All layers were sponged with Soft Suede ink.
  • On a scrap piece of Whisper White cardstock, I stamped the bear from the stamp set "Thankful Forest Friends" using Early Espresso ink.
  • After I attached the DSP and the Whisper White, I used an Oval framelit to create a window in the card. I used the size of the bear to determine which size of Oval framelit to use.
  • The bear was also die cut with an Oval framelit, but using a bigger size than the window.
  • I then adhered the bear to the window on the wrong side of the paper.
  • To create the frame, I used Soft Suede and 2 sizes of Oval framelits and ran it through the Big Shot.  The edges of the frame were then sponged.
  • A Neutrals button was threaded using a tiny sliver of  Early Espresso cardstock and attached to the lower frame with glue dots.
  • The sentiment is from the same stamp set, but it was inked up with markers:  Early Espresso, Old Olive, Soft Suede, Cajun Craze.  It was die cut using the Lots of Labels framelits, the edges sponged, and then adhered to the card front.
Supplies Used:
 
Built for Free Using: My Stampin Blog

Wednesday, August 12, 2015

The Wilderness Awaits - Card 2 - The Fox - a Window card

I just love this card set, but then Nature stamps have always appealed to me.
For the second card in this series, I decided to use the fox - plus I decided to make the card a little bit different.  By different I mean putting a window in the front of the card and seeing the fox through it.

  • The base card is Crumb Cake cardstock, layered with Pretty Petals DSP stack
  • After adhering the two layers together, I used the new Lots of Labels framelits to create a window in the middle of the card.
  • To make the Basic Black frame, I used 2 sizes of the Lots of Labels, the one used to make the original window and the next larger one.
  • At the bottom and top I placed strips of Basic Black card stock with the edging made using the smaller Lots of Labels framelit (the small end) and die cuting it all the way across the top edge.
  • The image was coloured first with a Crumb Cake ink and aqua painter, and then Cajun Craze mainly with the blender pen.  I emphasized the eyes with a black marker.  It was stamped with Black Memento on Whisper White card stock.  The grass was coloured with Old Olive and Always Artichoke markers.
  • The image was die cut with the same size Lots of Labels framelit as used to make the window, and a Basic Black frame was made around it in a manner similar to the front of the card.
  • Using the stamp set "Teeny Tiny Wishes", the sentiment was stamped under the fox.
  • To attach this image to the inside of the card, I used the front window as a guide.
Supplies Used: 
Built for Free Using: My Stampin Blog

Friday, April 17, 2015

Double Fold Moon Lake Father's Day Card

This card is different, in that it really is two cards in one.
The stamp set used is Moon Lake, the image of the bird on the branch.


The Old Olive is 5 1/2 by 8 1/4 scored at 4 1/4 to form an A2 card.  In the front I die cut an oval using the Oval framelits, and then texturized it using the Decorative Dots folder.  Some Baker's Twine was wrapped around it and tied in a knot.

The Whisper White piece is 5 1/4 by 8 scored at 4".  As you can see from the second picture, the image was stamped on a piece of Whisper White, die cut using the Ovals framelits, and an Oval frame in Old Olive was adhered around it.  This was adhered to the front of the Whisper White piece, so that when the card was closed the image showed through the oval cut out.

The image was coloured using markers and an Aqua painter, and the sky was coloured using a finger dauber and Soft Sky ink.

An easy card to make and leaves lots of room for writing.

Supplies used:

Built for Free Using: My Stampin Blog

Thursday, February 26, 2015

Happy Easter - Indescribable Gift - Blendabilities Background

This time I used the blendabilities background to make an Easter card.

The colours used for the background:  Crumb Cake, Melon Mambo, Daffodil Delight, and Wisteria Wonder.


This card was made a little differently.
I took a piece of 12 by 12 Whisper White cardstock and cut it to a size of 5 1/2 by 12.  I then scored it into 3 equal portions, at 4, and 8" making it a trifold card.
In the middle section, I marked a 1/2" mark all the way around, and with my trimmer, I cut the center portion out - leaving a 1/2" frame.  The completed image panel will be placed behind this frame.

Here's a side view.


The image, from Indescribable Gift, was stamped on the blendabilities background using Black stazon ink.  The sentiment is from Teeny Tiny Wishes.

The image piece was trimmed down to fit behind the window frame and double sided tape was used to secure the piece.

Double sided tape was placed on the front third, and it was adhered over the middle portion thus covering up the back of the frame.  Now we have a regular card.


On the inside, a piece of Whisper White was matted with Melon Mambo, stamped with the Easter sentiment and adhered to the back of the card.

Built for Free Using: My Stampin Blog


Saturday, December 7, 2013

Tulip Birthday Window card - The Friday Mashup 138

The challenge with the Friday Mashup is to use their sketch to make a window card.  I haven't used window sheets to make a window card in a long time so I had to put my thinking cap on as to how to do it.
This is what I came up with:


The base card is Island Indigo layered with first Whisper White and then Gingham  Garden  designer paper.
To make the window I measured out the space for it than cut out the rectangle using my cutter.  Since it was difficult to cut through all three layers at the same time, I cut out one layer at a time - using each layer as a template for the next.  I attached the window sheet, which I cut larger than the window it would be covering, between the designer paper and the whisper white layer. To finish the window off, I attached a silver sticker decorative line around the edges.

The tulip was coloured using SU markers and an aqua painter.  It was die cut using the Backyard Basics framelits and attached to a piece of Island Indigo card stock and adhered to the inside of the card so it would show through the window.  The same edging was used around the edges of this piece of Island Indigo as I did the window.

The flags were made with hand cut triangles of melon mambo card stock.

Stamps: Backyard Basics, Bring On the Cake
Inks: Black Stazon, Melon Mambo, SU markers (Melon Mambo, Pear Pizzazz)
Papers: Island Indigo, Whisper White, Melon Mambo,  Gingham Garden  Designer Series Paper
Accessories: Window sheet, Backyard Basics framelit, silver decorative line stickers (non SU)

Sunday, February 19, 2012

Mixed Bunch Window Card - Stamping 411 # 243

When I first saw the sketch for the Saturday challenge with Stamping 411 here I first thought the focal image was a circle, but then realized I could create a circlular window instead.

Here is the sketch:


My interpretation:


The window was created using the 2 1/2" circle punch - punching through one layer at a time.
The flower was then made by stamping the image using Poppy Parade ink and punching the image with the Blossom Punch. The petals were scored and folded up.  A flower was also punched out of Poppy Parade card stock.and attached under the stamped image off setting the stamped image. A center was stamped with Soft Suede and punched out with the 3/4" circle punch.  It was attached to the center of the flower with dimensionals.  Leaves were hand cut out of Lucky Limeade card stock.


Stamps: Mixed Bunch, Petite Pairs
Inks: Poppy Parade, Soft Suede
Papers: Soft Suede, Natural Ivory, Everyday Enchantment Designer Paper, Whisper White, Lucky Limeade
Accessories: 2 1/2" circle punch, Blossom punch, 1 3/4 by 7/8" oval punch, 3/4 by 15/16 " Oval punch, 3/8" Soft Suede Taffeta ribbon, rhinestones, dimensionals, dazzling details, Scallop border punch