Showing posts with label Timeless Texture. Show all posts

Saturday, July 21, 2018

Thank You Big Time

The images in the Animal Outing stamp set do make a lovely thank you card, but that's not where I got the image for this card.

Would you believe I fussy cut the images from the Animal Expedition DSP?

This is a picture of a two toed sloth, so technically I should have placed him upside down.

I cut him out of the DSP, sponged the edges and adhered him to a 2 1/2" circle "dotted" with the  stamp from the Timeless Texture stamp set.  I sponged the edges of the circle with Mossy Meadow ink as well. Some Glossy Accents added to his body made him look more alive and realistic.


I started with a top folding Crumb Cake base, layered with a Very Vanilla piece embossed with the layered petal embossing folder.  The edges were sponged with Soft Suede ink before adhering it to the card base.

To the left is a notched animal print (also from the Animal Expedition DSP) with a rectangular piece of Crumb cake card stock embossed with the stripe and scallop embossing folder tucked underneath it.

The sentiment , from the same stamp set is punched out with the 1 1/4" circle punch and adhered just below the embossed crumb cake piece.  The word "friend" is from "A Big Thank You" and is punched with the Classic Label punch and then adhered just below the main sentiment.

Supplies Used:
Stamps:  Animal Outings, A Big Thank You, Timeless Texture
Inks:  Mossy Meadow, Soft Suede
Papers:  Crumb Cake, Very Vanilla, Animal Expedition DSP
Accessories:  1 3/4" circle punch, 1 1/4" circle punch, Classical label punch, Glossy Accents, Clear Faceted gems, stripes and scallops embossing folder, Layering leaves embossing folder

Tuesday, July 17, 2018

A Pressed Flower Thank You Using Swirly Frames

I love the Swirly Frames stamp set as the frames provide an outline for many images, such as the Pressed Flowers below.


The images were inked with Gorgeous Grape and Daffodil Delight and Mossy Meadow markers and stamped onto Whisper White which had been stamped with the rectangle swirly frame.  The frame itself was colored with a marker, then cut out and matted with Elegant Eggplant card stock.

Around the image I stamped dot stamps from the Timeless Texture stamp set using Highland Heather ink, and stamping off first.

On both sides of the stem, I punched a 1/8" hole using the hand held punch, inserted a 1/4" organza ribbon through it and tied it into a bow.

The sentiment was stamped inside a smaller square frame which was also cut out and the edges sponged. A small flower was stamped in the lower right corner.  This was adhered to the art piece and the card front using dimensionals only on one side.


The base card is Elegant Eggplant layered with Whisper White embossed with the Layered Leaves embossing folder with the edges sponged with Elegant eggplant ink.

A white paper doillie was added to the card front before adding the art piece with dimensionals.

Dazzling diamonds were added to the flower centers, and metallic  enamel shapes to the upper right and on the sentiment square as well.

Supplies Used:
Stamps:  Swirly Frames, Pressed Flowers, Hand Delivered, Timeless Texture
Inks:  Gorgeous Grape, Daffodil Delight, Mossy Meadow markers, Highland Heather, Elegant Eggplant
Papers:  Elegant Eggplant, Whisper White, 
Accessories:  Gold Metallic Enamel Shapes, Layered Leaves Embossing Folder, Dazzling Diamonds, Dimensionals. 1/4" white organza ribbon, 1/8" hand held punch.

Monday, June 18, 2018

Here Comes the Bride

Beautiful You is one of my favourite stamp sets, and this set, "Wonderful Moments" in  the new Annual catalogue is a continuation of that.

One image  I am particularly partial to is the bride.

The bride was black embossed on Whisper White card stock, then die cut with  a layering oval framelit.  This was backed with an off-set Bermuda Bay oval.  Some Bermuda Bay dots were scattered around the bride and the flowers colored with a Bermuda Bay marker.

The background for the bride is some colored Glorious Vellum to mimic a church window. This was placed on a Whisper White layer embossed with the Leaf embossing folder. White polka dot ribbon was adhered to both ends of the stained glass layer,


The vellum flowers around the ovals, were punched using the new Four Petal punch, and before shaping them I colored the edges with a Bermuda Bay blendability. Two were adhered together to form a cluster.  A vellum leaf was also colored, shaped and added underneath each flower cluster. Using the Bermuda Bay blendability I colored some pearls and placed them in the center of each flower.


A 1 " circle punch was used to punch out the sentiment, which was layered with a 1 1/4" Bermuda Bay circle.

Supplies Used:
Stamps:  Wonderful Moments, Timeless Texture
Inks:  Versa Mark, Bermuda Bay, Blendabilities (Bermuda Bay, Pear Pizzazz, Daffodil Delight)
Papers:  Whisper White, Glorious Vellum, Vellum card stock, Bermuda Bay
Accessories:  5/8" white polka dot ribbon, layering oval framelits, Four Petal Punch, Leaf Punch, 1" circle punch, 1 1/4" circle punch, Pearls, Black embossing powder

Saturday, April 14, 2018

Cupcake Birthday

I still remember Sheila demonstrating techniques with this stamp set at On Stage, and that memory returns whenever I use this set.

But, unfortunately all good things come to an end.  This set and its coordinating framelits, are on the retirement list.   So, one last card - for the road.


Cupcake:
Icing:
Using the Stamparatus, the icing was stamped first with Pink Pirouette (retiring colour), Sweet Sugarplum (also retiring) and finally Rich Razzelberry. Sprinkles of candy were stamped with Rich Razzelberry.

Cone:
This was stamped in Crumb Cake and Early Espresso

Both the cupcake icing and cone were die cut using the Cupcake Cut outs Framelits and added to a Whisper White Stitched Circle die cut - the icing with dimensionals.  The stitched circle was matted with a Sweet Sugarplum scallop circle the two of which were adhered together using dimensionals. The sentiment, stamped in Rich Razzelberry on Whisper White, was made into a banner and added to the side of the cone with some mini dimensionals.


The card front is comprised of a 4 1/4 by 11 thick Whisper White top fold card.  Before adding the strip of Party Time DSP (retiring) to the left side, some texture was stamped in Rich Razzelberry ink using the dot stamp from Timely Texture (also retiring)  A strip of Burlap ribbon as well as metallic edge Berry Burst ribbon added over and on the edge of the DSP help to unite the colours in the card.

The focal image was added to the card front using dimensionals. Adhesive backed Tutti-Fruitti sequins were adhered at random providing some sparkle and colour.


Supplies Used: 
Stamps:  Sweet Cupcake, Timeless Texture
Inks:  Pink Pirouette, Sweet Sugarplum, Rich Razzelberry, Crumb Cake, Early Espresso
Papers:  Thick Whisper White, Whisper White, Sweet Sugarplum, Party Time DSP
Accessories:  Cupcake Cut outs Framelits, Stitched Circle Framelits, Layering Circle Framelits, Burlap ribbon, 1/4" metallic edge Berry Burst ribbon, adhesive backed Tutti-Fruitti sequins, Dimensionals, Stamparatus

Sunday, March 18, 2018

Bird Banter Long Note Cards

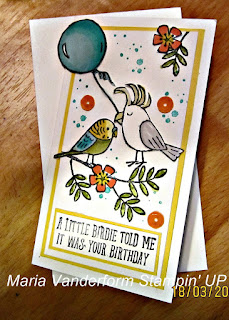
Spring is just around the corner and the Bird Banter stamp set is so reflective of Spring.
I hope you enjoy the 4 long narrow note cards I made using that stamp set.

I used the Whisper White long narrow note cards featured on Page 19 of the Occasions catalogue to make these 4 cute cards.  They are colourful, easy to make and what's great is that they're gender neutral.

Birthday:  "A Little Birdie Told Me it Was Your Birthday".  The birds and balloon were stamped on a scrap piece of Whisper White card stock, fussy cut and adhered on a stamped branch.  All images were coloured with the Blendabilities.  The background was stamped with the dot stamp from Timeless Texture.  I used the tutti-frutti adhesive backed sequins as embellishments.
The focal point was backed with Daffodil Delight before adding it the front of the note card.


Thank You:  What a wonderful thank you note to give to family/friends etc.  I just love this parrot.  A strip of Tutti-Fruitti DSP is added at the bottom and the art piece if adhered to a piece of Tutti-Fruitti DSP before adding it to the note card.  Again, the adhesive backed sequins are used.

My son groaned when he saw the sentiment for this one - "Just a Little Toucan of my Appreciation".  The toucon was added to a stitched oval, the background of which is again stamped using the dot stamp from "Timeless Texture".  A strip of Tuttit-Fruitti DSP edged with Daffodil Delight cardstock punched with the Decorative Ribbon punch.


These little Budgies reminded me of the Budgies I used to have.  These little birds were so smart they knew how to open the cage and would hang upside down on the edge of the cage door.  They provided hours of entertainment for myself and my husband.
I used Bermuda Bay to mat the focal piece, and again adhesive backed sequins were used.

Supplies Used:
Stamps:  Bird Banter, Timeless Texture
Inks:  Black Memento, Blendabilities, Bermuda Bay
Papers:  Long Narrow Note cards (Whisper White), Whisper White, Bermuda Bay, Daffodil Delight, Tutti-Frutti DSP
Accessories:  Stitched Oval Framelit, Oval punch, Adhesive backed sequins (tutu-fruitti), Decorative Label Edge punch


Saturday, January 20, 2018

Pop Up Card Using Hedgehugs

For my birthday, I was given a die that makes pop ups (non SU) and it makes a pop up card so easy to do.

For my friend who gave me this die, this card is for you


I used the Stamparatus to place and stamp the images from "Hedgehugs" and then added extra interest by using "Timeless Texture"

This Whisper White art piece is layered with Picture Perfect DSP


I just love these little Hedgehogs and the skunk is "stinkin" cute!  After fussy cutting them out they were added to the pop up mechanisms using dimensionals.
Tip:  When die cutting the inside, die cut the DSP at the same time.  The DSP then fits perfectly around the pop ups.


Above are close ups of the starring characters.

Supplies Used:
Stamps:  Hedgehugs, Beautiful Day, Timeless Texture
Inks:  Chocolate Chip, SU Markers (Pacific Point, Daffodil Delight, Always Artichoke, Berry Burst), Black Memento, Crumb Cake Stampin' Blender
Papers:  Early Espresso, Whisper White, Picture Perfect DSP
Accessories:  1/2" Early Espresso Seam Binding (retired), Dimensionals, Lucy Label Pop Up Die (non SU)

Wednesday, January 3, 2018

A Flower for Freshly Made Sketches #318

Have you ever done this?

Clean a drawer, only to  find a stamped image that you have no idea what stamp set it came from?  That's exactly what happened. So, if any of my readers recognize the stamp set from which this image came from please let me know.  Thanks.
I also happened to see the sketch challenge with Freshly Made Sketches, and this image was perfect for this challenge.
Here's what the finished card looked like:


The flowers were coloured with the Stampin' Blendabilies with dots of Soft Sky in the areas surrounding the blooms. I placed some 3D liquid lacquer over the petals and sprinkled some dazzling diamonds on top of that.


The Whisper White art piece was matted with Pear Pizzazz card stock, and mounted onto a Whisper White card front embossed with the Petal Burst embossing folder with dimensionals.  It was mounted over a strip of Pear Pizzazz shimmer ribbon. The Whisper White piece was adhered to a Pear Pizzazz card front.


Supplies Used:
Stamp:  Timeless Texture ??? unknown
Inks:  Black Memento, Stampin' Blendabilities, Soft Sky
Papers;  Pear Pizzazz, Whisper White, 
Accessories:  3/8" Pear Pizzazz shimmer ribbon, dimensionals, 3D lacquer (non SU), Dazzling Diamonds, Petal Burst embossing folder., Word Window Punch


Tuesday, January 2, 2018

Wishing for Spring...

Yesterday was the coldest day on record with some areas of the province at minus 50 degrees C.  Here in Peterborough it was minus 32.  Cold, cold, cold!!!  And lots of snow.  Everyday it seems to snow a little bit, just to make the roads slippery, and the snow plough to come out and bury the mouth of the driveway.

You can understand why this stamp featuring a robin with baby chicks appealed to me.  It is from the stamp set "Flying Home"

The image was stamped on a piece of Whisper White embossed with an embossing folder with an oval embossing (non SU).  The embossing as well as the edges were lightly sponged with Soft Suede.  I also stamped some texture "dots" in Crumb Cake around the image.  

The image was coloured with the new Stampin' Blendabilities.

The art piece was layered onto some Petal Garden DSP.  This particular piece in Calypso Coral did not have a pattern on it and thus was perfect for the image.  After the art piece and DSP were adhered together, I added some 1/8" Calypso Coral ribbon and bow, and this was adhered to a Soft Suede base.

Happy Birthday little chicks!

Supplies Used:
Stamp:  Flying Home, Timeless Texture
Inks:  Black Memento, Crumb Cake, Soft Suede, Stampin' Blendabilities
Papers:  Soft Suede, Whisper White, Petal Garden DSP
Accessories:  1/8" sheer Calypso Coral ribbon, Oval patterned embossing folder (non SU), Dimensionals.

Friday, October 6, 2017

Thank You Recessed Panel Cards - 2 views

Yesterday I posted a recessed panel card that was a Halloween card. See the post here

Today's Thank You card uses a different DS and  I am posting 2 versions of it.

 I show you both layouts because the direction of the recess does not really matter, nor does the size.

When I first made this card I actually put the card together with the recessed elements reversed (see bottom picture).  I was upset with myself and put the card aside, not even completing it.

After a couple of days I made another card, this time paying attention as to where to place the elements.  After I was done, I realized that it did not matter which direction the recess went.  I actually saw some cards made with the recess vertical and another one horizontal.

So, here's how I made the card.  I started with a Whisper White card base and cut a piece of DSP and a piece of Whisper White 4 1/4 by 5 1/2" - the same size as the card base.  The DSP was adhered to the card front.

The Whisper White was cut using the template pictured below.  Again, you don't need a template, you can just eyeball where to cut the pieces.
Two pieces of Pool Party card stock 1 1/2 by 6" were added to the inside edges extending over the edges about  1/8" with the excess trimmed off.
Before adhering the pieces, I stamped the image from "Timeless Texture" in Pool Party ink and the sentiment from "Daisy Delight" In Black Memento.

Using foam adhesive strips to adhere the cut pieces  to the card front allows the middle area to be "recessed".

For both cards I fussy cut floral and leaf images from the DSP, sponged the edges and adhered them to a 1 1/4" punched circle, which was then adhered to the card.


Supplies Used:
Stamps:  Daisy Delight, Timeless Texture
Inks:  Black Memento, Pool Party, Calypso Coral, Old Olive
Papers:  Whisper White, Lots of Lovely DSP, Pool Party
Accessories:  Trimmer, 1 1/4" circle punch, Strips of Foam tape


Template I used


Monday, July 3, 2017

Climbing Orchid - Hand Stamped Sentiments #267

I made this orchid card for the color challenge with Hand Stamped Sentiments
This is a stamp set I have wanted to play with ever since the new catalogue came out, but life happened.
When I saw the color challenge:  Lemon Lime twist, Rich Razzelberry, and Dapper Denim I knew I had my chance.  One of my down line told me today that her orchid is blooming today and in exactly these colors.


The orchids were first stamped with Rich Razzelberry and lightly colored in  the center and edges with a Lemon Lime Twist marker.  The center part of the flower was stamped with Lemon Lime Twist with the stamens stamped in Rich Razzelberry.  These  flower parts were die cut using the Orchid Builder Framelits. I also stamped and die cut two buds.

The center was added to each flower with a dimensional and Wink of Stella applied


To make a stem for the orchids, I die cut a branch from Layering Seasons Framelits in Dapper Denim and inserted it in a jar stamped with "Jar of Love framelits" and die cut with the "Everyday Jar Framelits".  Using a blender pen I colored with jar edges while the ink was still wet.  I also stamped in some water for the jar bottom , added some dot stamps from Timeless Texture and applied some Wink of Stella.

Before adding the branch in the jar, I stamped two floral images (not the stems) from the Jar of Love stamp set in Lemon Lime Twist. Then I added the flowers to the branch with dimensionals.

The buds were adhered to the top of the branch of the stem.

Finally, I stamped, die cut, and adhered a Dapper Denim bow at the neck of the jar.

Supplies Used:
Stamps:  Climbing Orchid, Jar of Love, Timeless Texture
Inks:  Lemon Lime Twist, Dapper Denim, Rich Razzelberry
Papers:  Dapper Denim, Lemon Lime Twist, Whisper White
Accessories:  Orchid Builder Framelits, Everyday Jar Framelits, Layering Seasonal Framelits, Dimensionals, Wink of Stella (clear)

A Birthday Card for my downline using Flirty Flowers

My downline's birthday was on Friday last week, but because of the holiday weekend and my craft show we were unable to celebrate the event until today.
This is the card I made for her...

The technique used here is referred to as water stamping i.e. stamping with water on a stamp rather than ink.
First I sponged the background with Bermuda Bay, Rich Razzelberry, Pear Pizzazz, and Crushed Curry, applying the sponge quite heavily yet leaving some light spots and overlapping some of the colors.
I used the largest of the solid stamp of  the Flirty Flower set, spritzed it with water and stamped it on to the sponged background in two places.  Holding it in place for a while gives this type of stamping a better effect.
Then, using Black Memento, I stamped the rest of the stamps in a random manner all over the rest of this art piece.


The sentiment, from "Special Celebration" was stamped on Whisper White with Bermuda Bay, matted with Bermuda Bay cardstock  and adhered to the card front with dimensionals.
A 1/8" piece of Bermuda Bay stitched ribbon was wrapped around the card and tied beside the sentiment piece into a ribbon

Supplies Used:
Stamps:  Flirty Flowers, Timeless Texture
Inks:  Bermuda Bay, Crushed Curry, Pear Pizzazz, Rich Razzelberry, Black Memento
Papers:  Whisper White, Bermuda Bay
Accessories:  1/8" stitched Bermuda Bay ribbon (retired)

Thursday, June 15, 2017

Colorful Seasons - Fall - Baby Wipe Technique

For the second class card featuring the Colorful Seasons stamp set and its coordinating framelits, the baby wipe technique was used to create the lovely fall colors.  Two cards were made, the second one being a bonus card.

If you're not familiar with the Baby Wipe Technique, check out the tutorial hereThe author did the technique a bit different than the way I did it in class.  For example, I used a large stamping block to put the baby wipes on, and then used one baby wipe folded in 4 to create my "ink pad".
The re-inker colors I used were as follows:  Daffodil Delight, Cherry Cobbler, and Cajun Craze (about 3-4 drops of each color, applied close together).
I stamped 3 large leaves down the left side, and then added 3 small ones.  Some black "dots" were added using the "dot stamp" from "Timeless Texture"
After stamping the sentiment, the art piece was matted with Basic Black cardstock, and added to the Cajun Craze card front using dimensionals.
Before adding the art piece, some 1/4" copper trim was wrapped around the card front and tied at the right side.
This card was a top fold card, so the ribbon was easy to wrap around, but if it was a side fold card, a tiny slit would have to be made in the middle fold so the ribbon could be inserted though that.

Similar stamping was done on the inside, and the sentiment "Thinking of you" , from the same stamp set, was used.
Supplies Used:
Stamps: Colorful Seasons, Timeless Texture
Inks:  Black Memento, Reinkers (Cherry Cobbler, Cajun Craze, Daffodil Delight)
Papers:  Cajun Craze, Whisper White, Black Memento
Accessories:  1/4" copper trim, dimensionals, baby wipes

This is another version of the front of the card, where a different sentiment (from "Just Add Text" is stamped on a separate piece of Whisper White and punched with the new Pretty Label Punch".  The edges are sponged with Cajun Craze ink before adding to the art piece with dimensionals.


Which do you like better?

Tuesday, June 13, 2017

Be Creative Every Day - Try Stampin' on Tuesday or Not #326

For the sketch challenge with Try Stampin' or Not this week, the optional theme is "Wiggles  and Waves".  I guess one would immediately think of the ocean or waves, but I immediately thought of paint lines made by brushes.

This week's sketch is by Kaylin


The Cajun Craze card base is layered with Whisper White card stock and then with two types of DSP.  The left side is a DSP made by stamping one of  the Playful Background stamps; the right side  with a striped Cajun Craze DSP. A 3/4" strip of Tranquil Tide card stock, with one notched end was adhered horizontally across the card front.

The focal image was embossed with black embossing powder and colored with ink pads and a blender pen.  It was then fussy cut and mounted on a 1 3/4" Whisper White circle embossed with the "Oh My Stars" embossing folder, This circle was matted with a 2" Cajun Craze before mounting it to the card front using dimensionals.

The sentiment is from the same stamp set.  I traced the outline of the sentiment using the spot left vacant when I removed the stamp from its case.

Three small pearls that look like Tranquil Tide were adhered on the right upper card.

Supplies Used:
Stamps:  Crafting Forever, Playful Background, Timeless Texture
Inks: Versa Mark, Cajun Craze, Black Memento, Tranquil Tide
Paint Brushes:  Dapper Denim, Cherry Cobbler, Crushed Curry, Garden Green, Gold marker, Silver marker
Papers: Cajun Craze, Whisper White, Cajun Craze DSP, Tranquil Tide
Accessories: Oh My Stars Embossing Folder, Black embossing powder, Tranquil Tide Pearls. Dimensionals

Now its your turn to create something using Kaylin's sketch.  Remember, you have 2 weeks to create something.  Don't forget to upload it to either the Try Stampin' on Tuesday blog site, or their Facebook site.  Looking forward to seeing what you create.

Monday, June 5, 2017

Feathery Friends - You are Amazing- a Gate Fold Card

I just love this hostess stamp set, but then I like to color.  The detail on these birds are incredible!
This card has a definite  vintage vibe.


.

On the central art piece, the Stamp-a-ma-jig was used to place the two birds close to and facing each other and I colored them with ink pads and a blender pen...

The background was stamped using the Timeless Texture stamp set

The art piece was then matted with Marina Mist card stock.

The basic card is a gate fold card.  The two front panels are lined first with Marina Mist DSP followed by a Whisper White layer which has 2 leaf branches stamped and colored on each.  The background has also been distressed with the Timeless Texture stamp set.  Some tiny yellow flowers with black centers were attached to the ends of the branches on both sides.  I also placed a small flower on the pink bird.

The branch and flower is also stamped on the inside.  Sorry you can't see that.

Supplies Used:
Stamps:  Feathery Friends, Timeless Texture
Inks:  Black Memento, Watercolor pencils, Pear Pizzazz, Marina Mist (second generation), Old Olive,Always Artichoke
Papers: Marina Mist, Whisper White, Daffodil Delight
Accessories:  Blender Pen, stamp-a-ma-jig, small flower punch (non SU)


Friday, June 2, 2017

An Under Sea Birthday - Fab Friday #113

This is my card for the sketch challenge with Fab Friday #113

The topic for this card was made at the request of a client who wishes to make a card of a similar nature for a male friend.

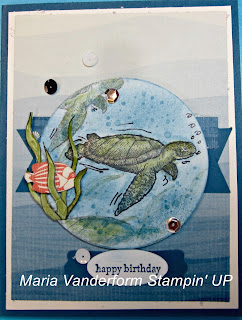
This  masculine birthday card featuring an under sea turtle was made using two stamp sets:  From Land to Sea, and Seaside Shores.  I also used some retired DSP.


For my card I flipped the sketch onto its side.  I did this because the DSP I used (and I had only a small piece left) had the waves going from left to right and would only fit on the card if I flipped the sketch.

The image was stamped onto Whisper White card stock with two other turtles stamped very lightly above and below it.  It was colored with a blender pen and the following colors:  Daffodil Delight, Crumb Cake, Old Olive, and Always Artichoke. The background was sponged with Marina Mist and Dapper Denim, and stamped with the Timeless Texture stamp.  Some air bubbles emerging from the turtle were hand drawn using a black marker.


The image was die cut using the layering circle framelit and adhered to the card front using dimensionals.

The basic card is Dapper Denim, layered with Very Vanilla and then Seaside DSP (retired). A 3/4" strip of Dapper Denim notched at both ends was adhered to the middle, and on the top edge of that was attached a 1/4" of DSP.  The art piece was adhered to this.

On the left side of the circle, I adhered some sea grass that was cut out with a fish that I cut out of the Seaside DSP weaving in and out of this.

To finish the card I added some black, white and silver sequins.

Supplies Used:
Stamps:  From Land to Sea, Seaside Shore, Timeless Texture
Inks: Black Memento, Daffodil Delight, Old Olive, Always Artichoke, Crumb Cake, Marina Mist, Dapper Denim
Papers:  Dapper Denim, Very Vanilla, Whisper White, Seaside DSP (Retired)
Accessories:  Layering circle framelit, small oval punch (retired), Modern word label punch, sequins, Wink of Stella, dimensionals.


Thursday, June 1, 2017

Circle Easel Sympathy Card

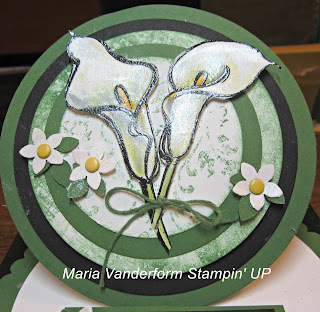
I seem to be in an easel making mood so after my class on Saturday, which ironically was on making Easel cards, I made this sympathy card -another scallop circle easel card.

Again, I used the retired Circle framelits only because the circles are larger in diameter.

 The Calla Lilies (from Remarkably Yours) were embossed with black embossing powder, colored,  cut out, and placed upon a Whisper White circle stamped with the Timeless Texture stamp set.
This circle was matted with a larger Garden Green circle, which was adhered to an again larger Whisper White circle sponged with Garden Green ink and then a Basic Black and finally a Garden Green circle.

Here's how the easel was made.

A large circle was die cut with one end of the circle was placed slightly over the edge of a folder Whisper White piece.  This results in two Whisper White circles joined in the middle.  One of the circles is folded in half towards the inside- this becomes the Easel.  The other half of the circle is adhered to the bottom large scallop circle.

The art piece is adhered to the folded circle half - and your card is done.

The flowers are punched using the Daisy Bunch Punch with Daffodil Delight candy dots placed in their centers.

The sentiment is from Floral Phrases.

Supplies Used: Remarkably You, Timeless Texture, Floral Phrases
Inks:  Versa Mark, Pear Pizzazz, Old Olive, Garden Green, Daffodil Delight
Papers:  Garden Green, Whisper White, Basic Black
Accessories:  Circle Framelits (retired), Daisy Bunch Punch, dimensionals, Garden Green thick Baker's twine

Tuesday, May 23, 2017

Picture Perfect Try Stampin' on Tuesday #323

For this week's challenge with Try Stampin' on Tuesday I used the Picture Perfect stamp set, namely the Hummingbird because the optional theme is Pretty as a picture.


The hummingbird was triple stamped using Basic Gray, Bermuda Bay , Real Red and Black Memento ink.  

The rose flowers were also triple stamped using Blushing Bride, Melon Mambo and Rose Red.  

The leaves I stamped with Pear Pizzazz, Old Olive and Always Artichoke.  The humming bird, the roses and the leaves were also fussy cut.

I cut a Very Vanilla art piece measuring 2 1/2 by 3 1/2", the background of which was stamped lightly with the Timeless Texture stamp set using Pear Pizzazz ink. It was matted with Rich Razzelberry card stock.  I first adhered the Roses and leaves, then added the hummingbird using dimensionals. Some Wink of Stella was applied to the bird.

The card base is Rich Razzelberry, layered with Very Vanilla cardstock.  On the upper part is one pattern of the Blooms & bliss DSP: the bottom part has the darker pattern of the same paper.

The art piece was adhered to the card front using dimensionals.

I placed a 2" piece of Winter Wonderland Vellum at an angle across the lower part and art piece of the card.  Instead of using a sentiment, I die cut the letter "M" using Mint Macaron glimmer paper and adhered it to a 1 1/4" very Vanilla circle.  This was matted with a Rich Razzelberry circle with dimensionals and then adhered to the vellum.

Supplies Used:
Stamps: Picture Perfect, Timeless Texture
Inks: Basic Gray, Bermuda Bay, Real red, Black Memento, Blushing Bride, Melon Mambo, Rose Red, Pear Pizzazz, Old Olive, Always Artichoke
Papers: Rich Razzelberry, Very Vanilla, Blooms & Bliss DSP, Winter Wonderland Vellum, Mint Macaron glimmer paper
Accessories: 1 1/4" circle punch, 1 3/8" circle punch, Timeless Type alpha junior dies, Wink of Stella, tiny pear, dimensionals

Now its your turn to create something.  When done, upload it to the Try Stampin' on Tuesday blog or the Facebook site.  Remember that you have 2 weeks to complete your project.

Tuesday, April 11, 2017

A Wobbly Birthday - Try Stampin' on Tuesday or Not, #316

The optional theme for this week's card challenge is "a ray of sunshine".  Fortunately the Cupcakes & Carousel DSP has a perfect design for this challenge.


The Carousel horse was stamped on Very Vanilla cardstock, die cut into a circle, and matted with a larger Bermuda Bay circle.  A wobble was adhered to the underside of the art piece before attaching it to the mat. This was attached to the card front.

One of the patterns in the Cupcakes & Carousel paper pack looks like rays of sunshine coming from the upper left corner, which fits perfectly with the theme for this sketch.  This was placed upon a Very Vanilla layer, and then onto a Bermuda Bay base.

The sentiment, stamped with Bermuda Bay ink, was matted with Daffodil Delight card stock and added to the lower right card below the art piece.

In making this card, I played around with a few techniques:

One, I stamped the image twice,  and after fussy cutting it out I placed it on top of the original using dimensionals.  This gives the horse a 3D effect.

Two, I added a wobble before adhering the art piece to it's mat.  Now, when the horse is touched, it starts to wobble, almost spin, making the card interactive (see the picture below).


Supplies Used:
Stamp: Carousel Birthday, Timeless Texture
Inks: Black Memento, Watercolor pencils, Bermuda Bay
Papers: Bermuda Bay, Very Vanilla, Cupcakes & Carousel DSP, Daffodil Delight
Accessories: Layering Circles Framelits, Dimensionals, Action Wobble (non SU)

Now it's your turn to make something using this week's sketch.  Remember you have two weeks (Deadline April 24) to make something.  Don't forget to upload it to the Try Stampin' on Tuesday or Not blog site, or their Facebook site. On April 18, Cheryl with input from the designers,  will select 3 of the favourite cards of the week.  While you're doing this take a look at the work of the other designers, and leave them a comment.  We all like feedback.
I look forward to seeing your work.

Wednesday, April 5, 2017

Gift of Love - SUO Challenges #171

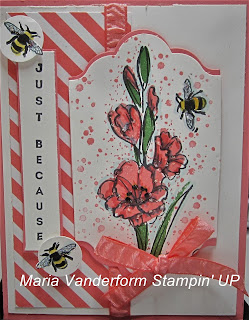
The theme this week at SUO Challenges is "A Favorite April Theme".  There's no secret of my love of flowers, and April is a month when flowers begin to grow and bloom in my garden and the bees begin to return.

So, a flower, with bees, is my favorite April theme.


 The flower was stamped using  the 2-step stamping technique using Flirty Flamingo and Garden Green inks. I touched up the flowers with coordinating colored markers, and some blue coloring was added to delineate the shadows. And of course I had to add a cute little bee which I colored with markers.

Some texture was added using the Timeless Texture "dot" stamp.

The image was die cut using the Labels framelit, matting the top and bottom with Flirty Flamingo card stock. It was added to the card front using dimensionals.

Whisper White cardstock with a 2" piece of diagonal striped Flirty Flamingo DSP constitute the card front. A piece of 3/8" ruched Flirty Flamingo ribbon was placed along the edge of the DSP, and a bow made with that ribbon adhered to the lower edge of the die cut image.

A vertical sentiment is placed on the left side of the focal image, with an image of a bee on both ends.

Supplies Used:
Stamps: Gift of Love, Timeless Texture, Vertical Greetings
Inks: Black Memento, Flirty Flamingo, Garden Green, Markers (Flirty Flamingo, Always Artichoke, Daffodil Delight, Basic Black, Soft Sky)
Papers: Flirty Flamingo, Whisper White, Flirty Flamingo DSP
Accessories: Labels Framelits, 3/4" circle punch, 3/8" Flirty Flamingo ruched ribbon, dimensionals, blender pen