Showing posts with label Birthday. Show all posts

Wednesday, April 10, 2024

A Birthday card using a layering Sunflower stencil and a SU die for Addicted to Stamps & More #465

 I have not "played " with stencils very much, but thoroughly enjoyed creating a couple of cards using a layered Sunflower stencil for the challenge with Addicted to Stamps & More #465


I also used a die from the Darling Details bundle from Stampin' Up.

I was having so much fun I actually made 2 floral cards. The second 5 by 5" card will be posted at the end of this blog post.

Using the layered Sunflower stencil, I used blender brushes to create the 3 sunflowers on a piece of Basic White card stock. For the flower itself I used the following colours of ink:  Daffodil Delight, Crushed Curry, Pumpkin Pie and Soft Suede.  For the leaves: Pear Pizzazz and Old Olive.  Balmy Blue was added to the background as well as dots of Crumb Cake .

For the centers of the flowers I used dark brown prills.

The image piece was cut down to 4 5/8 by 3 1/2" and adhered to a lacy die cut that was 4 7/8 by 3 5/8".

Using dimensionals, this was adhered to a Basic White card base that had a 1 1/4" Balmy Blue DSP adhered to the middle with a 3/8" sparkly Balmy Blue ribbon down its center.

The sentiment, from "Peaceful Moments" was stamped using Soft Suede ink and adhered at an angle towards the right side.

To finish the card some wonderful gems were added randomly across the front.

Supplies Used:

Stamps:  Peaceful Moments, Sunflowers (Tim Holtz)

Inks:  Daffodil Delight Crushed Curry, Pumpkin Pie, Early Espresso, Pear Pizzazz, Old Olive, Balmy Blue , Crumb Cake

Papers:  Basic White, Balmy Blue, Balmy Blue DSP

Accessories:  Layering Sunflower stencil, Darling Details die, Early Espresso Prills, Dimensionals, Blender Brushes, Wonderful Gems, 3/8" Glittery Balmy Blue ribbon.

Here is the other card I made, this time using all three sizes of flowers.


Thursday, February 29, 2024

Double Pillar Floral Display Birthday /Anniversary Card for Creative Folds #76

 This double pillar display card (6 by 6")was made specifically to celebrate the 3rd anniversary for the Creative Folds blog /challenge.  I had made a card earlier for challenge #76 but it was not made with the anniversary in mind.  So I wanted to make a card specifically for the occasion. However, I made it a birthday card.

To make the card I used a tutorial by Mixed Up Craft 


Note:  the flowers in the card are left over from previous projects.  I wanted to make my own flowers but I am having trigger finger and other issues in both hands that prevent me from doing fine work.

To protect the fIowers a piece of window sheet (thus the glare in the picture) was adhered over the card front. I also added the display to a 6 by 6" card base at the back. This allows the card to stand up as well although it will stand out without the extra card base.

On the front of the pillars I added some Pansy DSP (retired) matted with gold foil.


The  card does not fold flat for mailing so I made a box for the card.  It could be mailed, but it would be better to hand deliver this one.

Happy Anniversary (birthday) Creative Folds.


Monday, June 12, 2023

Star Fold Birthday Card - SUO Challenges #328

 I made this star card for a challenge with SUO Challenges  the theme for which is "flowers".  I love a pansy as it is the first cheerful face I see as the arrival of spring . I used the Pansy Patch bundle and the retired  coordinating DSP to make the card. 

 I couldn't decide on a size, so I made 2 star cards - one made from a 6 by 6" piece of card stock and the other a 12 by 12".  The smaller card will make a great tag on the bag I will make for the present.

Here are the two cards:


There are many tutorials on how to make a star card.  The one I used is here

Supplies Used:
Stamp:  Pansy Patch
Inks:  Merry Merlot
Papers:  Merry Merlot, Silver Foil, Pansy DSP, Basic White, Highland Heather, Soft Succulent, Mint Macaron, Scrap of Daffodil Delight
Accessories:  Pansy Patch Dies, Clear Wink of Stella, Ornate frame dies, 2021-2023 In Color Opal Rounds, Dimensionals

Sunday, April 23, 2023

Happy Birthday Zoo Crew images Sneak Peak 2023-2024 Annual Catalogue - Sketch Saturday #724

For the sketch challenge with Sketch Saturday #724,  I used the images cut from the Zoo Crew DSP, one of the new DSP in the 2023- 2024 Annual Catalogue,  as my focal images.

I did, however, change the size of the card, making it a 6 1/4 by 6 1/4" square card.


The base card is a 6 1/4" square Night of Navy card stock, layered with a 6 by 6" Basic white layer embossed with the Basics 3D Embossing folder.

At the bottom is a 6  by 2 1/2" piece of  Boho blue card stock, which will be the focal image pie

 Five (5) background pieces are punched using Basic White card stock and the Label Me Fancy punch,  The edges of each piece are sponged with Boho Blue ink before the images are added to them. These punchies are adhered to the Boho blue strip in random fashion as indicated by the sketch.

Five different Zoo Crew images are adhered to each of the punchies using dimensionals. Some of the images are left uncoloured; some are coloured with watercolour pencils and a blender pen.  Clear Wink of Stella was added to the balloons and present and a few other random places.


The sentiment was die cut in Night of Navy card stock and adhered above the image piece.


A bow was added above the images on the left side.

Supplies Used:

Stamp:  

Ink:  Boho blue, watercolor pencils

Papers:  Night of Navy, Basic White, Boho Blue, Zoo Crew DSP

Accessories:  3D Basic Embossing Folder, Birthday die, Label Me Fancy Die, Dimensionals, 1" white/pool party ribbon, Clear wink of Stella, Blue rhinestones


Wednesday, April 5, 2023

Hello Irresistible DSP & Waves of Inspiration bundle

 Like I did with the Enjoy the Journey DSP I am challenging myself to make as many cards as I can using the Hello Irresistible DSP - using as many  different stamps that I can.  Frenchie gave me the idea when she created a blog post on using this DSP as scenic backgrounds for cards.  I will be partially casing her ideas for several of my cards.

The new 2023-2024 Annual Catalogue launches soon, and with it new stamps, DSP, etc.  The Hello Irresistible DSP is one of the new DSP and one of the On Line options. Using this DSP as backgrounds for scenic cards allows for the maximum (& creative) use of the paper.

For the first card, I brought out the Waves of Inspiration stamp and dies.


I chose a DSP pattern that reminded me of a stormy sky above the ocean. To stamp the wave image, I used the Stamparatus to stamp  because I knew I would have to stamp repeatedly. (I am so sad this tool is retiring).  I used Basic Gray ink followed by the Night of Navy as the final stamping.  I'm not sure if it made any difference, but I thought I would give it a try.

The Pelican on the log was stamped on Basic White using first Smokey Slate ink, followed by a final stamp of Basic Gray. Again, I used the stamparatus.

The die cut Pelican on a log was added to the bottom left of the image piece using dimensionals.

To finish I added a couple of birds in the sky, and a Happy Birthday die cut sentiment 

The embellishments are rhinestone waves embellishments.


Supplies Used:

Stamp:  Waves of Inspiration

Inks:  Basic Gray, Night of Navy, Smoky Slate

Papers:  Smoky Slate, Basic Gray, Hello Irresistible DSP, Basic White

Accessories:  Waves of Inspiration dies, Gray Baker's twine, Dimensionals, Rhinestone Wave Embellishments

Thursday, March 16, 2023

Partial Die Cutting Circle Flip Birthday Card - a Case

 I saw this card on Pinterest here and knew that I wanted to make it. The author , in her blog, provides written instructions as well as video directions on how to make this fold.

This is the card I made following her directions. I did add a second bird, using the reflection technique,


Card opened

Stamp:  Nested Friends

Inks:  Black Memento, Basic Gray, Early Espresso, Watercolor pencils, Stampin Blends (Basic Gray, Daffodil Delight, Pumpkin Pie)

Papers:  Basic White, Garden Green

Accessories:  Nested Friends dies, Dimensionals, Pearlized enamel effects (white) on eggs. Layering circle die

Saturday, March 11, 2023

Its Your Special Day - Try Stampin on Tuesday #597

 I have been making cards using the Enjoy the Journey DSP, and today was no exception. So far I have made 11 different cards, using 11 different stamp sets, but all using the DSP mentioned.  Todays card, card number 12,  I will be submitting to the sketch challenge at Try Stampin on Tuesday #597.  The stamp set I used is the Sweet Songbirds stamp and coordinating punch. I decided not to use the St. Patrick Day theme for this card.


On a Basic White cardstock base I added some Enjoy the Journey DSP( the starry sky pattern).
Along the right border I added 3 sweet song birds stamped using Sweet Sorbet ink. On each bird, the eyes were stamped using Black Memento ink; the beak with Daffodil Delight and the feet  stamped separately with Black Memento. Two wings were also added to each bird.  When finished, they were added along the left side of the card using dimensionals.

A sentiment strip was added behind the lower bird and three small flowers were added along this strip.

Supplies Used:
Stamp:  Sweet Songbirds
Inks:  Sweet Sorbet, Black Memento, Daffodil Delight, Starry Sky
Papers:  Basic white, Sweet Sorbet DSP (flowers), Enjoy the Journey DSP (starry night sky)
Accessories:  Dimensionals, Basic rhinestones (flower centers), Songbird Builder Punch


Monday, January 23, 2023

Double Tower with Framed florets

 I made two of these double tower cards that look complex but aren't really.  I followed an excellent video tutorial by Sam Calcott  here to make both of these cards.

The first card I made using retired products; the second with the Framed Florets bundle and Texture Chic DSP.  I will use the second card for this post.


For directions on how to make this card check out the video tutorial.

Below are the dimensions of the supplies used:
Basic Gray card stock 7 by 9".  Score at 1, 2, 3, 6, 7, 8" (on the 9" side)
Gold foil: 2 3/4 by 6 3/4"                          DSP  2 1/2 by 6 1/2"
Gold Foil: 7/8 by 6 3/4"                             DSP 5/8 by   6 1/2"
Basic White 2 1/2 by 6 1/6  with a small strip of DSP on outside edge as well as a die cut flower.  This was adhered to the back of the card for written message.


On the front was placed a gold foil frame surrounding a Balmy blue center.  The birthday sentiment was added with gold embossing powder.  Around the frame was added some flowers and foliage from the coordinating DSP that retired the end of December.  I also added some foliage die cut in gold foil.


Below is the second card I made using a Valentine theme.


Supplies Used:
Stamp:  Framed florets
Inks:  Versa Mark
Papers:  Basic Gray, Basic White, Gold Foil, Texture Chic DSP, Balmy Blue, Floral Floret DSP
Accessories:  Framed Florets dies, Dimensionals, Gold embossing powder


Friday, December 23, 2022

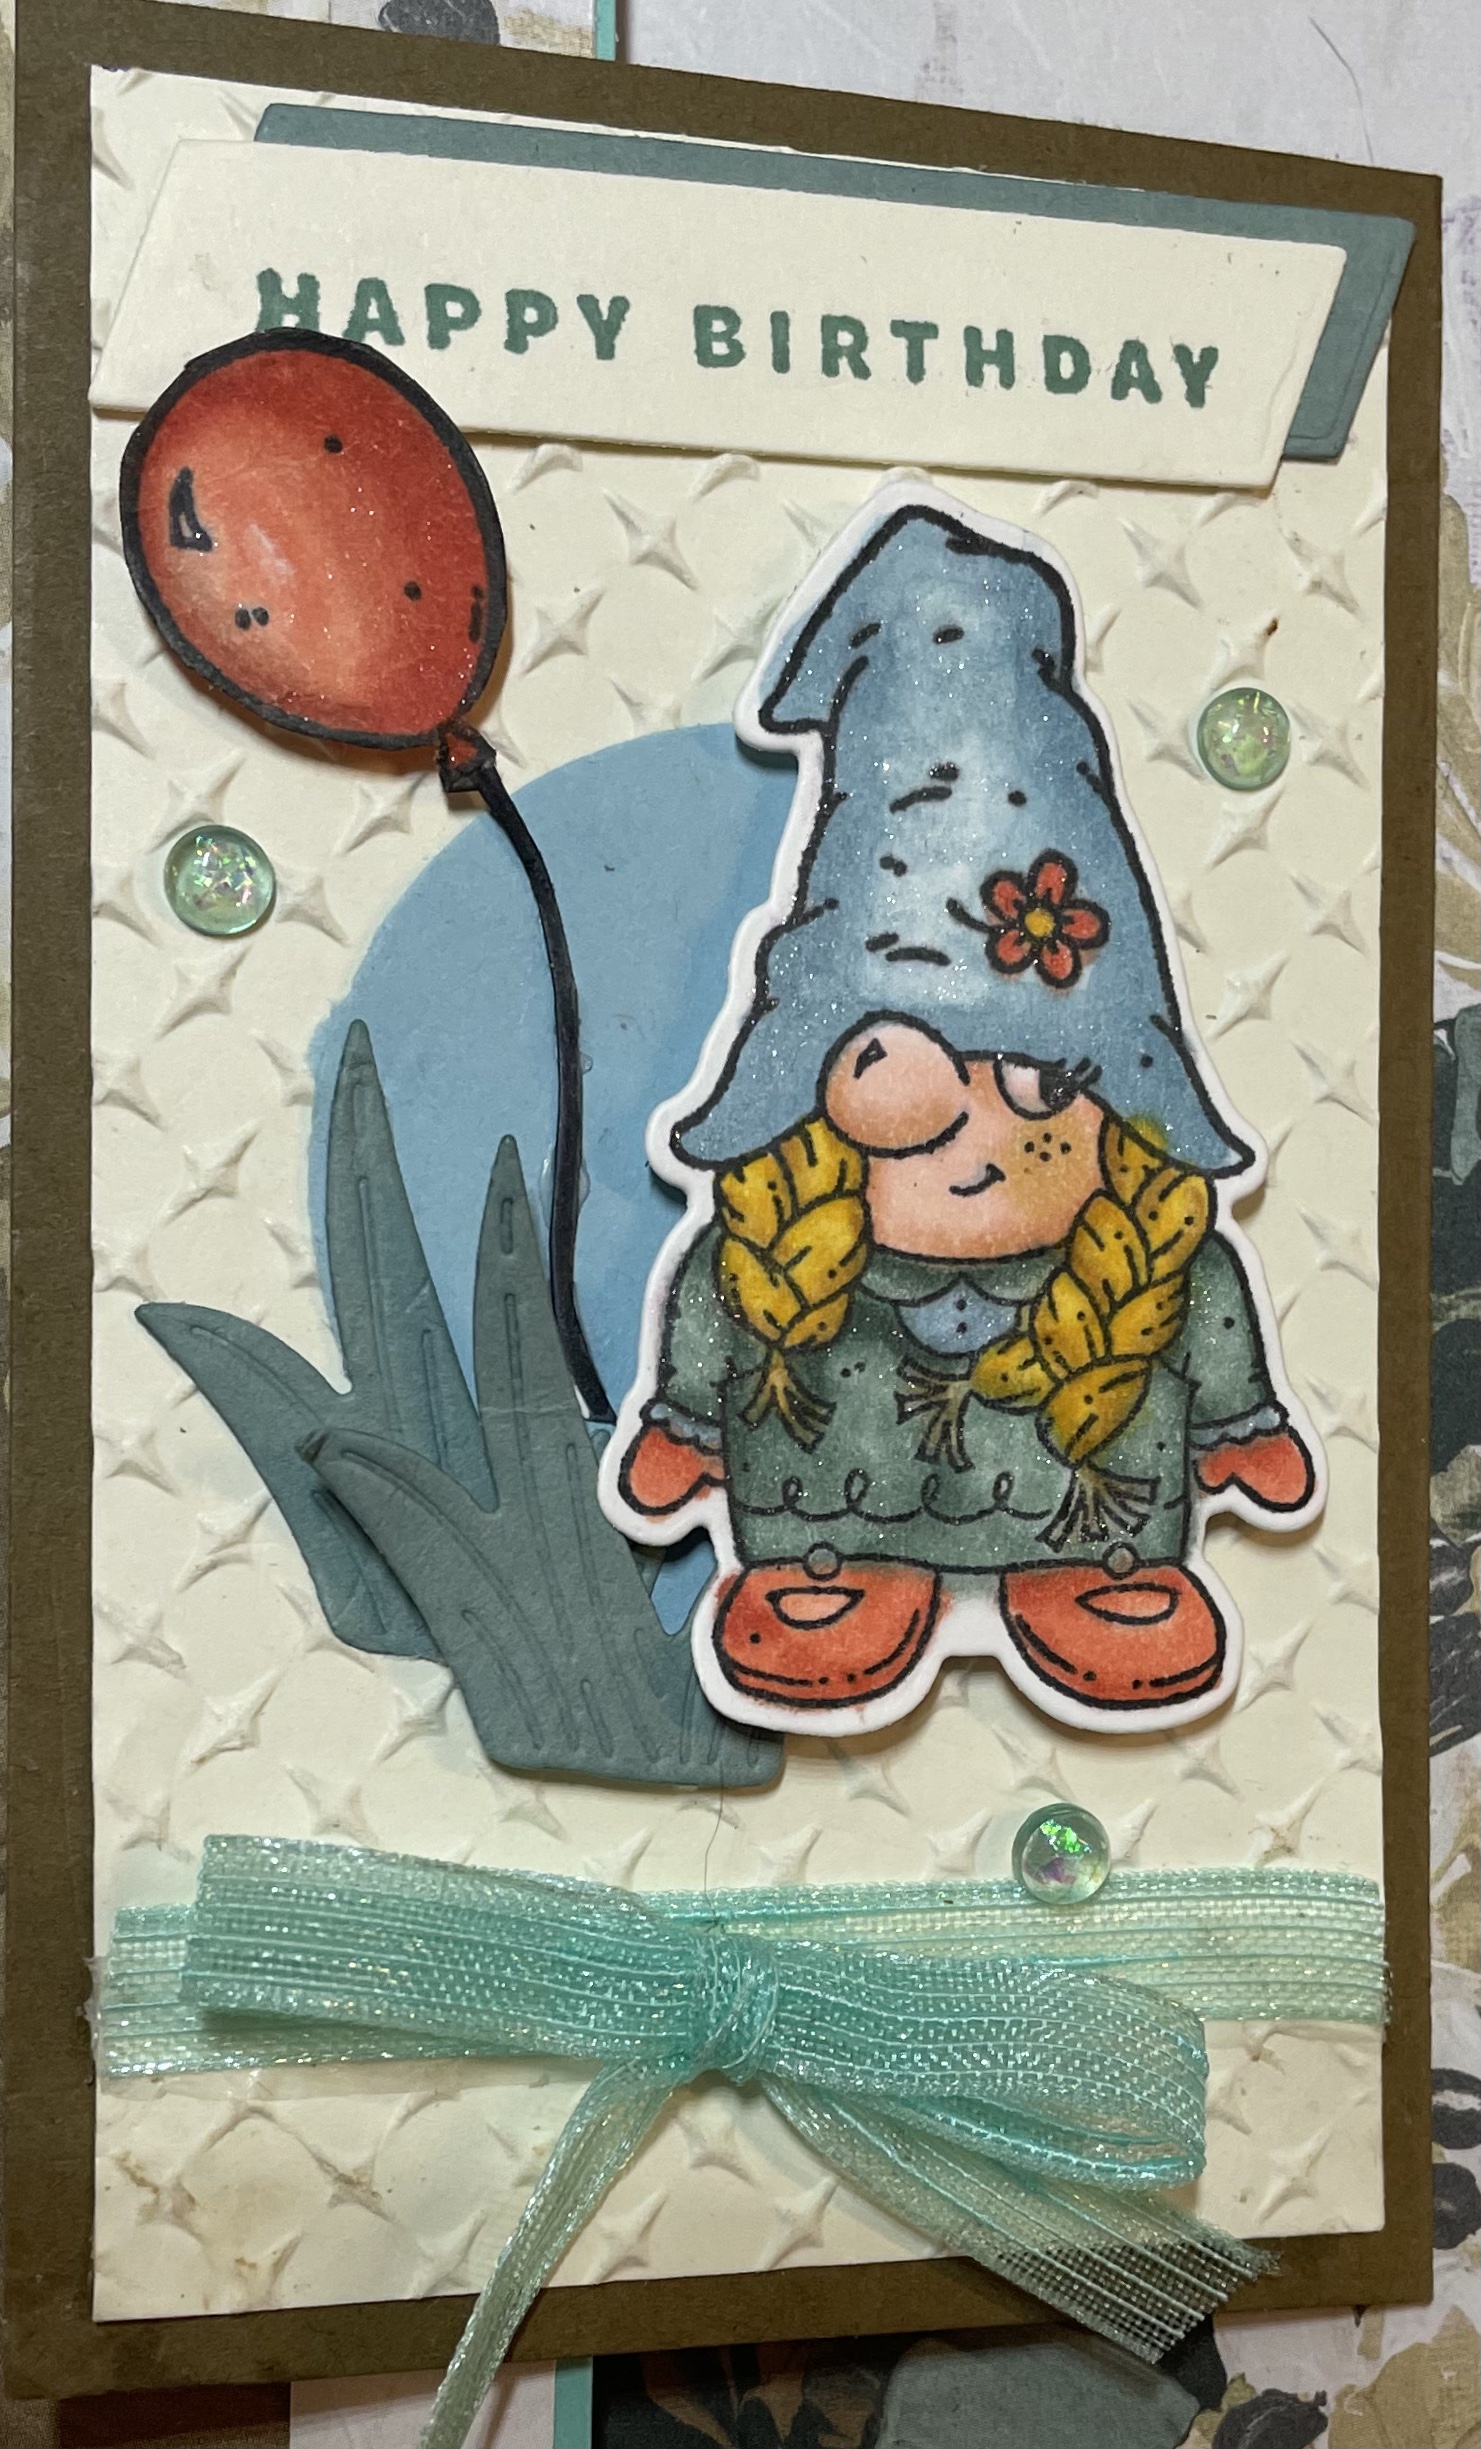
Friendly Gnome birthday fancy fold -Hand Stamped Sentiment #404

 Remember the Gnomes from the Christmas catalogue? They are back to grace us through birthdays, Valentine’s Day, and Spring. Although the stamp set is not carried over, the “Gnome dies” are and they coordinate perfectly with the new “Friendly Gnomes” stamp set from the new Mini catalogue.

It’s been a while since I participated in a sketch challenge, but today I decided to do so. I used to use the sketch challenge with Hand Stamped Sentiment #404.

To create the card, I used a fun fold demonstrated by Lynn Dunn a couple of days ago.


The card base is a 4 1/4 by 5 1/2" piece of Soft Suede card stock.  To that is added a  5 3/4 by 5 3/4" piece of Fancy Flora DSP scored a 1 3/4".  On the fold over edge is added a 1/4" strip of Balmy Blue card stock with a similar size piece of left over DSP.
The focal piece is added to a  5 1/2 by 4 1/4" piece of Soft Suede cardstock scored at 2 3/4" and folded in half.  To the front half is added a 2 1/2 by 4" piece of Very Vanilla card stock embossed with the new Metal Plate 3D embossing folder.  In the center of this is added a 2" Balmy Blue punched circle.

The Gnome  and balloon is stamped on a separate piece of Basic White card stock and coloured with Stampin' blend markers.  The Gnome is die cut using the matching Gnome die and the balloon is fussy cut. Two pieces of grass were also die cut using Soft Succulent card stock. All were added using dimensionals around the punched circle.


Below the circle is added an Organza pool party ribbon and bow.
Above the Gnome is added the birthday sentiment which is from the "Something Fancy" stamp set and is die cut using one of the Something Fancy dies.
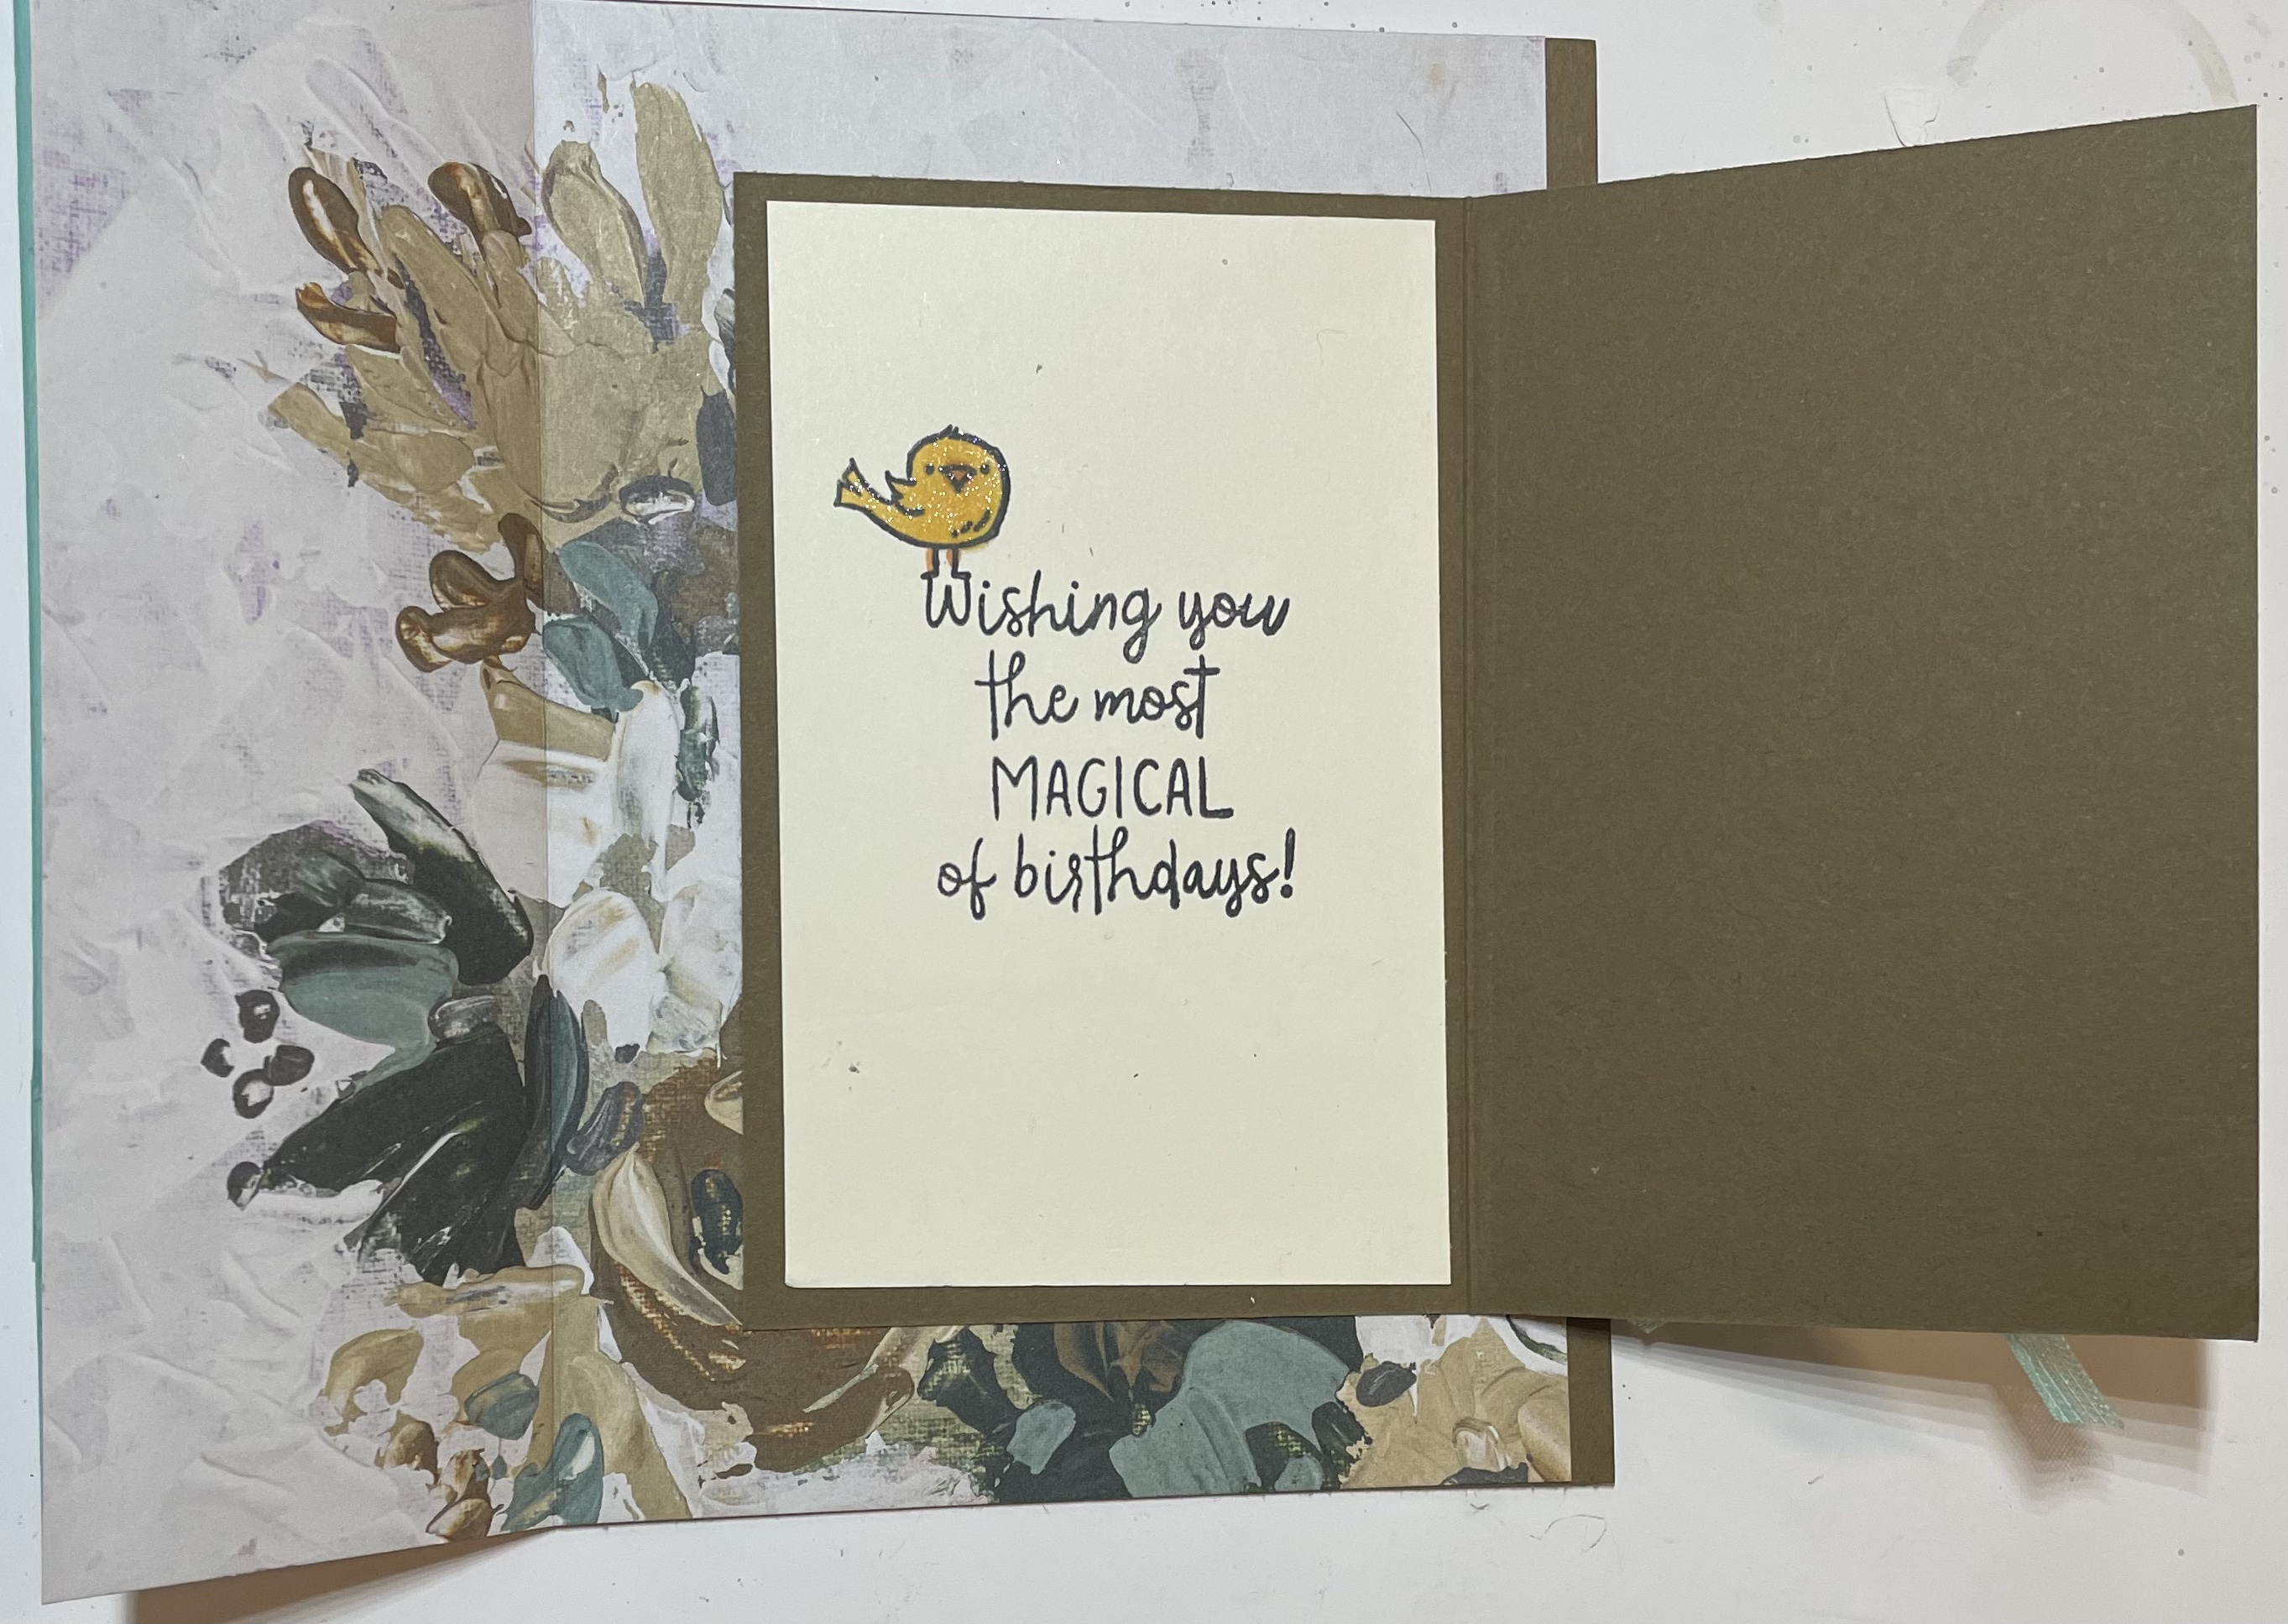
To the inner portion is stamped the sentiment on a similar size of Very Vanilla cardstock as on the outside.


This folded piece of card stock is inserted into the front flap and adhered to the inside only.


Some Clear Wink of Stella and some Opal Round embellishments and the card
 is done.


Supplies Used:
Stamps: Friendly Gnomes, Something Friendly
Inks: Black Memento, Stampin Blends
        Gnome: Balmy  Blue, Calypso Coral, Daffodil Delight, skin tones light
        Balloon: Calypso Coral, Basic Black
Papers:  Soft Suede, Very Vanilla, Basic White, Fancy Flora DSP, Soft Succulent, Balmy Blue
Accessories:  2” circle punch, Gnome dies, Something Fancy dies, Wink of Stella, 2021- 23 In Color Opal Rounds, Metal Plate 3D embossing folder.  


Sunday, December 18, 2022

On the Farm - another SAB and Mini Catalogue Sneak Peak

 When my parents and I emigrated to Canada we spent the first few years on a farm.  I have many fond memories of the cows, and the chickens but not the other animals. The community I live in now is surrounded by farm land.  When I saw this "On the Farm" bundle being demonstrated at On Stage in Vancouver in November, I knew I had to buy it.

The stamp and coordinating die set "On the farm" is in the new Mini catalogue which goes live next month; the "Day at the Farm" DSP is a free selection from the Sale-a-bration catalogue. 

Many of the animals, flowers and trees can be die cut directly from the DSP using the coordinating dies.

To best display all the different animals, I chose to make a 5 1/2 by 5 1/2" pop up card.


The sentiment is from “Itty Bitty Birthday Wishes”1


Check out my blog post of Nov 7 for dimensions of the internal pop up mechanisms. Sentiment on the inside from “ Something Fancy” another Mini Catalogue offering.

Supplies Used:

Stamps:  On the Farm, Itty Bitty Birthday, Something Fancy

Inks:  Early Espresso, Black Memento, Stampin Blends (Real Red, Smokey Slate), Garden Green

Papers:  Crumb Cake, Day on the Farm DSP, Basic White, Garden Green

Accessories:  Dimensionals, On the Farm dies, Linen thread, 2021-2022 In Color Opal Rounds, Stitched Rectangle dies


Monday, October 17, 2022

A Framed Florets birthday

This card was made using the Framed Florets stamp set and dies, as well as the coordinating dies and DSP.  These products are early releases from the Mini catalogue on Jan 2023 and will be available for customer order in November, 2022 (note:  only while supplies last)

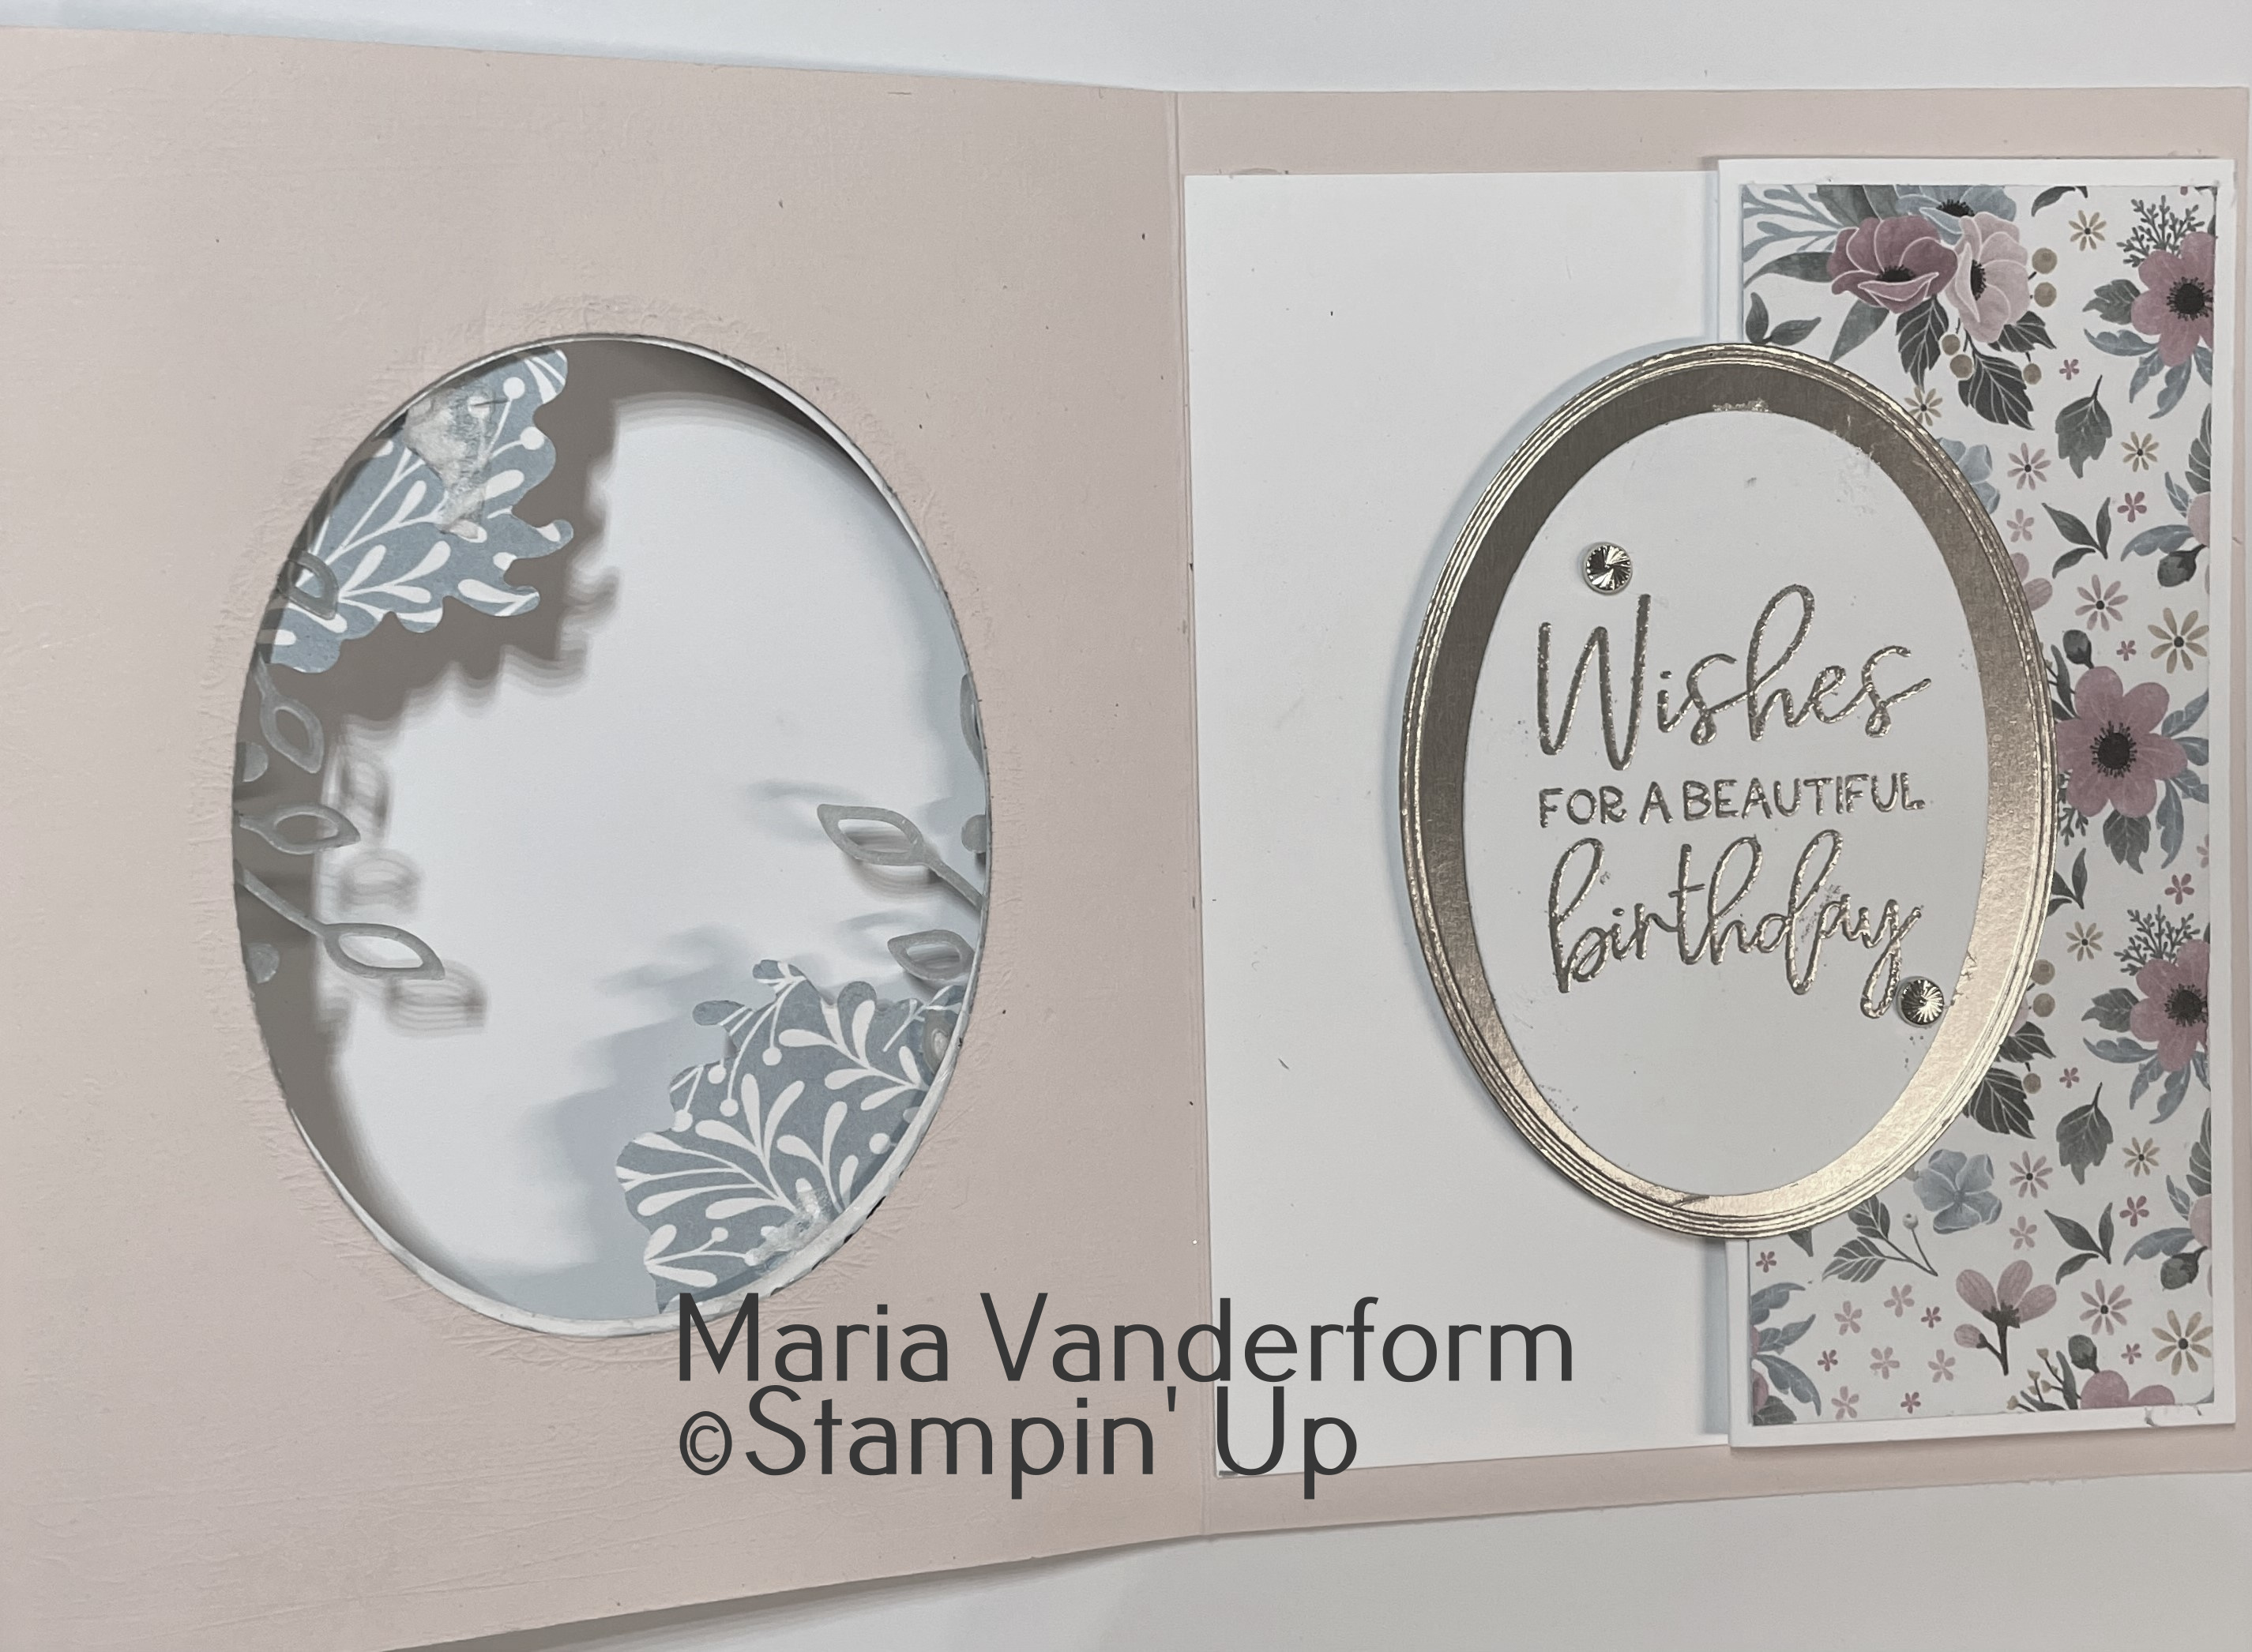
The base is Blushing Bride card stock, layered with Fitting Florets DSP. Once they were adhered together, a layering oval die was used to die cut an oval aperture in the middle.  I discovered that the largest of the layering oval dies was the same        size as the opening of the Framed oval die.

The framed oval die was then used to die cut the frame and oval insert from gold foil. The oval die cut was saved for the inside and the frame was added on the outside around the die cut oval opening.


Some flowers were die cut from the DSP and added them to the bottom and top of the framed oval.  A die cut sprig was also added 


On the inside was added a 4 by 9 piece of Basic white card stock. After scoring at 4 1/2 and 2 1/4 it was folded backwards at the 2 1/4 " score line. Some different pattern DSP was added to the end fold.


The sentiment was embossed with gold embossing folder on the Basic white card stock die cut and then adhered to the die cut gold foil piece.  Half of this was added to the folded edge of the Basic White insert.

Stamp:  Framed Florets

Ink:  Versa Mark

Papers:  Blushing Bride, Gold foil, Basic White, Soft Succulent glitter vellum (retired), Fitting Florets DSP

Accessories:  Framed Floret dies, Layering oval dies, Gold adhesive backed swirls


Wednesday, June 8, 2022

Double Pop Up Flower Birthday Card - SUO Challenge #303

 Flowers, flowers, everyone knows that I love flowers - in the garden, on cards, I love flowers.  So the challenge at SUO Challenges 303 "Flowers" was right up 'my alley'.

The card I made is a double pop up card, which was a technique I learned from Dawn.


The card base is Melon Mambo .  In the middle is a 4 by 3 piece of Hues of Happiness DSP layered partially with Basic White die cut with a Basic Border Die.

On top of that are added 3 flowers/ leaves  die cut from the same DSP, two of which were added using dimensionals.

Three glossy dots added to the front as well as the Parakeet Party metallic ribbon provide the glitter for this card. Clear Wink of Stella was also added to each flower. 
Below is a close up of the elements of the card front.


The double pop up is revealed when the card is opened.


Supplies Used:
Stamp:  Happiness Abounds
Inks:  Black Memento
Papers:  Melon Mambo, Basic White, Hues of Happiness DSP
Accessories:  Basic Border Die, Blossoming Happiness Dies, Clear Wink of Stella, Glitter dots, Dimensionals.


Thursday, June 2, 2022

Nature's Prints in a Tic- Tac-Toe Challenge -The Paper Players #593

 After the thunderstorms yesterday it is much cooler outside - perfect for touching up the garden.  There is still a lot of debris everywhere thanks to a powerful storm that moved through here about 10 days ago.

This card was made for the Tic-Tac-Toe challenge at The Paper Players#593, using the following 3 elements in the row across the top:  "birthday, embossing, ribbons". The Nature's Prints bundle was used for this challenge.


This A2 side fold card has a Night of Navy base, layered with Basic White.

The framed embossed floral is adhered to this card front using dimensionals.

The frame was die cut using the new "Fabulous Frame Dies", die cutting it twice - once in Night of Navy, and once in Basic White. The die cut frame has  both a stitched and an embossed edge. To create the layered frame look, the Night of Navy frame was fussy cut to the stitched line and the remaining embossed frame was adhered to the Basic White frame.

Behind the frames was added a piece of Night of Navy card stock embossed with the Tasteful Texture Embossing folder.


hree floral images from "Nature's Prints" were embossed with White embossing powder on Night of Navy card stock and die cut using the Nature's Prints die. They were added to the inside of the frame - the middle one directly to the embossed card stock and the other two with dimensionals.


A bow made with 3/8" Glittered Organdy Ribbon was added to the top of the floral stems using a glue dot.

The sentiment was stamped with Night of Navy ink and embossed with clear embossing powder before being separated into two words. After fussy cutting each word around the perimeter, they were added to the card front using dimensionals.

Supplies Used:

Stamp:  Nature's Print

Inks:  Versa mark, Night of Navy

Papers:  Night of Navy, Basic White

Accessories:  Nature's Print dies, Fabulous Frames die, White embossing powder, Clear embossing powder, Tasteful Texture embossing folder, dimensionals.

Wednesday, June 1, 2022

My card is Artist Pick of the Week at Hand Stamped Sentiments #389

 Thanks so much to the design team at Hand Stamped Sentiments for their selection of my card as the Artist Pick of the Week 

Below is the card, and below that is a link to my blog post.


Monday, May 30, 2022

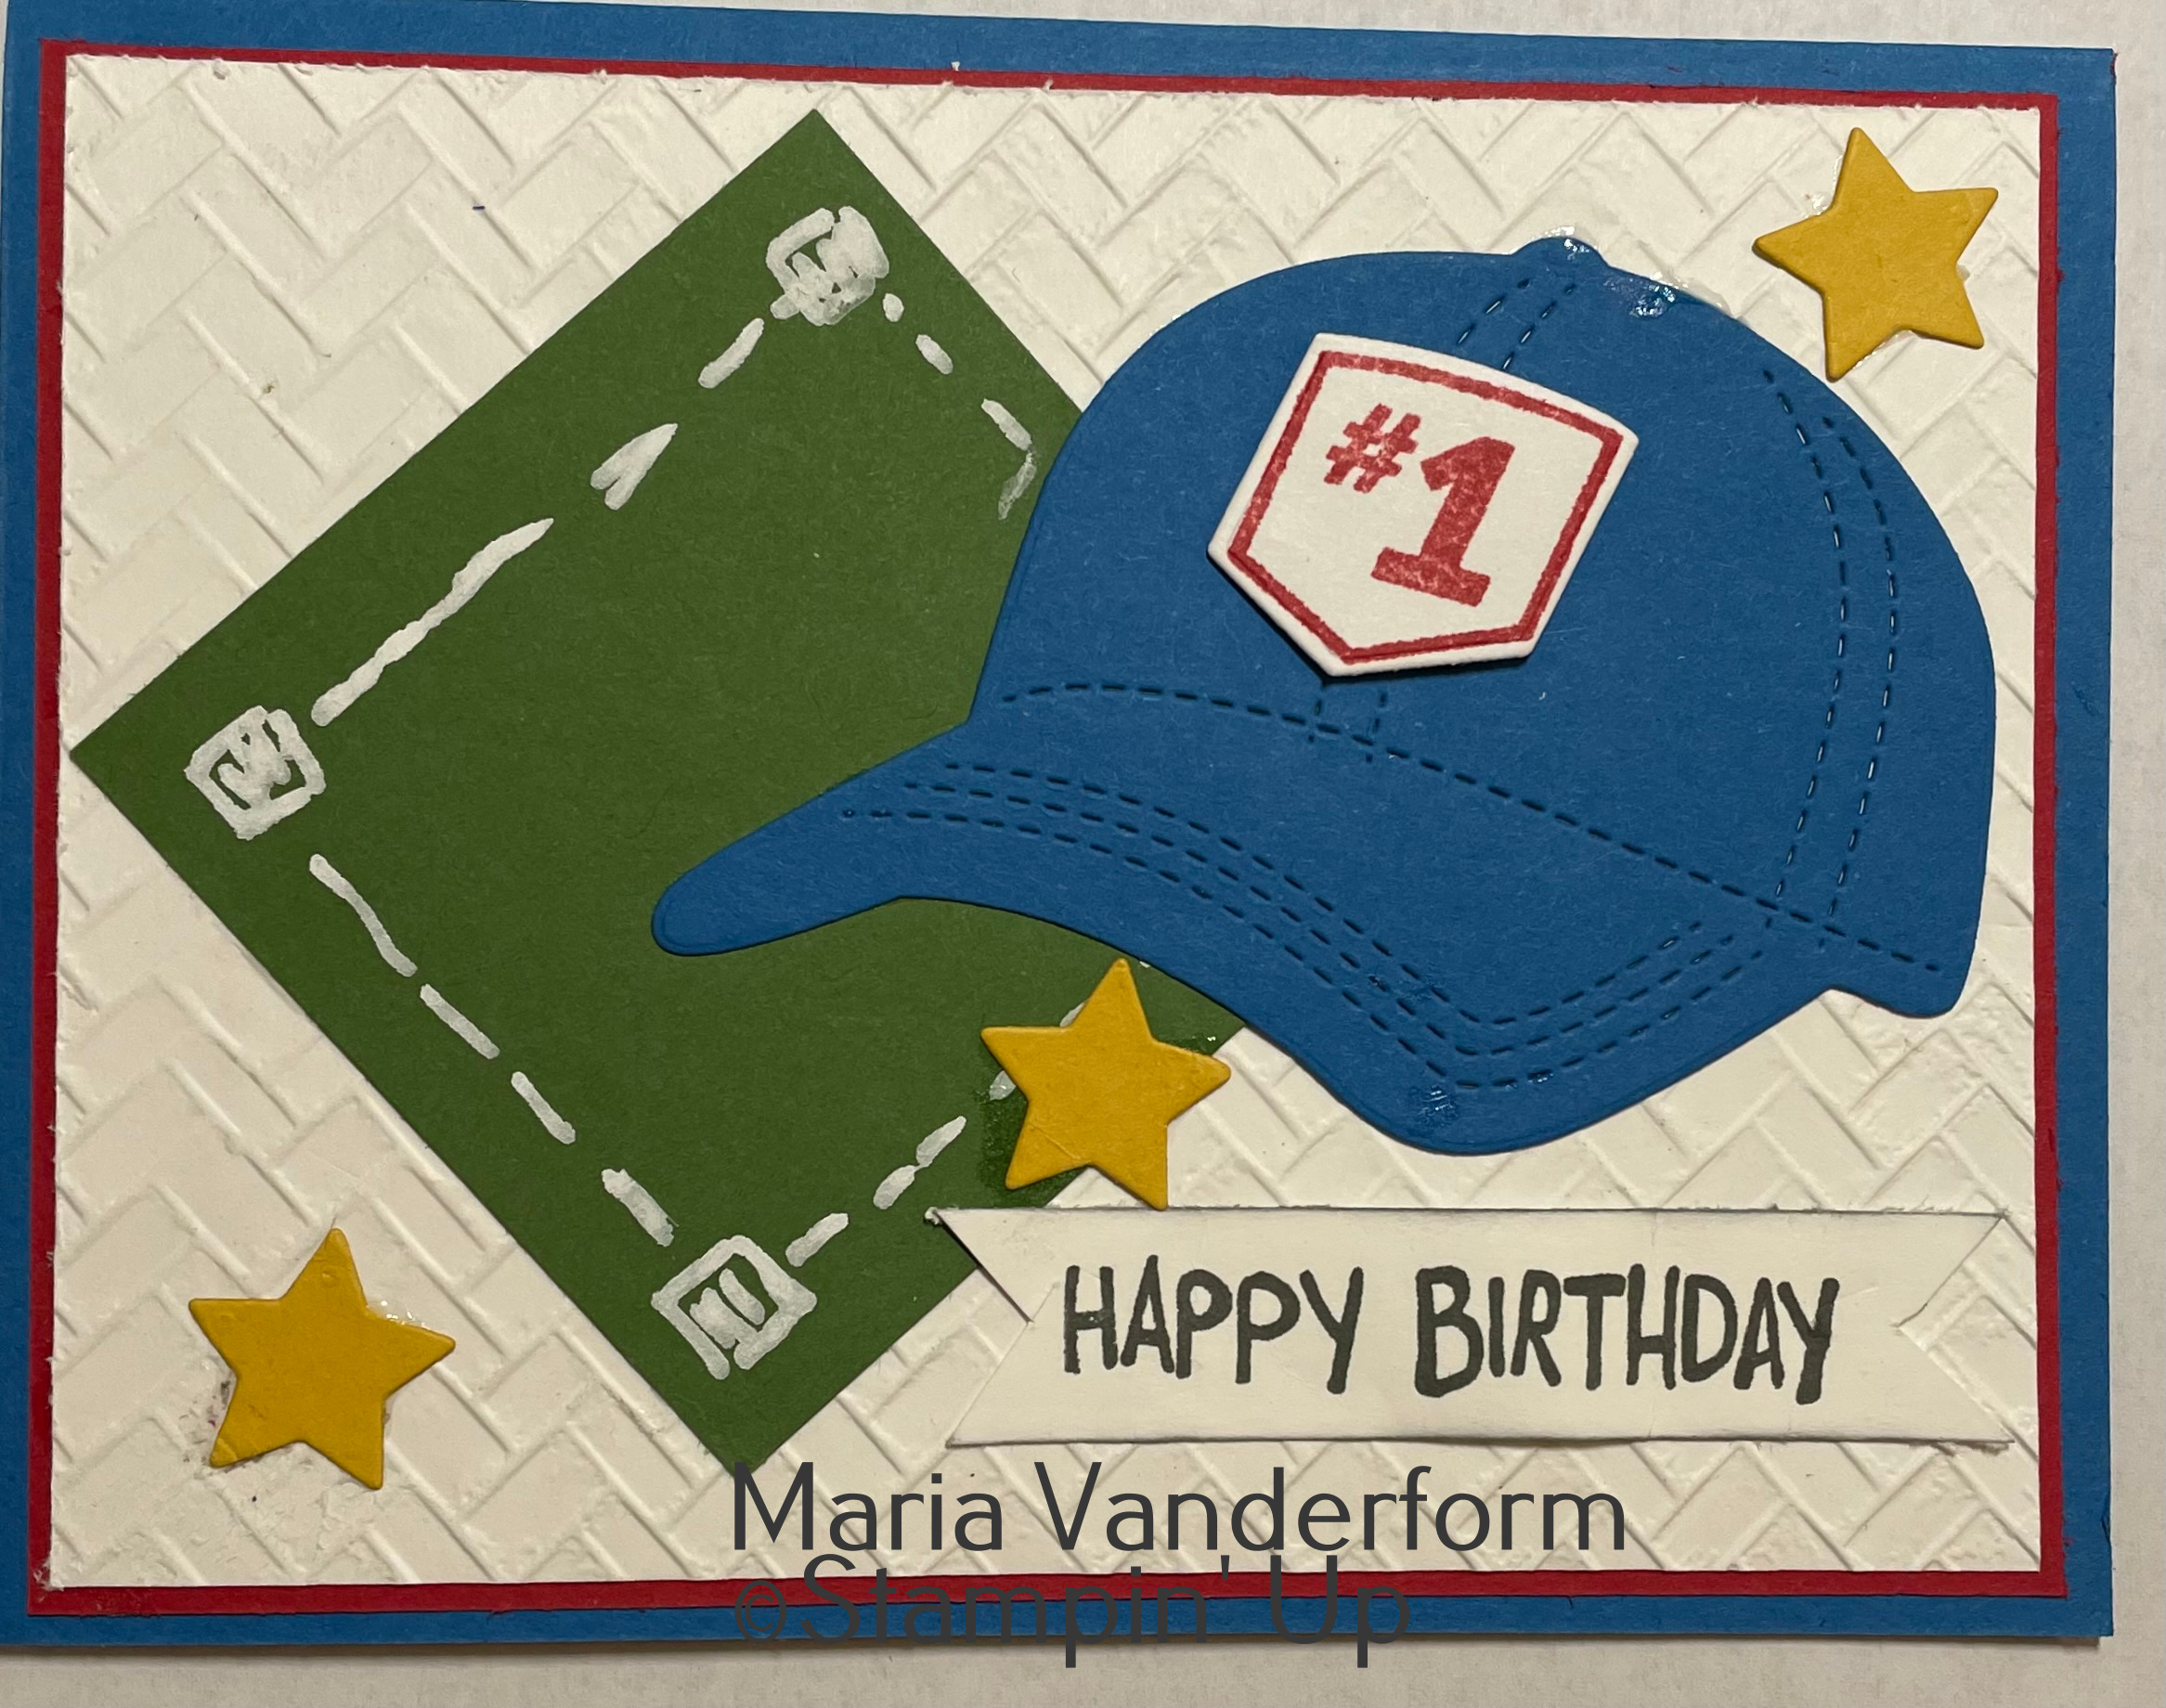
A Baseball Birthday - SUO Challenge #320 For the Kids

 This birthday card, for a male child, is similar to one I made for the craft show last weekend.  This show was cancelled due to a sudden severe storm that created havoc in its path.

Any child who loves baseball would love a baseball hat card. I did make it with a boy in mind, but make the hat pink, or leave it the way it is, and it could be for a girl as well.

 I use the "Hats Off" stamp set and coordinating dies as well as Coastal Weave 3D embossing folder.  The sentiment is from "Party Puffins"


The card base of Pacific Point Blue is layered first with Real Red card stock and then Basic White, which was embossed with the 3D Coastal Weave embossing folder.


The hat was die cut using the Hat Builder die with #1 stamped in Real Red ink, die cut and added to the hat front.


What's a ball game without a ball diamond?  A white gel pen was used to draw base lines and base plates on a  2 1/2" square of Garden Green card stock.  This was adhered to the left side of  the embossed piece of Basic White.  The hat was added to the right, slightly overlapping the ball diamond.


Three stars, die cut in Crushed Curry card stock scrap pieces, were added randomly around the hat and diamond.

The sentiment, from "Party Panda" was stamped with Black Memento on a strip of Basic White notched at both ends.  The edges were highlighted with some Basic Gray ink and a finger dauber to make it stand out a it better against the Basic White back ground.

Another die cut hat was added to the inside of the card.


Supplies Used:

Stamps:  Hats Off, Party Panda

Inks:  Real Red, Black Memento, White gel

Papers:  Basic white, Pacific Point, Real Red, Crushed Curry, Garden Green

Accessories:  Hat Builder dies, 3D Coastal Weave Embossing Folder, Dimensionals,


Friday, May 27, 2022

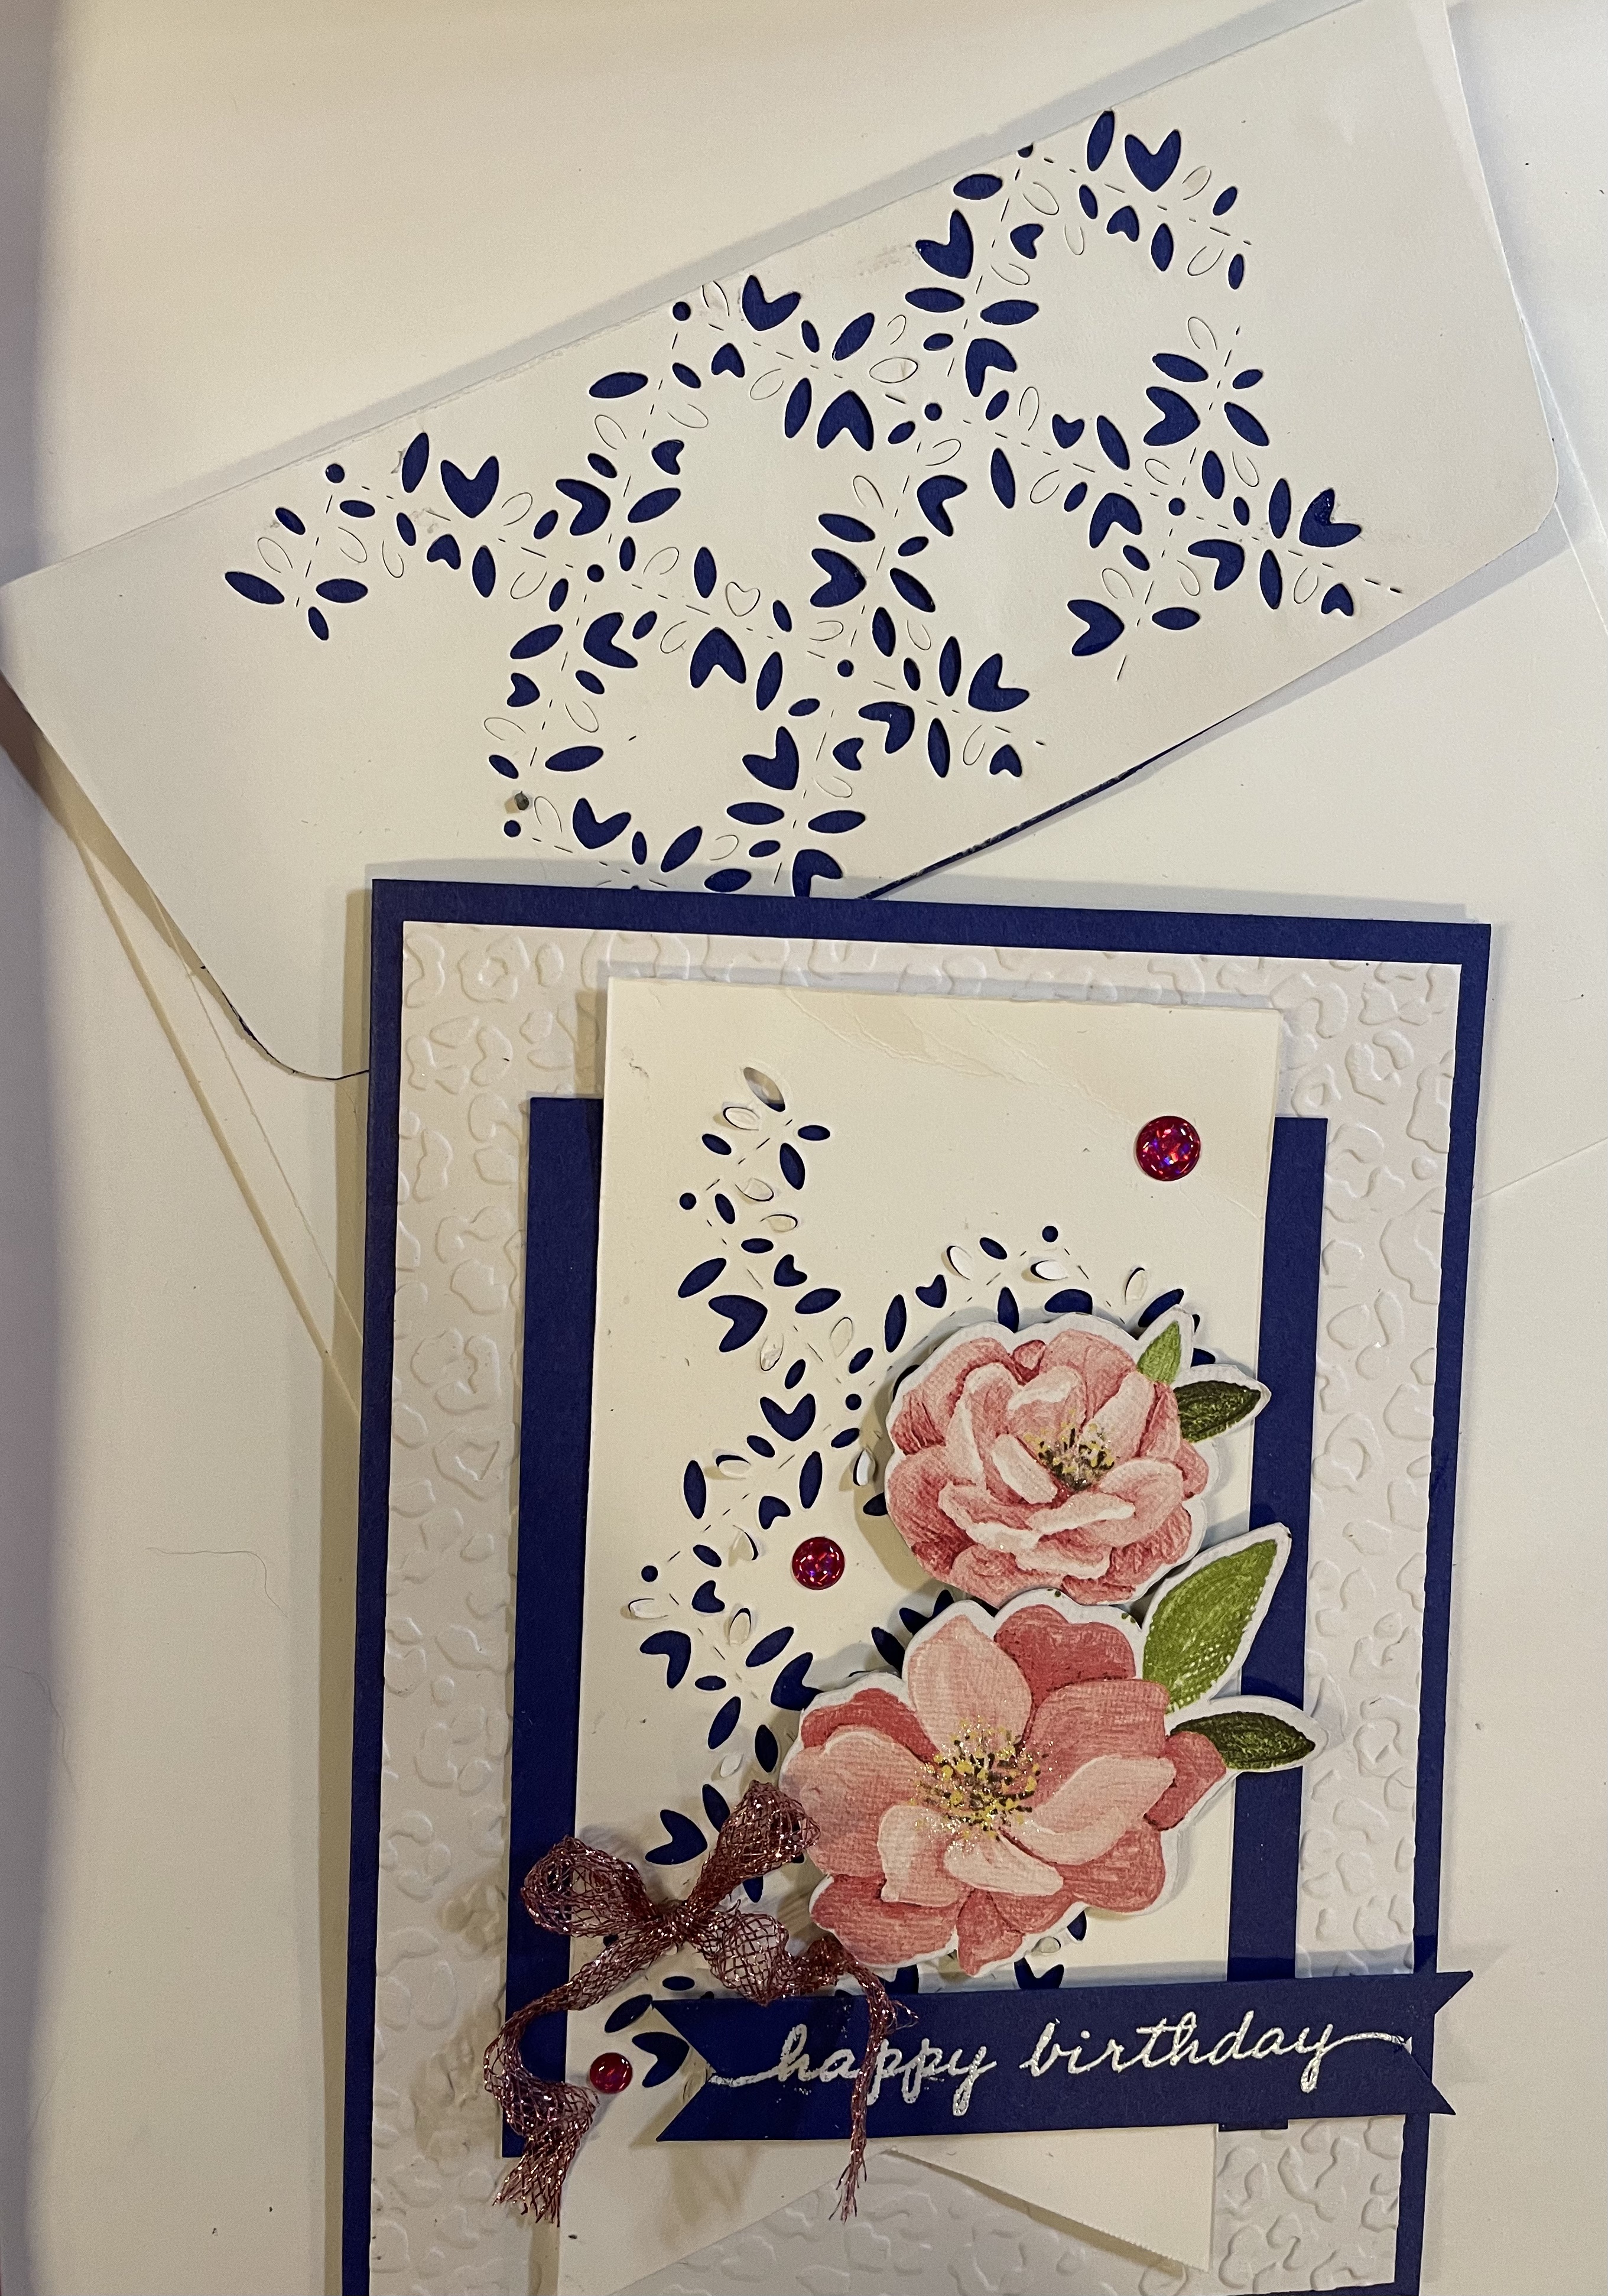
Happiness Abounds Birthday - Hand Stamped Sentiments

 This card was made for the sketch challenge with Hand Stamped Sentiments #389


The card base of Night of Navy is layered with Basic White cardstock embossed with the Animal Prints embossing folder. The images of the impressions remind me of little flowers rather than animal prints so perfect for this flower themed card.


The art piece is a Basic White banner which is die cut in the middle with one of the dies from the Blooming Happiness dies. I did not know initially what this die was for or what it did, until I did an experimental cut. I was pleasantly surprised to see that the die did not cut an outline image, but a pattern with tiny pop up features. I placed a piece of Night of Navy card stock behind it to bring out the elements of the die cut. 
It reminded me of a trellis, so the two die cut flowers ( die cut from the Hues of Happiness DSP ) were snuggled on it.  The flowers already have their leaves. Attached to them so I did not have to add those.
The banner and Night of Navy card stock were added to the card front using dimensionals.


The birthday sentiment was white embossed on a strip of Night of Navy card stock notched at both ends.  It was added using dimensionals below the flowers.
The card needed a pop of glitter, so I added 3 glossy dots and a bow made with the 1/8” sweet sorbet metallic ribbon.

I die cut the same image on the envelope flap and placed a piece on Night of Navy behind it to bring out the pattern.

Another piece of Basic White cardstock was added to the inside. An extra die cut flower with leaf was added to the inside.


Supplies Used:

Stamp:  Happiness Abounds

Inks:  Versa Mark

Papers:  Starry Night, Basic White, Hues of Happiness DSP

Accessories:  Blossoming Happiness Dies, 1/8" Sweet Sorbet metallic ribbon, White embossing powder, Glossy dots, dimensionals, Animal prints embossing folder