Showing posts with label Pretty Label punch. Show all posts

Sunday, March 15, 2020

Flowering Foil Card with Fun Folds

Today I challenged myself to design some cards using the Flowering foil DSP, a new second release SAB offering , free with a $60 purchase.

I had not been feeling well since a minor surgical procedure a couple of days ago.  Yesterday I felt well enough to colour some of the flowers on one of the 12 by 12 sheets.  Some  I  coloured  with Stampin' Blends, others were coloured with ink and  an aqua painter.  I must admit I prefer the ones coloured with the aqua painter.

After coloring them, both the single and double flowers were fussy cut.  Because the DSP is a bit flimsy I reinforced them by adding some punched card stock on the back before I added them to a card.

Here's the 3 cards I made


Card #1 Frame Card:


The base for this card is Thick Whisper White, layered with Whisper White embossed with the Layered Leaf embossing folder.  A frame made by die cutting 2 different sizes of the Stitched Rectangle dies, was added to the embossed layer using dimensionals.

A fussy cut flower which was coloured with ink and an aqua painter was adhered , with dimentionals, to the top left corner of the inside embossed layer slightly overlapping the frame.

Some dazzling diamonds was added to the center of the flower.

The sentiment, stamped with Rich Razzelberry ink, was punched with the  Pretty Label  punch. and adhered to a  piece of copper foil punched with the Label Me Lovely Punch with dimensionals.  Using the Detailed Trio Punch, notches were punched at both ends of this Pretty Label punchie so a piece of 1/4" metallic edged Rich Razzelberry ribbon could be added to the card front. This sentiment unit was added to the card front using dimensionals.

Stamp:  Tags in Bloom (SAB)
Inks:  Rich Razzelberry, Daffodil Delight, Old Olive
Papers:  Whisper White, Thick Whisper White, Flowering Foil DSP, Copper Foil
Accessories:  Aqua painter,  Stitched Rectangle dies, Layering Leaves Embossing Folder, `1/4" Metallic edged Rich Razzelberry ribbon, Dimensionals, Dazzling Diamonds, Detailed Trio Punch, Label Me Lovely Punch, Pretty Label Punch

Card #2  Wallet Card 


I call this card fold a wallet card  or a gift card holder card. The top half of the card folds down over a bottom fold which is made into a pocket which contains a pull out greeting card. The top flap is kept closed with a mini magnet.


The card base of Thick Whisper White card stock is 5 1/2 by 9 3/4 scored at 3 and 7 1/4". The top and bottom corners are rounded using Detailed Trio punch.

Two patterns of the DSP were used; the grid pattern on the top fold; the small flowers on the lower flap.  Both are matted with copper foil before being added to the card base.

A bit of tombo on the edges of the bottom flap and the flap is formed.

.A piece of Whisper White card stock 3 1/2 by  4 7/8",   for the written message, is inserted in this flap.  After taking this picture I added a tab to the top making it easier to access.

Decorating the top flap is a double flower, which has been adhered at an angle, with part of the flower extending over the end.  This flower is also coloured using inks and an aqua painter. Dazzling diamonds are added to the flower center. 

The grid paper below the fussy cut flower is sponged with Rich Razzelberry ink to create a bit more interest. 


The flap is kept closed with tiny magnets one of which you can see on the picture above.  You can also use velcro if you don't have magnets.

Two metallic design elements decorate the left upper flap.

I have not added any sentiments on this card as I wanted to leave my options open.


Card #3 - Another wallet card, but in blue


The fold on this card is the same as card #2, but the colour scheme is Bermada Bay and White with an accent of Copper.

Added to the edge of the top flap is some copper foil die cut with the Delicate Lace Die.

The DSP on the top has tiny copper foil flowers which were coloured with Bermuda Bay ink using a dauber.  Two large fussy cut flowers with their backs reinforced with circle card stock punchies are added to a Stitched So Sweetly die cut embossed with the Subtle Texture embossing folder.  The flowers, coloured with Bermuda Bay ink and an aqua painter, slightly overlap each other.


Some Bermuda Bay card stock embossed with the Layering Leaves Embossing Folder is added to the bottom flap. 

The card is also kept closed with mini magnets.

Again no sentiments.  They will be added later.


The corners of the insert are punched with the Detailed Trio Punch, rounded first, and then punched with that lovely floral pattern.  On the bottom is added a flower fussy cut from the edge of the DSP and a tab at the top.


Supplies Used:

Inks: Bermuda Bay, Old Olive, Daffodil Delight

Papers:  Thick Whisper White, Whisper White, Bermuda Bay, Flowering Foil DSP

Accessories:  Sweetly Stitched Dies, Delicate Lace Die, Subtle Texture Embossing Folder, Detailed Trio Punch, Circle tab punch, Layering Leaves Embossing Folder, Dazzling Diamonds, Aqua Painter, Mini Magnets


Wednesday, January 16, 2019

Hearts Pop Up

For some reason I'm in a 'pop up' kick, making cards that pop up , pop out or explode upon opening. Yesterday I posted a panel pop up featuring "Hey Love" here; and on Sunday an explosion card here.

Today's card is also a pop-up (or pop out), but the pop out's are hearts attached together.


Card Front

The card base is a Thick Whisper White top fold layered with Lovely Lipstick embossed with the Lace embossing folder.
    
On the upper portion I add 2 Whisper White stitched scallop hearts frames left over from another project.

The sentiment, from "Be Mine", was stamped in Lovely Lipstick, and punched using the Pretty Label punch.  To complete the front, two pearls are added on both sides of the sentiment.

Open the card, and out pops 4 hearts attached together.

Here's how to make the heart pop up insert: (The sample below is done using copy paper so as not to use up all my DSP)

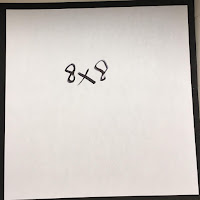
1.  Start with a piece of desired paper 8 by 8" (size may vary depending on the pop up)


2.  Fold in half, with the open ends facing down.


3.  Fold right corner down to bottom open ends followed by the left corner


4.  Place selected die to the upper folds, so that the cut edge is just barely over the fold.  You should see a very tiny open space.  Here I use the Sweet and Sassy heart framelit.


5.  Tape in place and run through Big Shot.


6.  Refold.  Place in inside of card  and position lower heart where you want it.  Adhere.  Add adhesive to the top heart, close card and your pop up is adhered in the card.

You can stamp a sentiment in the center of the inside if you wish.

Supplies Used:

Stamp: Meant to Be
Inks:  Lovely Lipstick
Papers:  Thick Whisper White, Whisper White, Love Me DSP, Lovely Lipstick
Accessories:  Lace Embossing folder, Delicate Lace Edgelit, Be Mine Stitched Framelits, Pretty Label punch, Pearls, Sweet & Sassy Framelits

Monday, August 28, 2017

Painted Autumn Thanksgiving Card

Thanksgiving weekend is coming up fast.  Here in Canada it is the first weekend in October, and since I am doing a 3 day craft show on that weekend I needed to make some Thanksgiving/autumn cards.

The this sunflower on this card, I experimented with several color combinations:  Daffodil Delight, Crushed Curry and Daffodil Delight; Daffodil Delight, Pumpkin Pie and Daffodil Delight; and finally Daffodil Delight, Cajun Craze and Daffodil Delight.- and deciding on the Daffodil Delight and Pumpkin Pie option.

On Very Vanilla card stock, I stamped 3 sunflowers in a random pattern using the predetermined color pattern.  The center is stamped with Early Espresso ink; the leaves in Garden Green.

At the bottom is a strip of Painted Autumn Specialty DSP with some burlap ribbon on top.

The sentiment was punched with the Pretty Label punch and gold faceted gems added to the flower centers and below the sentiment.

Some Gold Wink of Stella was "splattered" across the card front and then I was done.

Supplies Used:
Stamp:  Painted Harvest
Inks: Early Espresso, Daffodil Delight, Pumpkin Pie, Garden Green
Papers:  Cajun Craze, Very Vanilla, Painted Autumn DSP
Accessories:  Burlap ribbon, Pretty Label Punch, Gold Faceted Gems, Gold Wink of Stella

Tuesday, July 4, 2017

Congrats Grad - The Paper Players #351

Thank you Cindee Wilkinson for the inspiration to create this glossy background. She has a video on her blog which explains the technique very well.

I created several backgrounds and finally decided on one to make the graduation card for the challenge at the Paper Players.  The challenge is a theme one, and among the several options I decided to make a graduation card.


I made the background first using reinkers and glossy card stock.  The following reinkers were applied to the cardstock as separate drops:  Tranquil Tide, Berry Burst, Lemon Lime Twist, and Powder Pink.  After spritzing with water and observing the wonderful effect as the colors blended, I added some Wink of Stella and then allowed the card stock to dry.  And this takes a while.....

The base card is Tranquil Tide layered with Powder Pink cardstock embossed with the Ruffled Texture Impression Embossing Folder.  The ruffles on the card stock remind me of the ruffles on a graduation gown.

On the left side of the card I placed a 1 1/2" strip of the glossy background with an punched edge in Berry Burst. This punched edge was made using the new Decorative Ribbon edge Punch.

On a separate piece of Whisper White card stock I sponged 3 separate areas with  Berry Burst, Lemon Lime Twist, Tranquil Tide and Powder Pink and punched 3 large balloons with the Balloon Banquet Punch.  These were added with dimensionals with the Tranquil Tide strings stamped using a stamp from "Sunshine Sayings" emerging from the bottom of the balloons.  A bitty bow (Berry Burst) was added at the base of the balloons. Some Wink of Stella was brushed over the balloons.

The sentiment, from "Sunshine Sayings" was stamped with Tranquil Tide on Whisper White and punched with the Pretty Label punch.  I reinserted  the resultant punchie back into the punch to make it smaller.  Since it reminded me of a cloud I attached it to the balloons.

Some clear faceted gems were added to the sentiment and along the upper right side.

Supplies Used:
Stamps:  Sunshine Sayings
Inks:  Reinkers and ink pads:  Tranquil Tide, Powder Pink, Lemon Lime Twist, Berry Burst.
Papers:  Tranquil Tide, Powder Pink, Glossy card stock, Whisper White, Berry Burst
Accessories:  Clear faceted gems, Bitty Berry Burst bow, Balloon Bouquet punch, Decorative Ribbon punch, Pretty Label punch, Ruffled Texture Impression Folder, Wink of Stella, dimensionals.


Here are some other backgrounds I made:
Perfect Plum, Lemon Lime Twist, Pool Party


Bermuda Bay, Crushed Curry, Rich Razzelberry


Lemon Lime Twist, Island Indigo, Tangelo Twist