Showing posts with label Baby Bear. Show all posts

Monday, November 12, 2018

A Boy, a girl ?????

More and more couples choose not to know the gender of the baby until the baby is born.  Therefore I needed to design a card for that gender unknown "fetus"

In this instance I used Soft Sea Foam card stock as my card base, layering it with Whisper White and then a layer stamped with the Buffalo Check stamp.  I use the stamparatus to stamp with the Buffalo check as it seems to need several layers of ink to get the desired color. After the ink was dry I again drew a Petal Pink line between the Soft Sea Foam squares.

After adhering the patterned layer to the Whisper White, some 5/8" glitter Pear Pizzazz ribbon and bow was attached to the lower card front.  These layers were then attached to the Soft Sea Foam card base.

For the background of the baby, I again used the stamparatus to stamp the Bokeh dots background stamp - the one with the stars in it.  This stamp also needs multiple layers of Soft Sea Foam ink to get the right color.  The resultant background was embossed with clear embossing powder, cut out with the trimmer, and then matted with Whisper White before being added to the plaid background.

The baby was coloured with water color pencils and a blender pen and wrapper in a green polka dot blanket,  Dimensionals were used to add the baby to the Bokeh background.

The sentiment is from "Baby Bear"

Supplies Used:
Stamps:  Sweet Baby, Buffalo Check, Baby Bear, Bokeh dots
Inks:  Soft Sea Foam, Black Memento, Petal Pink Blend, Water color pencils, Versa Mark
Papers:  Soft Sea Foam, Whisper White
Accessories:  3/8" Glimmer Pear Pizzazz ribbon, Bouncing baby Framelits, Clear embossing powder, Dimensionals, Stamparatus, Blender pen

Sunday, September 2, 2018

Something for Baby - SUO Challenges #206

The challenge with SUO here Babies & Kids came at a perfect time.  I'm doing a craft show the end of October, and was in need of an item for a baby shower.

So, for this challenge I decorated a white gift bag I purchased for a baby shower - a girl.

It was not a project I put together in a few hours.  It took longer than I anticipated, but I am a bit of a perfectionist.
I started by placing a 2" strip of Petal Pink card stock down the center.  At the top I folded over a flap, rounded the corners, and placed a Nordic Designer button (retired) on it and on the band below looking as if  this was keeping the bag closed.  I also folded the Petal Pink strip over at the bottom.
Before adhering the Petal Pink strip to the bag front,  I added a strip of Sparkle glimmer paper die cut to each side using the Delicate Lace Framelits,

Below the lower button I added a 2 by 6" piece of Twinkle, Twinkle DSP, the bottom end of which was die cut using the Triple punch.

On a separate piece of Whisper White card stock, and using the Stamparatus, the Baby Bear was triple stamped , using Crumb Cake (stamped off), Crumb Cake, and Early Espresso inks.  This image was die cut using a circle framelit  Before removing the die cut image from the circle framelit, I stippled around the periphery of the image using Crumb Cake ink. It was added to the front of the bag using dimensionals.
To finish the bear I tied a left over piece of ruffled powder pink ribbon with pink Baker's Twine and adhered this to the bear's neck.


The baby shoes were made using a template you can find here.  They were made using Twinkle, Twinkle DSP with the image of the baby deer from "A Good Day" stamped and colored with blends on the front of each she. They are held closed with the new metallic brads, and on t"he opposite side I added a pink "Blossom Element".  I used the white tea room ribbon around the bottom of each shoe, and then tied a piece into a bow and adhered this to the shoe front above the stamped image.  Using a 1/8" hand held punch I punched a hole in the inside part of each shoe and used thick white Baker's twine to tie the shoes to the bag handle.


On the other handle I designed a gift card.


Supplies Used:
Stamps:  Baby Bear, A Good Day
Inks:  Crumb Cake, Early Espresso, Night of Navy (deer on shoes), Petal Pink blend
Papers:  Whisper White, Twinkle, Twinkle DSP, Glimmer paper, Petal Pink card stock
Accessories:  1/8" Team Room Ribbon (white), Ruffled powder Pink ribbon (scrap piece)  Pink/white Baker's twine, Nordic designer buttons (retired), thick white Baker's twine, 1/8" hand held punch, Triple punch, Circle framelit, Delicate Lace Framelits, Stamparatus, purchased white gift bag.


Friday, May 25, 2018

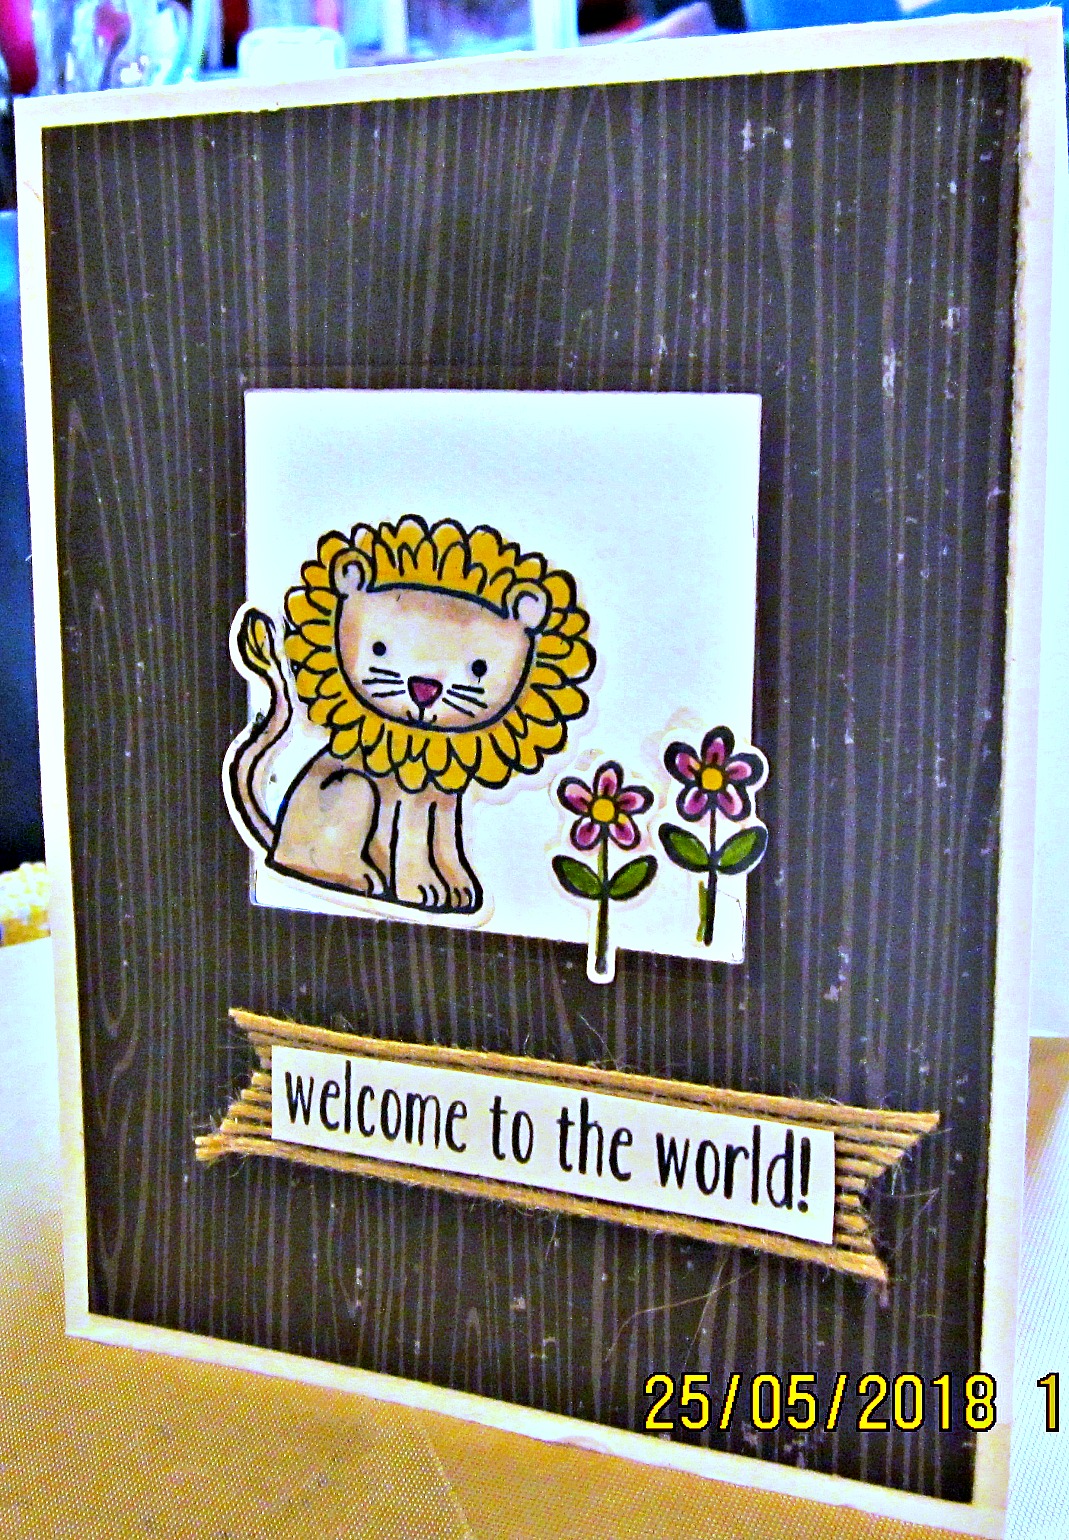
Welcome to the World little lion - another tulle window card

This is the 3rd tulle window card featuring the "A Wild Thing" stamp set. - this time focusing on the lion.


Supplies Used:
Stamp:  A Little Wild, Baby Bear
Inks:  Black Memento, Blendabilites
Papers:  Whisper White, Coffee Break DSP
Accessories:  5/8" Burlap ribbon, White Tulle (non SU), Little Love Framelits, Clear of Wink of Stella, Stitched Square Framelits


Baby Elephant Tulle Window card

Yesterday I made a tulle window card featuring the bear from "A Little Wild" stamp set.

Today I made 2 other tulle window cards featuring the other 2 "wild things" from that stamp set - the elephant, and the lion.

This post will focus on the elephant alone.  It makes the cutest baby boy card.


The elephant was stamped on Whisper White  colored with blendabilites then die cut and set aside.  Because the front and back halves are attached together, after die cutting I cut the two pieces apart and set them aside.

On a top folding Whisper White card base, I temporarily adhered a 4 by 5 1/4" piece of Coffee Break DSP to it and then die cut a stitched square aperture in the upper part of the card through both layers.

Separating the layers, some tear and tape adhesive was added around the edges of the square aperture on the card front and on the wrong side of the DSP.  I also added some tear and tape adhesive around the rest of the card front about 1/4" from edge and on the back of the DSP close to the edge.

After adhering the white tulle around the square aperture, the two card layers were added together.  The card front now has a tulle window in it.

The front of the elephant was added to the front tulle window using tear and tape adhesive.  Then opening the card, the back side of the elephant was adhered matching up the image outlines.


Some 3/8" shimmer pool party ribbon was wrapped around the card below the window and the stamped sentiment adhered over the ribbon using dimensionals.

Three balloons were punched using the balloon builder punch and sentiments from the "Baby Bear" stamp set added to two of them.  Some metallic pool party baker's twine was strung from the balloons to the nose of the elephant.

To finish, some Clear Wink of Stella was added to the balloons and part of the elephant.

Supplies Used:
Stamps:  A Little Wild, Baby Bear.
Inks:  Black Memento, Blendabilities
Papers:  Whisper White, Coffee Break DSP
Accessories:  3/8" shimmer pool party ribbon, square stitched framelits, white tulle (non SU), Balloon Builder punch, metallic pool party baker's twine, Little Love Framelits.
 

Thursday, October 13, 2016

It's a Girl - a Pop and Twist Baby card

I'm on a Pop and twist kick!  This is my second card today using this unique fold mechanism.  I ended up using 4 different stamp sets to complete this card.


The base card is Blushing Bride, layered with Blushing Bride DSP.  The Whisper White art piece has the edges stressed with the Timeless Texture stamp set, with the texturing continuing in the rest of the piece around the image.

The bear, from " Baby Bear" was stamped first with Pink Pirouette and then with Blushing Bride.  The bow was first white embossed on Pink Pirouette card stock, fussy cut out, and adhered to the baby bear with a glue dot.

The sentiments are stamped with Flirty Flamingo ink as the Blushing Bride ink was too pale.


Each panel has 2 layers:  Blushing Bride DSP, and a Whisper White layer.  The die cut images were first stamped using the "Something for Baby" stamp set, and then die cut using the coordinated framelits.

This is a close up of the panels.

Supplies Used:
Stamps: Something for Baby, Baby Bear, BYOP, Baby Prints, Timeless Texture
Inks: Blushing Bride, Flirty Flamingo, Black Memento, Pear Pizzazz, Crushed Curry, Versa Mark
Papers: Blushing Bride, Blushing Bride DSP, Whisper White
Accessories:Something for Baby thinlets, Baker's twine, clear embossing powder, velcro, white embossing powder


Tuesday, June 21, 2016

Baby Bear - Boy

Yesterday I posted a card featuring Baby Bear as a baby girl card.
Today it the little boy's turn.

  • Colours used for the Baby Boy Bear:  Soft Sky and Pool Party.  A pool party marker was used to highlight the joints and curves, a black marker for the eyes and nose. A pool party bow was attached to the bear in the neck area. A black marker highlighted some of the folds of the bos.
  • The bear was mounted on a piece of Whisper White cardstock which had been stamped with the Timeless Texture stamp set and then this was adhered to the card front.
  • The base card is Pool Party, layered with Whisper White, then Pool Party DSP for the next 2/3.  A banner die cut from Pool Party was embossed with Sparkle embossing folder.  It was adhered half way over the DSP and half way over the Whisper White layer.
  • Once the circle of Flirtatious Flamingo was then placed over the banner  the card front is conmplete.
Supplies: 
Stamps: Baby Bear, Timeless Texture
Inks: Soft Sky, Pool Party (ink and marker), black marker, Flirtatious Flamingo
Papers: Pool Party, Whisper White, Pool Party DSP, Flirtatious Flamingo
Accessories: Layering Circles Framelits, Sparkle Embossing Folder, dimensionals

Monday, June 20, 2016

Baby Bear - Girl

I spent the day making baby cards using the Baby Bear stamp set, driven by an unknown urge.  Late in the day I found out why.  My girlfriend called to inform me that she was going to become a great grand mother and could I made a baby card for her.
Here is the Girl Baby Bear card:

  • The two colours for the bear:  Pink Pirouette and Blushing Bride.  A Blushing Bride marker was used to highlight the bear features, and a fine tipped black pen highlighted the eyes and nost.  The bear was cut out and the edges sponged with Flirty Flamingo.  A piece of 1/8" silver taffeta bow was adhered under the chin.
  • The bear was attached to a Whisper White circle die cut with the Layering Circles die.  This die cut circle was stamped with the Timeless Texture stamp andthen adhered to the new white doilie.  This unit was adhered to the left side of the card going over the edge of the card.
The main card is Blushing Bride, layered with Whisper White.  Then Blushing Bride DSP was cut into 1" pieces, the edges sponged with Flirtatious Flamingo, and adhered vertically alternating sides along the bottom of the card.  A 1" strip was also placed vertically across the top.  Some Whisper White organza ribbon coloured with a Flirtatious Flamingo marker was adhered to this vertical strip and tied into a bow.

Three small dots of dark pink glitter were placed at the upper right corner and allowed to dry.

Supplies Used:
Stamps:Baby Bear, Timeless Texture
Ink: Pink Pirouette, Blushing Bride, Flirtatious Flamingo (ink and marker), black marker
Papers: Blushing Bride, Blushing Bride DSP, Whisper White, White Doilie
Accessories: Layering circles dies, 5/8" White Organza ribbon, dimensionals, 1/8" silver taffeta ribbon

Saturday, June 18, 2016

Happy 2nd Birthday Baby Bear

I played some more with the Baby Bear stamp, and still now happy with the way I'm lining the images up, but I'm getting better.  For this birthday card, I used only 2 colours:  Crumb Cake and Soft Suede (stamped off once).  I used those colours because those are the colours of the teddy bear I got for my 10th birthday.  Unfortunately I couldn't find it, but when I do I will take a picture and put it on my blog post.

  • Base card is Pacific Point, layered with Whisper White
  • I just love the Timeless Texture stamp set and used it to create a background for the baby bear. Then this image piece was matted with Pacific Point cardstock and adhered to the card front.
  • The hand cut out baby bear had its edges sponged with Soft Suede, the eyes and nose darkened with a black marker, and then adhered to the background using dimensionals. 
  • A Pacific Point bow was cut out and adhered to the top of the bear's head.
  • The balloons were stamped using the Balloon Celebration stamp set, and punched out using the coordinating Balloon Builder punch. A line was drawn down from the balloons to the bear's paw using the fine end of black marker.
  • Wink of Stella glimmer brush applied clear gitter to the balloons, the eyes and nose
  • Using the junior alphabet die, the number "2" was die cut using diamond glimmer cardstock and adhered to the bear's tummy.
Supplies Used:
Stamps: Baby Bear, Balloon Celebration, Timeless Texture
Inks: Crumb Cake, Soft Suede, Pacific Point
Papers: Pacific Point, Whisper White, Diamond Glimmer paper
Accessories:Balloon Builder punch, dimensionals, Wink of Stella clear glimmer brush.

Friday, June 17, 2016

Hello Baby Bear - Pals Paper Arts #305

This card is for the colour challenge with Pals Paper Arts  
This challenge is a colour one:  Pool Party, Island Indigo, and Whisper White. I've been playing with the Baby Bear stamp set the last couple of days, and thought this would be a perfect colour combination for the bear.

  • Card base:  Island Indigo
  • First layer:  Whisper White
  • Second layer:  Pool Party DSP
  • Fourth layer:  3 pieces of Whisper White, each embossed with a different embossing folder:  Seaside, Decorative Dots, and Dazzling.  They were lightly sponged with Pool Party ink. They were adhered to a piece of Island Indigo cardstock, which was then adhered to the card front.
 The Baby Bear:
  • The two step stamping technique was applied to the bear:
  • Step one: bear stamped with Pool Party ink
  • Step two:  bear stamped with Island Indigo after stamping off once.
The baby bear was cut out and the edges sponged with Island Indigo ink.  A bow was stamped with Pool Party, sponged with Island Indigo and applied to bear with a glue dot.

The Baby Bear was adhered to a piece of Whisper White cardstock the background of which had been stamped with Timeless Texture stamp set and Pool Party ink.  Dimensionals were used.
This piece was matted with Island Indigo cardstock, and this image piece was adhered to the card front at and angle, using dimensionals.


The sentiment, stamped with Island Indigo ink on Whisper White, was die cut with the banner framelit and matted with island Indigo cardstock. It was adhered to the baby bear with dimensionals.

Some bling was added in the form of Wink of Stella (to the eyes, ears, nose) and some dazzling details to adhered to heart shaped sequins from the Brights Sequin Assortment.

Supplies Used:
Stamps: Baby Bear, Timeless Texture
Inks: Island Indigo, Pool Party
Papers: Island Indigo, Whisper White, Pool Party DSP
Accessories: Embossing folders (dazzling, seaside, decorative dots), Brights sequin assortment, dazzling details, Wink of Stella clear glimmer brush, dimensionals, banner framelit