Showing posts with label Video. Show all posts

Tuesday, January 11, 2022

Drive By 2 cards and a video

 Sale-a-bration  (SAB) is in full swing right now. This means that with every $60 spent you get one free product from the SAB brochure.

One of the free products is a stamp set “Drive By” where the images of the vehicles evoke some powerful memories for myself.

Before I show you the cards have a look at the video below.  You can also view it on You Tube here


I cased one of the cards in the new Mini catalogue and made 2 cards -  although I did change them up a bit.

For both of them, I used a base card that is 4 1/4 by 5 1/2", layered with a piece of the same color of card stock embossed with the gingham embossing folder.

For both the image is stamped on a piece of Pool Party card stock 2 3/8 by 5 1/4" using Pool Party ink. The sentiments are stamped on a 5/8 by 2 1/4" piece of Basic white notched at one end using the Tailor Tag punch.

Both images were stamped on a separate piece of Basic White card stock and then fussy cut.

Card #1:

  • A2 Pool Party card base layered with a 4 by 5 1/4" piece of Pool Party embossed with the Gingham embossing folder.
  • The image of the volkswagen and the presents on the roof were stamped on a 2 3/8 by 5 1/4" piece of Pool Party 3 times using Pool Party ink.  The fussy cut image was coloured with Stampin' blends then added to the Pool Party strip using dimensionals.

  • The sentiment was added to the card above the image of the car
  • Iridescent gems were added to add a bit of bling to the card.
Card #2

  • The card base here is Magenta Madness .  The only difference is  the car - in this case a Volkswagen camper.
  • The vehicle was coloured with Daffodil Delight Stampin' blends and when done, some loose Flower Floret embellishments were added to the side of the vehicle. It was added to the Pool Party strip with dimensionals.

Supplies Used:
Stamp:  Driving By (SAB)
Inks:  Black Memento, Stampin' Blends 
Papers:  Pool Party, Magenta Madness, Basic White
Accessories:  Gingham embossing folder, dimensionals, Loose flower florets, Iridescent gems


Tuesday, October 19, 2021

Tombstone Treat box - a partial catalogue case, plus a video

 I must admit my mind went blank when it came to decorating the Halloween Tombstone Treat boxes on Pg. 50 of the July-December Mini Catalogue 2021, so I did something I keep telling others to do - case the catalogue.

The first treat box is below along with a video describing how to put the boxes together and how to decorate this one.


You can watch the video on this blog or on You Tube here


Supplies Used:
Stamp:  Cutest Halloween
Ink:  Pumpkin Pie
Papers:  Basic White, Cute Halloween DSP
Accessories:  Halloween punch, Cute stars adhesive backed sequins, Black & white 1/4" gingham ribbon, 1 treat box (2 pieces)

Other treat boxes made:


Friday, July 9, 2021

Christmas in July - Evergreen Elegance - a Simple Card with Video

 Christmas in July! I know this is a popular concept, but this year I could not get my head around this celebration,  when the thermometer outside is hovering around 31 degrees C. 

However, once I started making Christmas cards, that feeling changed and I began to enjoy myself. And, I ended up making 3 Christmas cards!

I used the stamp set "Evergreen Elegance" which is in the 2020-2021 Annual Catalogue. It has an Evergreen border punch that goes with it but I did not use it for this card.

This is a simple card and great for the beginning stamper. The hardest part was making the rectangle in which the tree is stamped - and stamping the sentiment on the inside straight.


To make the rectangle back ground, I created a template on a piece of Crumb Cake card stock using  a Stitched Rectangle die. You can make it any size you want but I made mine 2 1/4 by 3 1/2".

I taped the template onto a piece of Basic White card stock. Using a Stampin' Blender brush, and Crumb Cake ink, colour was added inside the die cut area.

Using the Stamparatus the larger of the 3 trees was stamped inside the rectangle using Evergreen Evening ink.  The sentiment was stamped using Cherry Cobbler ink below the art piece.

Check out the video below. You can also watch it on You Tube here


Measurements:
  • Cherry Cobbler  5 1/2 by 4 1/4"  - Card Base
  • Basic White - 3 3/4 by 5" (top layer)
  • Basic White 4 by 5 1/4" -on inside
Supplies Used:
Stamp:  Evergreen Elegance
Inks:  Evening Evergreen,  Crumb Cake, Cherry Cobbler
Papers:  Cherry Cobbler Basic White
Accessories:   Stitched Rectangle Die, Blender Brush, Stamparatus

Here are three other cards I made using this stamp set:


Friday, June 18, 2021

Elegantly Said Make & Takes for Team Meeting plus video

Because of the pandemic Team Meetings are still being held virtually.  Starting tomorrow June 11, the Stay at Home will gradually be lifted.  But we're not out of the woods yet, as I won't be getting my second vaccination until June 22, and children under the age of 12 have yet to be given the shot in the arm.  So, until it is safer, team meetings will remain virtual.

That means Make and Takes, traditionally made during these meetings, will also be done virtually.  How that will work I am not sure.  Before I reveal my plan I want to describe the projects for the meeting.


The 3 projects include: a note card, an A2 card and a treat box.  

I made a video describing how to make all three projects.  It can be viewed here or on You Tube  https://youtu.be/fTpL4V2S3bw


Thank You Note Card


 Measurements:

  • Basic White Note card 5 X 3 ½”

  • Basic Gray cardstock 3 1/8 X 4 ½’

  • Basic White cardstock  2 ⅞ X 4 ¼”

  • DSP 1 by 4 ¼”

  • Silver Foil ¼ by 4 ¼”

  • Basic White 3 ¼ by 4 ¾” for inside


Tag:

  • Basic white 1 ⅝ X 4 ¼” - punch both ends

  • Simply Elegant Gold trim 12”

  • Gilded Gems  3


Envelope:

  • DSP 2 ¼ X 5 ½” (optional) and not included.


Elegantly Said Thank You Card


Measurements:

  • Basic Black Cardstock 4 ¼ X 11” scored and folded at 5 ½”

  • Basic White Cardstock (2) 4 by 5 ¼” (one for inside)

  • Basic Cardstock 3 ¾ X5”

  • DSP 1 ½ X 5”

  • Copper Foil ¼ by 5”


Mini Treat Box


Measurements:

  • Simply Classic treat Box #1 13/16”

  • DSP 1 ¼ by 9 ½”

  • Elegantly Said trim (gold) 15”

  • Scrap of Basic White ½ by 2 ¼”

  • Scrap of Silver Foil ¾ by 2 ¾” 


Supplies:

Simply Elegant Suite  #155764

Elegantly Said Bundle #155753

Elegantly Said Stamp set #155095

Elegant Tag Punch #155762

Simply Classic Treat Boxes #155566

Elegantly Said DSP #155761

Copper Foil #142020

Silver Foil (retired)

Copper Embossing Powder #155555 (includes Silver & Gold)

Heat Tool #129053 

Basic White note card & envelope #159232

Whisper White cardstock #159276

Basic Black cardstock #121045

Basic Gray cardstock

Simply Elegant (Gold & Silver) trim #155766

Gilded Gems #152478

Versa Mark ink#102283

Tuxedo  Black Memento Ink #132708

As a bonus I demonstrate how to make a book mark using the Elegant Tag Punch


Making a Book Mark with Tag Punch

1 Insert top end of 1 ¾” strip of DSP into top end of punch.

Tip:  if you experience difficulty inserting the cardstock through the top insert it from the exit slit in the front pulling the tail out.


2.  Then insert the bottom end into the opposite end of the punch


My Plan:

1.  Design the make and takes.  Create a PDF with measurements

2.  Make kits for 7 team members

3  Mail kits and PDF - giving the post office 2 weeks to get the kits to team members.

4.  An e-mail to team members re the plan

4.  Create a video

All the planning has been done.  I created an extra kit for myself which will be used during the meeting to help with the direction.

A couple of days before the meeting I decided to release the video early so that the make and takes could be done prior to the meeting.  Then during the meeting each item will be discusses and each member can discuss difficulties encountered making the item.


Sunday, May 30, 2021

Artistically Inked Car #1 with video

 What gorgeous paper to work with! When I first saw the Expressions in Ink DSP I drooled!  When I started working with it I drooled again.

So I made my first card to highlight the DSP- and made a video as well.


The Thick Basic White card base is layered with a 4 by 5 1/4" piece of the Expressions in Ink DSP.

The sentiment, from the Artistically Inked stamp set, is stamped in Polished Pink on a 1/2 by 2 1/4" piece of Basic White.  This was matted with a slightly larger piece of Evening Evergreen card stock.

Before adding this sentiment, a shaped element as well as a leaf branch from the Expressions in Ink Ephemera pack was added to the card front.  The sentiment was added over the bottom half.


Watch the video below, or on You Tube here


Before adding the leaf branch, I used he smaller end of a scoring tool to make vein marks in the leaves. Gilded Gems were added to around the sentiment.


The accompanying envelope was stamped with the largest one of the stamps (see the first picture)

Supplies Used:

Stamp: Artistically Inked

Inks:  Polished Pink

Papers:  Thick Basic White 4 1/4 by 5 1/2  Card base

              Basic White 1/2 by 2 1/4 for sentiment

             Basic white 4 by 5 1/4" for inside

             Basic White envelope

             Evening Evergreen 2 1/2 by 1 1/4" - mat for sentiment

             Expressions in Ink DSP - 4 by 5 1/4" for card front

Accessories:

            Artistic Dies

            Gilded Gems

            Expressions in Ink Ephemera Pack


Wednesday, May 26, 2021

Art Gallery Thinking of You - Class to Go card plus video

 A colleague of mine and myself organized a Class to Go in time for Mother's Day and focused on celebrating all women. The class offered kits for 4 cards and one 3D project, a PDF and a video for each card.

Over the next little while I will be posting a picture and the video for each card of the Class to Go, Celebrating Women.  

The first card features 2 Step stamping using both the stamp set and coordinating dies.  An introduction is made to the new blender brushes.


Here are the products used to make this card:

Stamp:  Art Gallery

Inks:  Blushing Bride, Melon Mambo, Mint Macaron

Papers:  Blushing Bride, Mint Macaron, Very Vanilla, Basic White

Accessories:  Floral Gallery dies, Blending brush, Gilded Gems, Dimensionals, Very Vanilla envelope, Gilded Gems


View the video on this blog post or on You Tube here


Monday, May 3, 2021

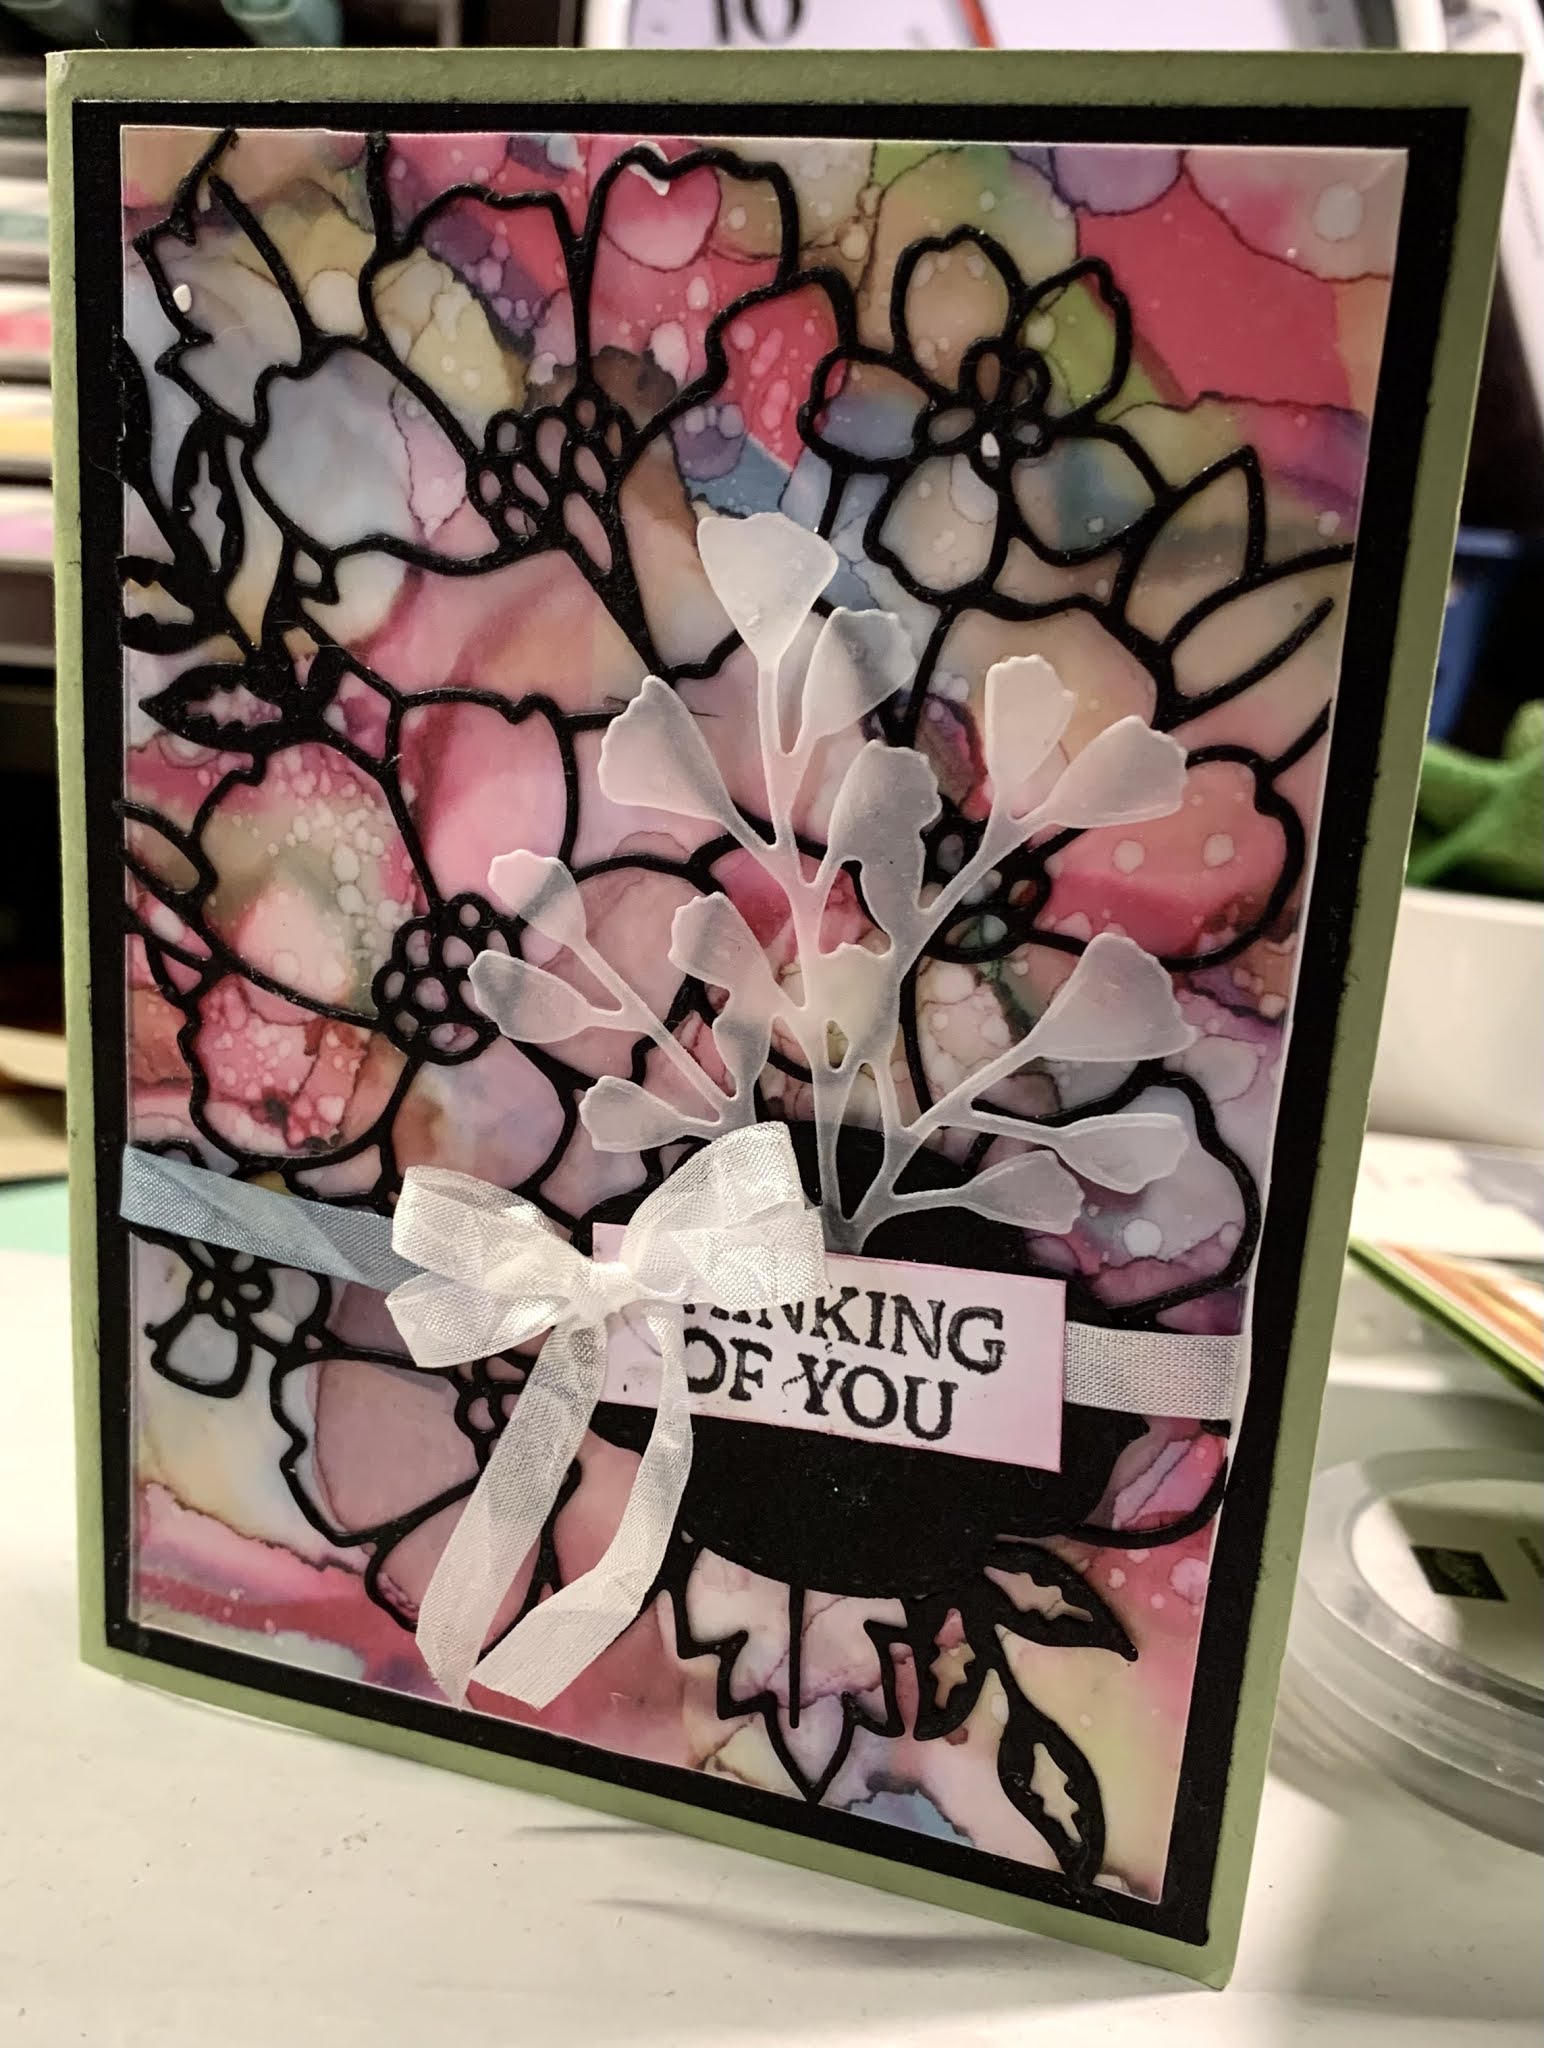
Vellum Background with Stampin Blends and Alcohol - with Video

 This technique has made a revival.  It was quite popular a few years ago and has made a come back and is taking today's craft world by storm.  There are numerous Pinterest and blog posts re this technique and my video today will join them.

Once I heard about this technique I made quite a few backgrounds, using various colour combinations, and today I made a video.

Here is the video:


  You can watch it on this blog or on You Tube here

In the video I used the following colour combinations:  Fresh Fressia, Soft Succulent, Polished Pink, and Pale Papaya to demonstrate how to apply these Stampin blends with 91% alcohol to a piece of Vellum.  After the treated vellum dried, I demonstrated how to adhered the Vellum to a piece of Basic White card stock using an adhesive sheet. In lieu of an adhesive sheet, Tombo glue can be used, applying it with a sponge.

Several of my background pieces have been made into cards.  Several are below with the names of the stamp sets/dies used below each one.

Sailing Home and High Tide


Beautiful Trees die


Many Layered Blossoms Dies


Pansy Petals DSP & Scallop Contour Dies - Gilded Leafing Flakes


Celebrating Sunflowers

Beautiful Moments


Thursday, April 22, 2021

Tote Post it Note Holder - video

 This video tutorial describes how to make this lovely tote note holder.


Let me know what your think.

Saturday, March 27, 2021

Making a Small Men's Shirt Without Using Dies - with Video

 This idea is not mine alone.  I saw this first on Frenchie's blog and after making several of the smaller men's shirts, I decided to make a video, which will be on this blog below.

These shirts are really cute, measuring about 4 by 3 1/2" (finished)


This is what the small shirt looks like compared to a regular shirt


Below is the template I made:


To form the shirt, I started with a 4 by 4" piece of Well Suited Dressed DSP.  Starting at the bottom of the shirt, I measured as follows: 
  • 3/4" from outside edges toward center
  • 1 1/2" up sides.  Cut out areas indicated by slashed lines
On the top measure as follows;
  • 3/4" from top outside edges down sides
  • 1" from the 3/4" point towards the center.  With trimmer cut along 1" line towards the 3/4" mark.  Do not cut along the 3/4 " mark to the 1" mark. This is the collar.
Turn the DSP to the side that will be the front.  Fold the "collar" to the front and adhere tips with a glue dot.

See template below

Score ends of sleeves at 1/8" , fold and adhere with tombo.
Adhere button tab along center of shirt tucking upper end under the collar, and rimming the bottom end.
Add 5 Basic Black buttons on tab with glue dots
Add faux pocket tab


The Night of Navy card stock base is 4 1/4 by 11 scored at 5 1/2".  On the front is adhered a 4 by 5 1/4" embossed piece of Basic White card stock.
The finished shirt is adhered to the card front at an angle.

The sentiment is stamped using Night of Navy and Poppy Parade markers and die cut with the smallest of the Stitched Oval dies. The word "Birthday" is stamped twice with the Poppy Parade marker, then cut out with paper snips and added over the original word using dimensionals. A bow made with the Night of Navy Baker's twine is added above the sentiment with a glue dot.


Supplies Used:
Stamp:  Handsomely Suited
Inks:  Night of Navy, Markers (Night of Navy, Poppy Parade)
Papers:  Night of Navy, Basic White, Well Dressed DSP, Basic Black
Accessories:  Absolutely Argyle Embossing Folder, Stitched Oval Die, Night of Navy Baker's twine, Dimensionals, Ruler, Scissors, Trimmer


Saturday, February 6, 2021

Z Fold Card Using Art Gallery Bundle with Video

 Today I am working with 2 of my loves - working with the Art Gallery bundle and making a video (although I have a long way to go there).  I thought I would make a video tutorial on how to make a Z-fold card aimed at the not so experienced crafter


Stamp:  Art Gallery

Inks:  Flower 1:  Poppy Parade and Merry Merlot with Night of Navy in center
          Flower 2:  Bumblebee and Pumpkin Pie with Night of Navy inside
          Flower 3 (in video) Daffodil Delight and Pumpkin Pie & Night of Navy 
          Stem and leaves:  Pool Party
          Sentiment: Pool Party


The link to the video below is here


Here are the dimensions:

Thick Whisper White 4 1/4 by 11 - scored at 5 1/2 & 2 3/4"  - card base

Pool Party 4 by 5 1/4" - inside

Pool Party 2 1/2 by 4" (2 pieces) - one for each of front panels - mat for DSP

Pool Party  3 3/4  by 2 1/4  "    (2 pieces) - one as mat for art piece on front of card, and the other as mat for sentiment on inside of card

Whisper White  3 1/2 by 2"  (2 pieces) - one for art piece and one for sentiment inside

Whisper White 4 by 5 1/4 " - stamp flowers and leaves

Whisper White - scrap for sentiment

Designer Series Paper (DSP): 3 3/4 by 5" for inside

DSP  2 1/4 by 3 3/4" (2 pieces) on front panels

Gold Foil  3 by 3 to punch stems

Whisper White A2 envwlope


Picture above shows the various papers used in this card.

To decorate the envelope a piece of the reverse side of the DSP was adhere to the flap of the envelope.  Cut a piece that extends beyond the sides of the envelope flap by at least 1/2", and extends beyond the end of the flap by about 1/2".  The other end, is lined up with the fold line of the envelope flap.
Conversely the flap could be stamped.


Accessories:
Floral Gallery dies
Sprig punch
Dimensionals
Gilded Leafing embellishment
Gilded Gems


Thursday, February 4, 2021

Slide and Lock Card with SAB products

 I came across a number of cards made using the Slide and Lock mechanism while surfing on Pinterest and this motivated me to try this unusual card fold. So I made the following birthday card using this slide and lock mechanism. 

There are many tutorials on how to make this mechanism but I found this one helpful here.


The base card is Thick Whisper White card stock 4 1/4 by 11" scored at 2 3/4" at each end.  Then at one of the ends an extra 1/16th of an inch was trimmed off.  This was necessary so when the card ends were folded together in a Gatefold style, the ends did not meet but instead left a gap. This gap is necessary for the slide mechanism. On the 2 front panels, some Flower & Field DSP was matted with Pool Party cardstock      

The art piece  is a die cut piece of Whisper White  with a piece of of Pool Party card stock  added between the stitched lines.  This  provides a background for the flowers  fussy cut from the Flowers & Field DSP.


Now for the mechanism....

Three more Whisper White pieces were die cut with the exact same die, Two were folded together with one of the folded sides adhered to the 3rd piece with the folded ends abutting each other. The art piece is then adhered to this piece. Now there are 2 "wings" that will be inserted into the slit between the openings of the Gate fold card.


Supplies Used:

Stamp:  Approaching Perfection

Inks:  Versa Mark, Black Memento

Papers:  Thick Whisper White, Pool Party, Flowers & Field DSP, Vellum

Accessories:  Black embossing powder, Dimensionals, All the Trimmings Embellishments, Stitched So Sweetly Dies