Showing posts with label Thank you. Show all posts

Saturday, June 10, 2023

Nature's Harvest- Color challenge for Hand Stamped Sentiments #415

 I don't usually do color challenges as I'm not very good at them.  That doesn't mean that I don't try every once in a while.  This is one of those times where I try.

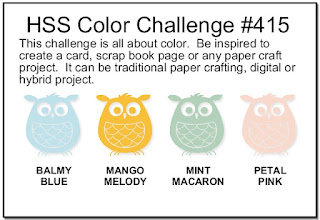
The colours of the challenge at Hand Stamped Sentiments #415  were Mint Macaron, Pink Petals, Balmy Blue, Mango Melody. Below is my card:


The background was created using  blender brushes.  I punched a 1 1/4" circle mask to cover the sun while the other colours (Balmy Blue, Mango Melody, Petal Pink) were applied. I added Mango Melody to the sun after the mask was removed.  At the bottom Mint Macaron was applied with a blender brush, and then a background stamp from the Nature's Harvest stamp was used to stamp the same colour of ink. A 1/4" Mint Macaron ribbon was added along the bottom of the card.

Birds from "On The Horizon" stamp were stamped across the bottom of the sun.

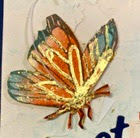
The coneflower was stamped on a piece of Basic White card stock and coloured with Stampin Write markers as follows:  Petals - Petal Pink; Cone - Mango Melody; Stem/leaves - Mint Macaron.  It was then die cut. Two branches were die cut - one in Petal Pink; one in Mint Macaron.

The branches and flower were added as shown in the picture.  Dimensionals were  used for the flowers.

The sentiment, from "Peaceful Moments" was added below the ribbon and was used to hide the stems.  A bow made from the ribbon was added to the top of the sentiment.

Three self adhesive sequins were added randomly to the card front.

Supplies Used:
Stamps:  Nature's Harvest, Peaceful Moments, On the Horizon
Inks:  Black Memento, Balmy Blue, Mango Melody, Pink Petal, Mint Macaron
Papers:  Mint Macaron, Basic White, Pink Petal
Accessories:  Harvest Dies, Dimensionals, 1/4" Mint Macaron ribbon, Self adhesive sequin, blender brushes, 1 1/4" circle punch

Thursday, April 6, 2023

Hello Irresistible DSP & Grassy Grove bundle - a Thank you card

 For the second scenic card using the Hello Irresistible DSP as  background, I used the "Grassy Grove" stamp set to stamp the trees, and the "On the Horizon" stamp set for the birds in the sky.


The sentiment is punched with the double oval punch and adhered together using dimensionals. The edges of the smaller punch are daubed with Pretty Peacock ink.  The ribbon behind the sentiment is 1/2" Natural Woven ribbon; the rhinestones are from the wave rhinestone collection.

The completed scene is adhered to an A2 Pretty Peacock card base.

Supplies Used:

Stamps:  Grassy Grove, On the Horizon

Inks:  Shaded Spruce, Basic Gray, Pretty Peacock

Papers:  Pretty Peacock, Irresistible DSP, Basic White

Accessories:  1/2" Natural Woven ribbon, Double oval punch, Waves rhinestones, dimensionals.

Monday, January 2, 2023

Seaside Bay Bundle - two thank you cards and a video

 Happy New Year everyone.  I hope this year will be a little less bumpy than  last year was.

In 2 days the new Mini catalogue goes live.  All sorts of wonderful stamps, dies, designer papers, ribbons, and embellishments will be available for order.  What will be on your wish list?

To make things a little easier (or harder) for you, today's post will focus on one of the new bundles as well as the Designer Paper (DSP), ribbon and pearls that accompany this bundle.

All I can say about the DSP is wow!  The gold foil, the pearlized enamel, the images etc are so nautical. When you make a card, the 6 by 6" DSP does all the work for you.  What could be easier than that?

Both cards I made are "thank you" cards.

Below is the first one followed by the video I made.  Please excuse my going off camera a number of times.


I just love the gold streaking across the sky of the DSP.  It is added to a mat of Night of Navy card stock which is added to a  Basic White card stock base.

Some Navy/white Baker's twine is added to both the DSP/Night of Navy card stock layer twice and tied into a knot.

The Sandpiper is stamped in Basic Gray ink and coloured lightly with a light Crumb Cake Stampin' blend marker.  Alternatively the bird can be die cut directly from the DSP using the image specific die. It is added to the card front using dimensionals.


Two pieces of sea grass, one die cut in Mint Macaron card stock, the second using Soft Succulent cardstock are adhered  behind a die cut clam. Before adding them, these grasses are sponged using their corresponding ink colours. The clam is die cut using Crumb Cake cardstock. The edges are sponged with Crumb Cake ink- and inside is a pearl.

The sentiment is from the stamp set, is stamped with Sahara Sand ink and then die cut using a stitched Stylish Shape die notched at both ends. It is added above the Sand Piper using dimensionals.

To finish the card, some clear Wink of Stella is applied to the bird, and two more pearls are added to the sentiment piece.

Supplies Used:

Stamp:  Seaside Bay

Inks:  Sahara Sand, Basic Gray, Crumb Cake, Mint Macaron, Soft Succulent

Papers:  Basic White, Night of Navy, By the Bay DSP, Crumb Cake

Accessories:  Seaside Bay dies, Navy/white Baker's twine, Stylish Shape dies, Dimensionals, Clear Wink of Stella, Flat adhesive backed pearls.


A second card is made using different DSP as a background.


For this card I stamped and die cut the mother Sand Piper and the 3 babies. And instead of the clam, I added a ribbon bow made with the Balmy Blue ombre ribbon that coordinates with this bundle.


Wednesday, November 30, 2022

Dainty Flowers Thank You - A Sale-a-bration 2023 Sneak Peak

 It's early, but its coming - another Sale-a-bration event(SAB).  A time when a purchase of $60 results in a choice of a gift from the SAB catalogue.

There are some beautiful free products that can be obtained with a purchase of $60, and the Dainty Flowers DSP is one of them. The paper is like a water colour work of art.

Because it is such beautiful paper, when I made this card, I let the paper speak for itself.  I did a bit of blending with a blender brush at the bottom of the paper, but that is all I did.


Out of one piece of this 12 by 12" DSP I was able to cut 6 card fronts that re 4 by 6" each.  One of the fronts is on the card in the picture above.  The DSP was trimmed to a 3 3/4 by 5" in order to fit on the card.
Before I trimmed it, some Mossy Meadow ink was added to the lower 1/2 using a blender brush. This created a bit of interest and some dimension.

The 3 3/4 by 5" piece of DSP was matted with a 4 by 5 1/4" piece of Mossy Meadow card stock and then added to a Basic White card base.

Before adding it to the Basic White card base, I added some 3/16" braided Mossy Meadow trim (retired)  near the bottom.  A bow was made of the same trim and it was added using a glue dot beside the sentiment.

The sentiment is from a new stamp from the new January to April 2023 mini catalogue "Something Fancy".  It is stamped in Mossy Meadow, punched with the Double Oval Punch, and layered with the Scallop portion of the Oval punch.  The two layers are joined together using dimensionals, and added over the trim on the right side using dimensionals.

To finish the card, I added some 2021-2022 In Color Opal Rounds randomly on the front and one brass butterfly.

Some DSP was adhered to the lid of the envelope which accompanies the card.

Supplies Used:
Stamp:  Something Fancy
Ink:  Mossy Meadow
Papers:  Basic white, Mossy Meadow, Dainty Flowers DSP
Accessories:  2021-2022 In Color Opal Rounds, Brushed Brass butterfly, 3/16 Mossy Meadow braided trim (retired), Double oval punch, Dimensionals.


Saturday, September 18, 2021

Nature's Beauty Thank You Slide and Lock Card

 Oh My!  I'm in love with the Blackberry Bliss DSP, and I'm wondering why it took me so long to order it.  After it arrived by UPS last week I have been waiting anxiously to free up time so I could make some cards.  So, today was that day!

When I showed this card to my son, he described it as "elegant" and he doesn't often use that word.

The card is a gate fold card, with a Slide and Lock mechanism.


The  4 by 5 1/4" Basic Black card base is scored at 2 1/8" at either end to form a gatefold card. At one of the ends I trimmed off a tiny sliver to allow room for the sliding mechanism.

On both front panels are adhered Blackberry Bliss DSP matted with Rich Razzelberry card stock.
Measurements on the left panel:  Cardstock 2 by 5 3/8"  DSP 1 7/8 by 5 1/8"
Measurements on the right panel: Cardstock 1 7/8 by 5 3/8"  DSP 1 5/8 by 5 1/8"


On the inside is added a piece of Rich Razzelberry card stock 4 by 5 3/8" layered with a 3 7/8 by 5 1/8" piece of Basic White card stock.

The Slide and Lock Mechanism is created using 3 Basic Black oval die cuts using the 3" Layering Oval die,  the top of which is decorated with embellishments and ribbon and an embossed image. Two of the three Basic Black oval die cuts are scored at the mid point on the long axis, folded and burnished well. The third is added to the back of the image piece.


On a separate piece of Basic White card stock, I applied Rich Razzelberry ink using a blender brush.  The silhouette of the Cone Flower from Nature's Harvest was embossed with Black embossing powder on this background.  This image was die cut with a 2 7/8" oval die, matted with a slightly larger Basic Black die cut and finally with a Gold Foil oval die. A sentiment from the same stamp set is added near the bottom, as well as a bow made with the 3/8" Berry Burst metallic ribbon (retired).  Brushed metallic dots applied randomly complete this image piece.

The remaining 2 folded die cuts are adhered to the back with the folded ends facing each other and adhesive only applied to one of the halves.  These folds open up like wings and become the sliding mechanism.

Supplies Used:
Stamp:  Nature's Beauty
Inks:  Rich Razzelberry, Blackberry Bliss, Versa Mark, Versa Mark
Papers:  Basic Black, Basic White, Rich Razzelberry, Gold Foil, Blackberry Beauty DSP
Accessories:  Layering Oval Dies, 3/8" metallic Berry Burst ribbon (Retired), Black embossing powder, Brushed metallic dots, Blender brush, dimensionals, glue dots


A Simple Blackberry Beauty Card and a video

 I don't know why I waited so long to get  this gorgeous Blackberry Beauty DSP!  Once it arrived, I couldn't wait to make a card  - and along with that a video tutorial.

The card front consists almost entirely of the DSP, with minimal stamping from the Nature's Harvest stamp set.


                                                                                                                                                  I made the front of the card 2 different ways.  In one I sponged the edges of the DSP with Early Espresso ink; in the other I did not.

Below is a video explaining  how I made the card.


 Below is the card without the sponging.  Although I like it I find the sponging on the edges of the DSP gives the card a more elegant finished look.


Here is the card with the sponging


Supplies Used:

Stamp:  Nature's Harvest

Ink:  Early Espresso

Papers:  Gray Granite, Early Espresso, Blackberry Beauty DSP

Accessories:  3/8" Gold Art Gallery ribbon, Brushed Metallic Adhesive Backed Dots, tombo, Blue dots                                  

Sunday, June 13, 2021

Beauty of Friendship Thank You

 I have a large tree in my back yard which provides shade for my garden, houses squirrels and birds.  In some ways it is my friend.  So, when I saw the "Beauty of Friendship" bundle with its lovely DSP I was excited. I couldn't wait to make some cards!

Here is one of them:


Mossy Meadow goes wonderfully with the Beauty of the Earth DSP  so I selected this as the base colour.  Layered on this is a Basic White layer followed by that lovely DSP from which I selected the base colour.

I decided to use the Bark Embossing folder on a Basic White piece I used to offset the Art Piece. I love the texture created by this folder and is perfect for this card.


The Art Piece is the heart of the card.  On the  Basic White piece, I first stamped the tree structure using Early Espresso ink.  The canopy was stamped one on trop of the other, with two shades of green using 2 different canopy stamps.  The base (less detailed stamp) was stamped with Pear Pizzazz ink; the top stamp (detailed) was stamped in Old Olive ink. To ground the tree, the base was also stamped with Early Espresso.  I used the "splotch" stamp to randomly stamp Crumb Cake ink around the tree and then used the Crumb Cake ink to sponge the edges. 


Before adding the art piece to the card front, it was matted with Early Espresso Card stock, and some braided Mossy Meadow trim, tied into a bow, was added below the canopy.

On a separate piece of Basic White I sponged some Pacific Point and Crumb Cake in a small area and die cut the birds. A fine tipped black pen added some tiny eyes on each bird.

One bird was added at the base of the tree using a small dimensional.  The other was perched on the sentiment which I placed side ways along the art piece.

Supplies Used:

Stamp:  Beauty of Friendship

Inks:  Early Espresso, Pear Pizzazz, Old Olive, Pacific Point, Crumb Cake, Fine tipped black pen.

Papers:  Mossy Meadow, Basic White, Early Espresso, Beauty of the Earth DSP

Accessories: Mossy Meadow braided trim, Beautiful Trees dies, Dimensionals, glue dots, Bark Embossing folder

.  


Thursday, February 4, 2021

Hydrangea Thank You note cards

 The lovely Hydrangea stamp and DSP was used to make a collection of customer Thank You notes. 


On a separate piece of WhisperWhite card stock I stamped the entire flower first using Black Memento ink. Using the solid stamp, the flower head was stamped - one in Gorgeous Grape, the other in Highland Heather and the third in Rocco Rose . 

The solid stamp , and Old Olive ink, was then used to stamp the leaves.


The entire flower was then die cut using the Hydrangea Die and adhered to the Note Card towards the right edge.

The sentiment was stamped with Gorgeous Grape ink, under the flower near the bottom of the card.

To finish the card a strip of the Hydrangea Haven DSP was added to the left edge,  and three pastel pearls were randomly added to the front.

Stamping was also done on the envelope and a narrow strip of DSP was added to the flap.

Supplies:
Stamp: Hydrangea Haven
Inks: Gorgeous Grape, Highland Heather, Rococco Rose, Old Olive
Papers:  Whisper White Note Card & Envelope, Gorgeous Grape, Hydrangea Haven DSP
Accessories:  Hydrangea Dies, Pastel Pearls


Friday, January 29, 2021

Art Gallery Slim Line Card - Try Stampin' on Tuesday #491

 I love making Slim Line card, and I adore the new Art Gallery bundle and its coordinating DSP. So I couldn't resist using the DSP on a Slim Line card for the sketch challenge with Try Stampin on Tuesday #491 As well I added the butterfly from "A Touch of Ink", giving it the water colour treatment. I used a different technique with the butterfly and the humming bird to give them a water colour look (see end of post)


Stamps:  Art Gallery, A Touch of Ink

Inks:  Night of Navy
Butterfly:  Night of Navy, Poppy Parade, Balmy Blue


Dimensions;
  • Thick Whisper White 7 by 9" scored at 3 1/2"
  • Night of Navy Card Stock 8 3/4 by 3 1/4"
  • Fine Art Floral Designer Series Paper 8 1/2 by 3"
  • Night of Navy 3 by 3" adhered to an Adhesive Sheet to die cut sentiment
  • Whisper White 4 by 4" for Butterfly and Hummingbird (on inside)
  • Night of Navy card stock 1/4 by 3" - strip near bottom


Accessories:
  • Floral Gallery Dies
  • Gilded Leafing
  • Gilded Gems
  • Dimensionals
Inside:


Techniques:


Both the butterfly and humming bird were stamped using the stamparatus.  The detailed image was first stamped with Black Memento ink on Whisper White (although watercolor paper could be used). Various colours of ink were applied directly to the solid counter part image using finger daubers, spritzed with water,  and then stamped directly over the detailed image. This gives a water colour look.
The colours did go outside the stamped lines, but when the butterfly and hummingbird were fussy cut this was not an issue.


Gild Leafing was applied to some of the butterfly.  Some glue was applied with the fine tipped glue pen, allowed to get tacky, and then the gild leafing was applied

Wednesday, June 24, 2020

Single layer Thank You card -Hand Stamped Sentiments #342

As I have mentioned frequently I don’t participate in colour challenges- usually.... Unless the colours speak to me, which of course is unscientific and cannot be proven.  However, I’m sticking to my story.

The colour challenge at Hand Stamped Sentiments #341 is for the following colours: Pool Party, Mint Macaron, Bermuda Bay. Did you picture ferns?

Using those colours I decided to do a technique I haven't done for a while - clear block stamping.


A "D" block, inked with Pool Party ink, is spritzed lightly with water and stamped onto a 3 3/4 by 5" piece of Whisper White towards the top half.  After it was dry, two images from "Forever Fern" were stamped over this background - the larger one with Bermuda Bay; the other with Mint Macaron. Some Bermuda Bay "dots" were added to the background - another stamp from the Forever Fern stamp set. The sentiment, stamped in Bermuda Bay, is from "Positive Thoughts"

To fit in with the colour scheme, a 1/4" Whisper White ribbon is coloured with a Bermuda Bay Stampin' Blend, tied into a bow and added at the junction of the two stems with a glue dot.


This Whisper White layer is matted with Mint Macaron card stock, and this in turn is added to a Bermuda Bay card base.


Supplies Used:
Stamps:  Forever Fern, Positive Thoughts
Inks:  Pool Party, Bermuda Bay, Mint Macaron, Bermuda Bay Stampin' Blend
Papers:  Bermuda Bay, Mint Macaron, Whisper White
Accessories:  D Block, Spritzer with water, 1/4" Whisper White ribbon

Tuesday, February 4, 2020

Ladybug stamp floral Thank You - Tutorial

This thank you card was made using the  Little Ladybug stamp set, without the Ladybugs!  I used just the flowers which I coloured with Stampin Blends and die cut with the new Ladybug dies.


A Tutorial in PDF format can be downloaded using this link

Monday, January 27, 2020

Floral Essence Thank You Notes

These are Thank You notes made using the Floral Essence stamp set with the sentiment from Peaceful Moments.
All are stamped on Whisper White card stock with the image inside a rectangular embossed frame. A different colour of ink was used for the flower of each card. The image piece was matted with a similar colour of card stock or DSP. The frame is embossed with the Stitched So Sweetly Die using the embossing mats.

Centers of flowers filled with Black or Gold Prills

Colours of Rhinestones used were as close as possible to the ink colour.  In some instances they were coloured with Stampin' Blends.


Card 1:
Inks:  Poppy Parade, Mossy Meadow, Black Memento


Card 2:

Ink:  Blueberry Bushel, Mossy Meadow.  Matted with Blueberry Bushel DSP


Card 3:

Ink:  Rich Razzelberry, Mossy Meadow.  Image matted with Peaceful Poppy DSP


Card 4:

Inks:  Blackberry Bliss, matted with Blackberry Bliss card stock


These note cards came together very quickly so would be ideal for mass production

Wednesday, January 8, 2020

My Meadow Thanks - Try Stampin on Tuesday #439

It's hard to pick a favourite stamp set in Stampin' Up's new Mini Catalogue and "My Meadow" right now  is at the top.  This is the stamp set used to make the card for the sketch challenge at Try Stampin' on Tuesday #439 which has an optional theme of "thank you"


On a piece of Whisper White card stock, I used the various stamps from the "My Meadow" stamp set to create the above scene- an early spring morning in the meadow with some ground fog.

I started with the bridge, added a stream under it, and some grass on the banks, and then some trees on both sides of the banks.  Randomly stamped grass on the banks and around the tree bases provide some interest and texture. Tulips stamps on top of the grass add a bit of colour as do the blossoms on the trees. Some green is also stamped on the tree tops because it is Spring and leaves emerge after the blossoms fall off.


The bridge over the stream has as a gravel path leading up to it. Behind you can see a glimpse of a body of water. Early morning fog can be seen creeping over the landscape.


Some clouds, and birds finish the scene.

The art piece is matted with Early Espresso before being added to the card front with dimensionals.

The sentiment from Peaceful Moments, is stamped with Early Espresso on Whisper White, matted with Early Espresso card stock and mounted at the bottom of the art piece with dimensionals.


Two banners notched at one end are adhered to the Old Olive card base behind the lower art piece. One banner is Calypso coral card stock the same colour as the flowers, and a larger one is Early Espresso card stock.  A green gem is added to each notched end.

Supplies Used:
Stamps:  My Meadow Peaceful Moments
Inks:  Early Espresso, Balmy Blue, Mossy Meadow, Calypso Coral, Basic Gray
Papers:  Old Olive , Early Espresso, Calypso Coral, Whisper White
Accessories:  Dimensionals, Green gems (non SU)

Sunday, November 10, 2019

Winds of Change - a Free Tutorial

My birthplace is in the Netherlands, a land well known for its windmills.  I

 was a young girl of 6 when I came to Canada with my parents and 2 siblings, and have only been back to the country of my birth once. But I remember the windmills.

The stamp set "Winds of Change" in the annual catalogue, immediately caught my attention, but I waited until after my craft show before getting it. Here's the  first card I made.

The tutorial is free.


Stamp:  Winds of Change, Sailing Home
Inks:  Black Memento
          Sky:  Seabreeze Spray, Balmy Blue, Blueberry Bushel - apply with Brayer
          Windmill:  Crushed Curry, Soft Suede and Early Espresso watercolour pencils, blended with a             blender pen
          Tulips:  Lovely Lipstick watercolour pencil and Stampin' Blend, Old Olive, and Garden Green
Papers:

  • Lovely Lipstick 4 1/4 by 5 1/2" scored at 4 1/4" to make an A2 top folding card base
  • Lovely Lipstick 3 1/2 by 5" - mat for focal image
  • Whisper White 4 by 5 1/4" (2 Pieces) - one to layer on front card base  and other  inside
  • Whisper White 3 1/4 by 4 5/8"  - mat for focal image
  • Whisper White 3 by 4 3/8"  - focal image
  • Lovely Lipstick DSP 1 1/4 by 5 1/4" - to adhere across 4 by 5 1/4" Whisper White
  • Lovely Lipstick DSP 1/4 by 4" to adhere to inside piece of Whisper White
  • Lovely Lipstick card stock 1/8" by 4" to adhere next to DSP on inside Whisper White
Accessories:
  • Brayer
  • Blender Pen
  • Glitter Crystal Effects
  • Dimensionals
  • Post it note for masking
Putting the Card Together:
  1. Fold Lovely Lipstick card base and burnish fold with a bone folder.
  2. Mat with 4 by 5 1/4" piece of Whisper White which has 1 1/4 by 5" piece of Lovely lipstick DSP adhered horizontally across the middle.  Set aside this completed card front.
  3. Stamp image  using Black Memento onto 3 by 4 5/8" piece of Whisper White card stock. Stamp image  onto a post it note and  cut out  outline of windmill and silhouette of tulip tops. Adhere it to the stamped image on the Whisper White piece.
  4. With a brayer, apply these colours, Seabreeze spray, Balmy Blue, and Blueberry Bushel starting with the lightest colours near the horizon.
  5. Colour windmill and tulips
  6. Stamp birds from "Sailing Home" stamp set, and sentiment with Black memento ink - in the sky.
  7. Sponge edges of focal image with Blueberry Bushel ink
  8. Mat image piece with 3 1/4 by 4 5/8" of Whisper White
  9. Mat this with 3 1/2" by 5" piece of Lovely lipstick.
  10. Add this to the card front using dimensionals.
  11. Inside:  Adhere strips of DSP and DSP to one  end  of the 4 by 5 1/4" of Whisper White inside piece and adhere to the inside of the card.  Stamp sentiment of choice.
  12. Add Crystal Effects to tulip flowers only.


Wednesday, June 5, 2019

Free As a Bird Corner Pop Up Card

The new Annual catalogue is finally here and finally can display some of the wonderful stamps and DSP as well as ribbons and embellishments.
The Free As A Bird stamp set with its coordinating DSP is one of these gorgeous bundles and I used them to make this Corner Pop Up card.
I have not made this particular fun fold before, but I found several tutorials on You Tube to help me, two of which I found the most helpful here and here
Below is the finished card.


Opened up, this is what the card looks like.  You can see the score lines clearly.


Close up of Left Corner.  The birds are fussy cut from the DSP and mounted on a 1 3/4" Whisper White circle.


Close up of  Right Corner


Close up of bird and flowers on easel.


The card can be folded up for mailing, but an envelope will have to be custom made for it.

Here's what I used: 
  • Thick Whisper White card stock 8 1/4 by 8 1/4" Scored at 4 1/8" turned and scored at 4 1/8" again. Cut lower score line  to center.  Burnish all score lines.
  • Blushing Bride card stock 1 piece 3 7/8 by 3 7/8" cut into 2 triangles
  • DSP - Bird Ballad DSP   1 piece 3 3/4 by 3 3/4" cut into 2 triangles - add this to Blushing Bride card stock triangles and adhere to two upper corners.
  • Blushing Bride card stock 1 piece 3 7/8 by 3 7/8" 
  • DSP - Bird Ballad DSP  1 piece 3 3/4 by 3 3/4"
  • Whisper White 1 piece 3 1/2 by 3 1/2"  - adhere this to DSP and to Blushing Bride and adhere to bottom piece.
  • 3 birds fussy cut from DSP
  • 3 1 3/4" Whisper White circles.  Adhere birds to circles and add to upper triangles
  • Two stitched rectangle pieces formed into an easel
  • Image of bird , 3 flowers and a leaf sprig stamped on Whisper White , coloured with Stampin' Blends, and die cut with Bird Ballad dies.  Arrange on Easel.  Adhere small rhinestones in center of flowers.  Adhere easel to Whisper White base
  • Stamp sentiment on smaller rectangle die and adhere to easel. Add Easel to lower card. Add Bird Ballad trinket above sentiment
  • Tie 5/8" organza ribbon into a bow and adhere below easel.
Stamp:  Free as a Bird
Inks:  Black Memento, Stampin Blends (Calypso Coral, Crumb Cake, Old Olive)
Papers:  Thick Whisper White, Bird Ballad DSP, Blushing Bride, Whisper White
Accessories:  1 3/4" circle punch, Bird Ballad trinkets, Stitched Nested Dies