I’m laying on the couch with my feet elevated. I had foot surgery a week ago and I’m trying to keep the swelling down.
Recuperating can be quite boring so naturally I turned to cards - making cards to be exact. And since Father’s Day is approaching I thought I would make some Masculine cards.
I’m now retired from Stampin Up so I don’t have the latest Masculine stamps so I used some of the stamps and paper I already had.
Below are the three cards I made:
First card:
This is the first time I have used this bundle, consisting of the Legendary Ride stamp set and coordinating dies, and Ready to Ride DSP.
In the card above I die cut the motor bike from the DSP ands added Glossy Accents over the mechanical parts and wheels. Using dimensionals the bike was added to the scenic panel (also cut from the DSP) Behind this panel was a piece of Cajun Craze cardstock which was torn at the bottom. All of this was mounted onto a Basic Black cardstock base
The sentiment was stamped with black memento ink onto Very Vanilla cardstock. Since the sentiment was a single stamp. I cut it into 2 parts after stamping rather than cut the stamp. Each part was matted with Cajun Craze and added to the card front.
Some retired embellishments were added to the card front.
For this card I again use a scenic panel from the DSP. I trimmed it down, sponged the edges and matted it with Basic Black cardstock. At the to I added some natural cord and then added it to the card front with dimensionals.
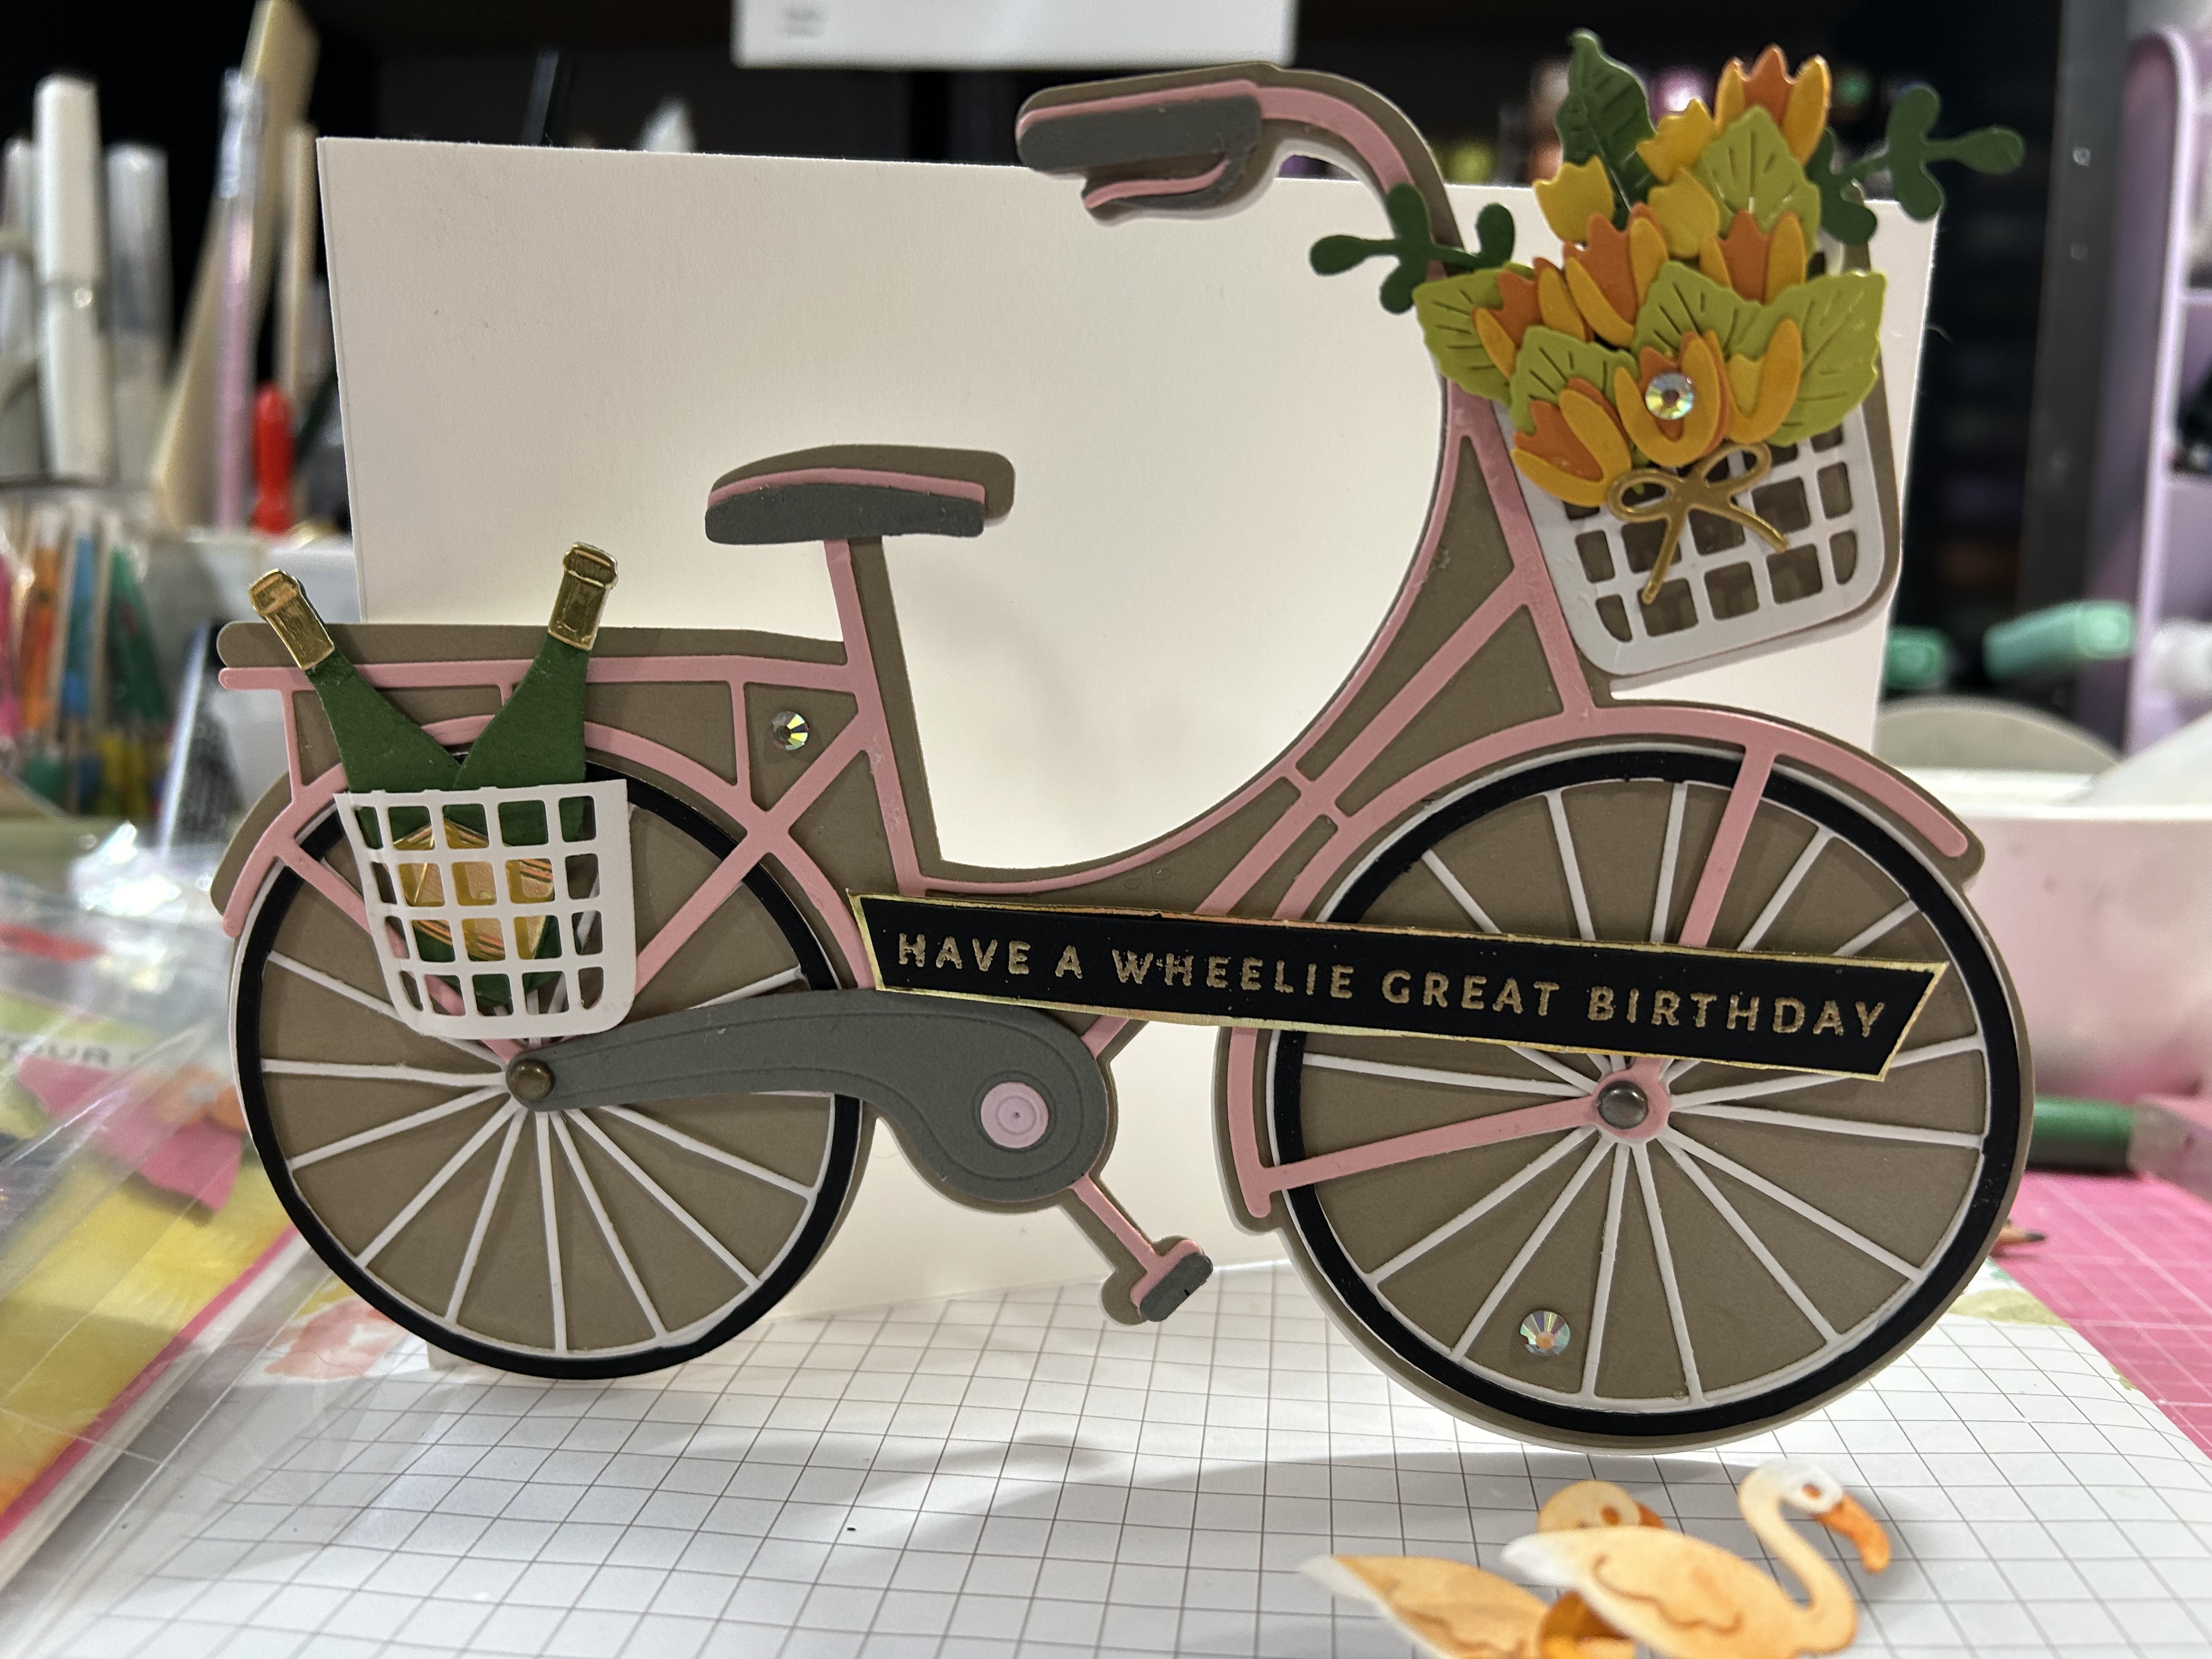
This time I die cut all the pieces for the bike and then assembled it. The basic bike was die cut in Basic Black: part of the fuselage in Basic Gray; the frame and wheels in silver foil; the tires in Basic Black and the seat and wheel covers in Cajun Craze. Once assembled it was added in front of the matted frame using dimensionals.
The card base is Basic Black matted with a piece of DSP.
In this card I stamped two of the smaller bikes and die cut them, adding them to the card front using dinensionals.
The Cajun Craze card front , matted with a oiece of Very Vanilla cardstock embossed with the Metal Hammer embossing folder.
Again I use a map panel cut from the DSP which I trimmed and matted with Cajun Craze cardstock. I cut two strips of DSP which look like tire tracks and added them below the panel. The bikes were added below and beside the panel with the wheels on the “tracks”. I added some “exhaust fire” behind the second bike. I die cut this in Basic White and sponged it with the following inks : Cajun craze, daffodil delight, and real red.
The sentiment was stamped on Very Vanilla , fussy cut, then matted with Cajun Craze cardstock, and added above the second bike using dimensionals


.jpg)