This will be one of the cards to be made in class in a couple of weeks. During SAB my plan is to include a card made with a SAB stamp with each class. So far the "Hey, Chick", Avant-Garden and So Much" SAB stamps have been used. With this class, coordinating the Designer Tee with the Custom Tee stamp makes perfect sense.
The card is like a flip chart. In other words there are 3 shirts on this card, and the cards flip up to reveal a different message. Read the message on the first card, then flip the shirt up to read the message on the second shirt. Finally, open the card to read the message on the third and last shirt.
The Pacific Point card base is layered with a Sparkle embossed Whisper White layer. To the left is a 2" strip of Animal Party DSP, with a 1" strip of Garden Green cardstock adhered to this DSP to the left side.
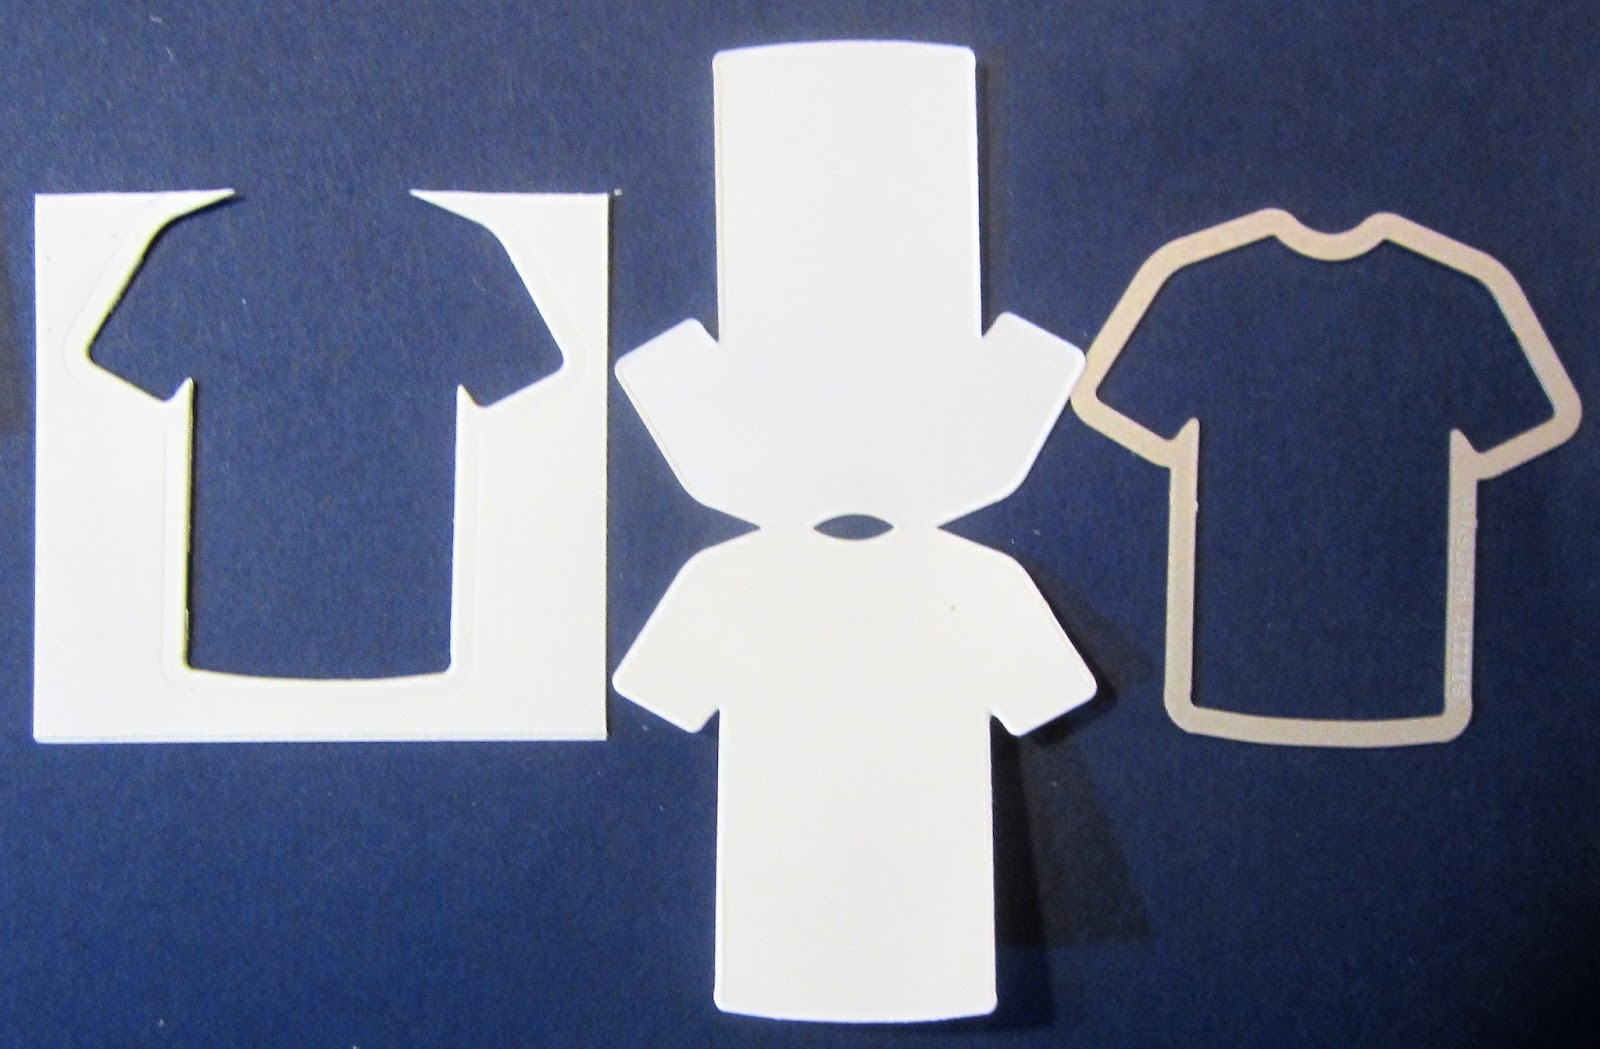
The shirt is two shirts attached at the shoulders. It was made by folding a 3 3/4 by 5 1/4" piece of Whisper in half and placing the shirt framelit with the cutting edge slightly over the fold line.
After running that through the Big Shot, you have a Siamese shirt. See below.
The shirt on the front is decorated with stripes on the sleeves and the hem. This stamped decoration is common to all three shirts. The sentiment on the front "I think I can...." is stamped using the Garden Green and Real Red markers.
The first card is flipped up to reveal a second shirt which has another sentiment stamped in Pacific Point ink. This shirt is adhered, at an angle, to a Whisper White square die cut with the square stitched die and stamped with the Touches of Texture stamp. It is then matted with a Pacific Point die cut square.
This art piece is adhered to the card front using dimensionals.
On the inside the third die cut shirt has the final sentiment stamped on it.
Supplies Used:
Stamps: Designer Tee, Custom Tee (SAB), Touches of Texture
Inks: Black Memento, Pacific Point, Markers (Garden Green & Real Red), Tangelo Twist
Papers: Pacific Point, Whisper White, Party Animal DSP, Garden Green card stock
Accessories: Stitched Shape dies, Tee Builder framelits, Sparkle embossing folder, Classic Label Punch.