Showing posts with label Layered circle framelits. Show all posts

Tuesday, April 4, 2017

Enjoy an Egg-cellent Easter - Try Stampin' on Tuesday or Not #316

For this week's sketch by Donna, with Try Stampin' on Tuesday or Not, I thought I would make an Easter card. After all, Easter is only a matter of week's away. The optional theme?  A burst of color.

I made the central focus of the card a shaker element and placed colorful embellishments around it.


I made the shaker the usual way, using layering circle framelits, and the Sprinkle Embellishments as the "shaker" elements. These elements are from the Occasions Catalogue and come in wonderful Easter colors.

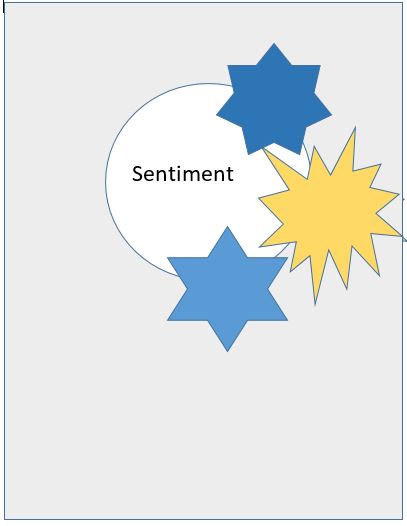
Three different embellishments, all symbols of Easter, surround one side of the shaker.

The first one has an Old Olive pansy flower base with a Daffodil flower adhered to it. This flower was made using the Basket Bunch stamp set, but I chose to fussy cut it rather than using the coordinating framelits.  It was coloured using the new watercolor pencils and a blender pen. I made 3 flowers, and the other two were used to decorate the inside.

On a scallop garden green circle, 5 tiny colorful Easter eggs are added. These are die cut using the Basket Builder framelits because all 5 eggs can be die cut at the same time.

The lower-most embellishment is a Daffodil Delight star on which there  is an Easter bunny holding a basket.

Don't you just love the Easter colors?

Close up of focal point,


Supplies Used:
Stamps: Basket Bunch, Retired SU Easter stamp set (? name)
Inks: Black Memento, Old Olive, Tip Top Taupe, Watercolor Pencils
Papers:Sweet Sugarplum, Whisper White, So Succulent DSP, Daffodil Delight, Old Olive, Garden Green
Accessories: Layering circle framelits, Star framelits, Basket Builder Framelits, Pansy Punch, Sprinkle Embellishments


Tuesday, February 28, 2017

Three Little Cygnets for Easter - Try Stampin' on Tuesday #311

What are Cygnets you might ask?

Cygnets are baby swans, and technically they are covered in a gray down (I had to look this up).

One of the stamps of the "Swan Lake" stamp set features 3 little Cygnet swimming in a row.  They became the focal point for the card I made as a Design Team member for Try Stampin' on Tuesday #311.  I used the sketch made by Vicki          .

And since "Plaid" was optional theme, the DSP I used had a plaid pattern.

You will probably notice that using my artistic license, I coloured the baby swans yellow instead of gray.

I coloured the Cygnets using various colours of ink pads and a blender pen. They were masked in order to add the flowers.

Texture was added to the sky using Marina Mist ink on the dot stamp from Avant-Garden (SAB).

I stamped the sentiment (from Little Cuties) under the little guys, after which I die cut with the stitched circle framelit and using dimensionals, adhered the die cut to a Sweet Sugarplum scallop circle.

The Sweet Sugarplum  base card was layered with Whisper White cardstock embossed with the Hexagon Texturized Embossing Folder. A piece of Succulent DSP matted with Sweet Sugarplum cardstock with a piece of 3/8" ruffled Sweet Sugarplum ribbon wrapped around it was adhered to the left side of the embossed layer.

I love glitter on cards, and this card was no exception.  So, Dazzling Details was added to the flowers and the water under the Cygnets.  As well gold metallic enamel dots was added on both sides of the sentiment.

Supplies Used:
Stamps: Swan Lake, Avant-Garden, Little Cuties
Inks: Black Memento, Marina Mist, Daffodil Delight, Crushed Curry, Flirty Flamingo, Pacific Point, Tangelo Twist.
Papers: Sweet Sugarplum, Whisper White, Succulent DSP
Accessories: Stitched circle framelits, Blender pen, gold metallic enamel shapes, dimensionals, Hexagon dimensional embossing folder, 3/8" ruffled Sweet Sugarplum ribbon, Layered circle framelits, Dazzling details,


So, get out your stamps, paper, and ink, and make a card using the above sketch.  When it is finished, upload it to the Try Stampin' on Tuesday blog or the Facebook page.  You get 2 weeks to create something.  At the end of the two weeks, 3 top picks are selected and posted on the blog and on Facebook.  Who knows, it could be you.

Whether you upload to the blog site or to Facebook, take some time to look at what the design team has created and leave each of them a comment. We all like our work to be acknowledged.

Thursday, February 23, 2017

Bugs & Beetles Get Well Card

I am not particularly fond of bugs, beetles, or anything that flies and buzzes around - with the exception of butterflies.  I was not a child who collected bugs in a jar, instead aggressively removing them from my house whenever I saw them. And some bugs, like the Ash bore beetle needs to be totally exterminated, having done some incredible damage to our Ash trees!

So why would I get a bug stamp set?

Not collecting them does not mean I am not fascinated by them.  In their own environment they are a wonderful. Talk about colour schemes, shapes, etc!! These are not only a means of identification, but also,more important to us, these colours and shapes or more, can be a source in inspiration. In addition I do craft shows and I have customers who would love this subject on cards.

I found the idea for this get well card  on Pinterest .


Confining the bug in a jar appeals to me tremendously, so the Everyday Jars Framelits were a god send. After putting the bug in the jar I immediately put a lid on it. Then it was coloured with markers. The die cut jar was adhered to a stitched Crumb Cake circle with dimensionals and matted with a Soft Suede scalloped circle. This art piece was adhered to the card front.

The sentiment (non SU) was stamped on Whisper White.  It was perfectly paired with the topic for this card.  A couple of flying bugs were stamped below the sentiment. After die cutting and matting the sentiment it was adhered to the card front.

The Soft Suede card base is layered with the striped pattern of the Soft Suede DSP, with a 1" strip of the dot pattern along the left side. A 1/8" stitched Bermuda Bay ribbon was placed over the seam.  This brought a pop of colour to the otherwise monochromatic card.

Supplies Used:
Stamp:  Jar of Love, Sentiment (Class Act Stamps) non SU, Bugs & Beetles
Inks: Black Memento, Basic Gray, SU markers (Bermuda Bay, Real Red, Pool Party)
Papers: Soft Suede, Crumb Cake, Whisper White, Soft Suede DSP
Accessories: Shape Stitched framelits, Layering Oval framelits, Everyday Jars Framelits, 1/8" stitched Bermuda Bay ribbon, dimensionals, Layering circle framelits.

Tuesday, July 26, 2016

Jar of Love Christmas Card - Pal Paper Arts # 310

I'm rather tired today because I spent the night in the sleep lab.  You're supposed to sleep there, but I don't think I slept well and was awake for good at 4 a.m.  So the technician unwired me and I was home by 6 a.m.

Now I wanted to stay up to watch a video on the SU website related to the unveiling of the new Christmas catalogue, but I didn't realize that 8 am. Mountain Time was 10 a.m. Toronto time, so I gave up and went to bed.  I watched the video when I got up.

Feeling a little more awake, I came down to the craft room and made another Christmas card, this time for the sketch challenge with Pal PaperArts 
I've been itching to use the Jar of Love stamp set and coordinating framelits, so I used this as my opportunity to do so.


PPA310 A sketch Challenge
I played around with the sketch a little bit as the focal image is not the round circle but in the shape of a jar instead.
The jar is from the stamp set "Jar of Love", which I just love.  It was stamped with Black Memento and die cut using the coordinating "Everyday Jars Framelits".
Since this is a Christmas card, I wanted to put some Ivy in the jar.  So, I went to the stamp set "Embellished Ornaments" and stamped 2 Ivy images.  I coloured them with a blender pen and ink pads and then cut them out by hand - a bit fussy!!  I put them aside as I prepared the jar.  First I die cut a band that went around the jar from the Christmas DSP, stamped water (Pool Party) in the bottom of the jar, and 2 stems (Old Olive). 

The base card is Cherry Cobbler, layered with a piece of Whisper White embossed with the Boughs & Berrys embossing folder.

Before adhering the Ivy and jar some dots were stamped randomly in the center of the embossed piece with stamped off Cherry Cobbler.

The jar was adhered to the front of the card using dimensionals.  The stems of both Ivy sprigs were lined up with the stems in the jar and adhered directly to the card front.  Then a bow made with 1/8" gold taffeta ribbon was attached to the jar with a glue dot.  Some Cherry Cobbler dazzling details were applied to the Holly.

The sentiment is from the stamp set "Holly Jolly Greetings", and die cut using the Layering circle framelits, and matted with Cherry Cobbler.  It was adhered to the lower left jar with dimensionals.  Three gold metallic enamel stars were placed on the sentiment.

Below the sentiment I placed a retired wooden snowflake.

Supplies Used:
Stamps:   Love Jar, Embellished Ornaments, Holly Jolly Greetings
Inks:Black Memento, Pool Party, Cherry Cobbler, Old Olive, Always Artichoke.
Papers: Cherry Cobbler, Whisper White, This Christmas Specialty DSP
Accessories: Everyday Jar Framelits, Layering Circles Framelits, Boughs & Berry embossing folder, Cherry Cobbler dazzling details, 1/8" gold taffeta ribbon, dimensionals, glue dots, Gold metallic enamel shapes, wooden snowflakes (retired)


Friday, July 1, 2016

Fairy Celebrations - Hand Stamped Sentiments #261

For the sketch challenge with Hand Stamped Sentiments the stamp set "Fairy Celebrations" was used again.


  • The coloured image was die cut with the layering circles framelits and matted with a larger circle of Blushing Bride.  After adhering the two layers together, it was adhered to a white doillie.  This was adhered to two strips of DSP one wider than the other.

  • The basic cardstock was Blushing Bride, with the lower left corder was rounded.  It was layered with Whisper White cardstock embossed with the Sparkling embossing folder
Supplies Used: 
Stamp: Fairy Celebrations
Inks: Black Memento, Blushing Bride, Peek-a-boo Peach, Flirty Flamingo, Sweet Sugarplum, Daffodil Delight
Papers: Blushing Bride, Whisper White, White Doillie, Fruit Stand DSP
Accessories: Layering Circles Framelits, Blender Pen, Wink of Stella clear glimmer brush, triple punch, dimensionals