Showing posts with label Four Petal Punch. Show all posts

Sunday, July 8, 2018

Decorated Gift Box with Paper Flowers - SUO Challenges #203

The challenge this week with SUO Challenges is to make "Anything but a Card", so ---- I made something to put cards in - a decorated gift box.  Not only that, but part of the decoration are 3D flowers made using the new Four Petal Punch.

This box will hold 6 A2 cards with their envelopes, or it can be used to store other precious items.

Below is a close up of the lid and below that the flowers I made:


The box measures 2 by 2 3/4" and is in two parts - a bottom and a lid and is made using 2 pieces of Grapefruit Grove card stock.

Bottom:  
Cut one piece of card stock 8 1/2 by 9 3/4", scoring 2" on all 4 sides.  Burnish folds, then clip at both ends, add adhesive and form into a box.

Lid:
Cut one piece of card stock 6 5/8 by 7 7/8", scoring 1" on all four sides, and form into lid.

Decorating Lid:
Add a 4 1/2 by 5 1/2" piece of Very Vanilla card stock.
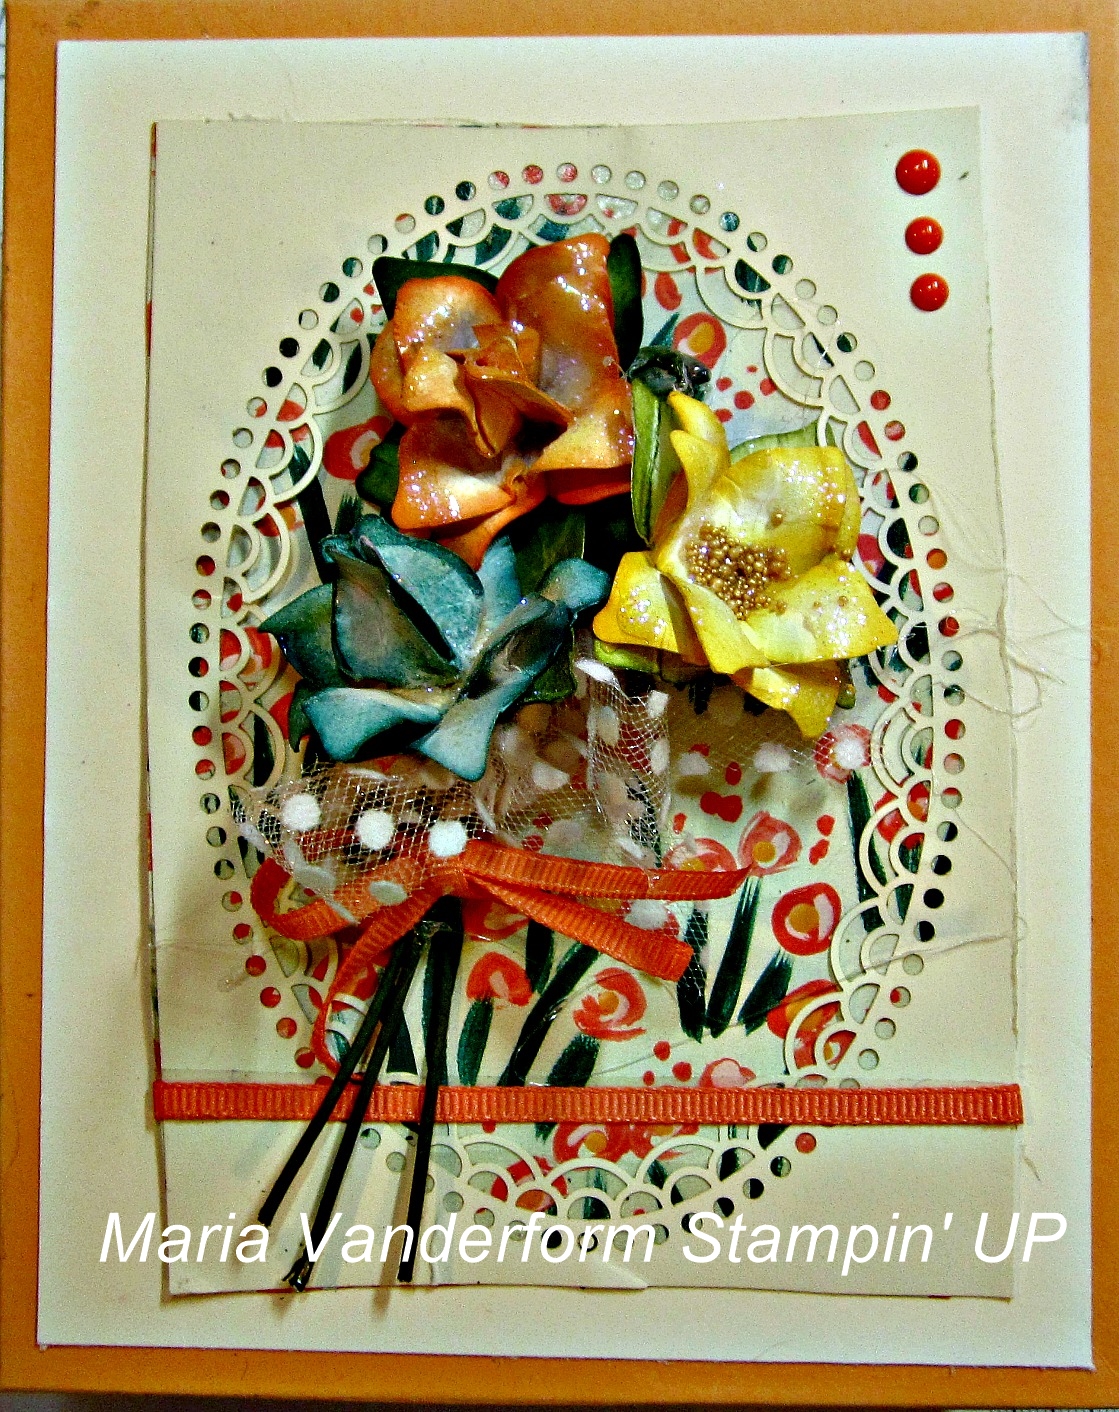
Add the oval frame from the Delightfully Detailed Laser Cut DSP which has some Garden Impression DSP the same size adhered underneath it to this Very Vanilla layer.  Before doing some add some 1/8" Grapefruit Grove Grosgrain ribbon around the bottom.

The Flowers:
They were made in a manner similar to other flowers I had made using punches.  Check out the pictoral tutorial here where I made flowers using the Pansy Punch.
For each flower I punched 3 petals in Whisper White card stock and one in Mossy Meadow.  
Flower 1:  Edges and backs of 3 petals sponged with Grapefruit Grove ink
Flower 2:  Edges and backs of 3 petals sponged with Balmy Blue ink
Flower 3:  Daffodil Delight used.

Each petal was spritzed with water, dried, and then shaped using a shaping tool.  Two of the petals were adhered together alternating petals using tombo glue.  The third petal of one of the flowers was punched between my fingers to form almost a square and adhered into that shape with tombo.  When dry it was added to the flower center.  I added tiny beads to the center of the other two. The completed flower was adhered to the Mossy Meadow petal which was formed into leaves in a similar manner.

Some 3D lacquer (Crystal Effects) was added to each flower and while wet I added Dazzling Diamonds.

Each flower was then added to some floral wire with a hot glue gun.

Some White Tulle Polka dot ribbon was tied around the 3 wires near the flower leaves: some 1/8" Grapefruit Grove ribbon below it.

The bouquet formed was added to the lid using hot glue.

Below is a better close up of similar flowers.


Supplies Used:
Papers:  Grapefruit Grove, Very Vanilla, Delightfully Detailed Laser Cut DSP, Garden Impressions DSP, Whisper White, Mossy Meadow
Inks:  Grapefruit Grove, Daffodil Delight, Balmy Blue, Mossy Meadow
Accessories:  Four Petal Punch, Floral Wire, Hot Glue Gun, yellow beads, 3D Lacquer, Dazzling Diamonds, 5/8" Whisper White Polka Dot Tulle ribbon,  1/8" Grapefruit Grove Grosgrain ribbon


Friday, June 29, 2018

3D flowers made with Four Petals Flower Punch

Making paper flowers from punches is one of my most favourite activities, especially when it is 30 plus degrees outside (with a humidex of 40).

The paper flowers I made today were made using the new Four Petal Flower Punch.  The method of making t he flower is similar to other flowers (see tutorial here) I have made.


For each flower I punched 2 petals in Whisper White and 1 in Mossy Meadow.  Then, using a finger dauber, I applied color to the edges of the Whisper White ones, and Mossy Meadow to the 3rd one.

All 4 were spritzed with water, and when dry they were shaped using a flower forming tool or stylus.  The 3 layers were adhered together alternating petals, after which I applied a 3D Crystal Lacquer and glitter.

The center of each flower was die cut using a retired framelit set.

I had so much fun I made a whole bouquet of them.


Monday, June 18, 2018

Here Comes the Bride

Beautiful You is one of my favourite stamp sets, and this set, "Wonderful Moments" in  the new Annual catalogue is a continuation of that.

One image  I am particularly partial to is the bride.

The bride was black embossed on Whisper White card stock, then die cut with  a layering oval framelit.  This was backed with an off-set Bermuda Bay oval.  Some Bermuda Bay dots were scattered around the bride and the flowers colored with a Bermuda Bay marker.

The background for the bride is some colored Glorious Vellum to mimic a church window. This was placed on a Whisper White layer embossed with the Leaf embossing folder. White polka dot ribbon was adhered to both ends of the stained glass layer,


The vellum flowers around the ovals, were punched using the new Four Petal punch, and before shaping them I colored the edges with a Bermuda Bay blendability. Two were adhered together to form a cluster.  A vellum leaf was also colored, shaped and added underneath each flower cluster. Using the Bermuda Bay blendability I colored some pearls and placed them in the center of each flower.


A 1 " circle punch was used to punch out the sentiment, which was layered with a 1 1/4" Bermuda Bay circle.

Supplies Used:
Stamps:  Wonderful Moments, Timeless Texture
Inks:  Versa Mark, Bermuda Bay, Blendabilities (Bermuda Bay, Pear Pizzazz, Daffodil Delight)
Papers:  Whisper White, Glorious Vellum, Vellum card stock, Bermuda Bay
Accessories:  5/8" white polka dot ribbon, layering oval framelits, Four Petal Punch, Leaf Punch, 1" circle punch, 1 1/4" circle punch, Pearls, Black embossing powder