Showing posts with label Halloween. Show all posts

Tuesday, October 19, 2021

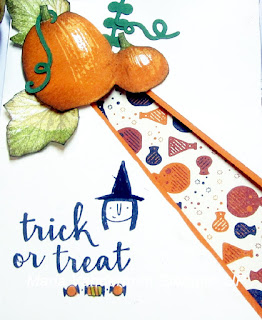
Tombstone Treat box - a partial catalogue case, plus a video

 I must admit my mind went blank when it came to decorating the Halloween Tombstone Treat boxes on Pg. 50 of the July-December Mini Catalogue 2021, so I did something I keep telling others to do - case the catalogue.

The first treat box is below along with a video describing how to put the boxes together and how to decorate this one.


You can watch the video on this blog or on You Tube here


Supplies Used:
Stamp:  Cutest Halloween
Ink:  Pumpkin Pie
Papers:  Basic White, Cute Halloween DSP
Accessories:  Halloween punch, Cute stars adhesive backed sequins, Black & white 1/4" gingham ribbon, 1 treat box (2 pieces)

Other treat boxes made:


Friday, October 15, 2021

Halloween Jam Jar Holder -Catalogue Case

 This Halloween Jam Jar holder  is a case from the July- December 2021 Mini Catalogue on  Pg. 50. 

Since there were no directions from Stampin' Up it took me a few tries to get the box part the right size.  
There are 2 ways this little holder could be made;
1.  With one piece of card stock so the back portion and the box are cut from the same  piece of card stock
2.  In 2 pieces - with the box and back are made separately and then adhered together.
I chose to do the second option.

Measurements:
Box:
Basic Black card stock 4 3/4 by 4 3/4" .  Score 1 1/2 " on all 4 sides.  Make this into a box in the usual way.

Back portion:
Basic Black card stock 2 1/4 by 4". Adhere a 2 1/4 by 4" piece of Halloween DSP to it and then round the corners with a corner rounder punch. Determine which side of the box is the back side, and adhere this piece to the inside of that.

Decorating:
  • Cut 2 pieces of  6 by 1 1/4" black glitter paper, joining the two pieces together.  Trim to 9"
  • Adhere to box ends all the way around box.
  • Use a blender brush to apply Old Olive ink to a 6 by 6" piece of  Cute     Halloween DSP (polka dot pattern).  Cut 2 pieces of 1 by 6".  Adhere together and trim to 1 by 9".  Add on top of  black glitter strip around box.
  • White emboss the sentiment "Trick or Treat" on Basic Black cardstock and die cut with layering circle die.  Layer with a larger Pumpkin Pie scallop circle and ad to box front using dimensionals.
  • Stamp a cat face with Basic Gray ink and punch with the Halloween punch.
  • Adhere to box front at an angle overlapping the sentiment circle.
Jam Jar:
  • Adhere some black/white gingham ribbon  and a bow around the rim of the jar.
  • Die cut a 1 5/8" black glitter circle using the layering circle dies.  Die cut a smaller DSP circle (candy corn) which had been colored with Pumpkin Pie ink.
  • Adhere together and then adhere to top of lid.
  • Fill container with candy.                                                                                                                               


                                                                                                                                                                                                                                                                                                                                                                                                                                                                                                                                    .

Thursday, September 23, 2021

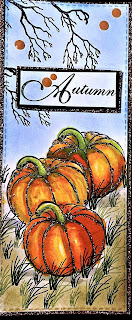
Spooky Pumpkin Patch

 It’s almost October and with that comes Halloween so today I’m making Halloween  cards. The stamps used are from Frog's Whisker's Ink in Campbellford, Ont.


It's a slimline card the base of which is Early Espresso layered with Pumpkin Pie glitter paper (retired).  The art piece itself is Basic white and was die cut with a Tutti Slimline  Stitched stitched die.


Three pumpkins are masked together on a Crumb Cake field.  The sky was was created using blender brushes and Balmy Blue ink.

The following Stampin' Blend colours were used to colour the pumpkins:  Light and Dark Pumpkin Pie, Light and Dark Mossy Meadow.  The grass stamped with Mossy Meadow ink is from the stamp set "High Tide"


The spooky branch is from Stampscapes and was stamped with Early Espresso ink.

After I was finished colouring, I applied Nuvo Golden Sunset drops on the pumpkin and stems.


Tuesday, October 13, 2020

Boo - Try Stampin on Tuesdy #478

 I hope everyone had as wonderful a Thanksgiving.  It certainly was different than usual because of the pandemic. Despite there being only my son and myself, we still had all the traditional Thanksgiving dinner.   

Looking forward to better times for Christmas.

In the meantime we have Halloween to look forward to although I doubt if children will to trick or treating this year. Hand made cards from Grandma will have to suffice.

I made this 'spooky' card for the sketch challenge at Try Stampin' on Tuesday #478.  I used mainly retired SU DSP complementing that with Black Glimmer paper.

I include a history lesson about the role of black cats in Halloween.


The Basic Black card stock base is layered with retired SU DSP that has black cats in various poses in a Pumpkin Pie background.

Here's a little history lesson about black cats and Halloween.


Black cats are a classic Halloween symbol.  They have long served as objects of superstition and associated with witch craft. In Medieval France and Spain, black cats were considered bringers of bad luck and any human that came near them were cursed especially if the black cat crossed their path.

However, in some cultures e.g. the British Isles, black cats were considered a symbol of good fortune, bringing good fortune and affluence to places they resided.  In Egypt they were worshiped as sacred.

So how did black cats get to represent bad luck and spookiness in the United States?  It all started with the Pilgrims in the Plymouth colony.  They distrusted anything associated with witches and sorcery, including black cats.  The belief was that black cats could be disguised as witches. They actively persecuted black cats and it became a practice to burn black cats on Shrove Tuesday to protect the home from fire.

Since then black cats have been cemented in popular legend along with witches on Halloween, and are prominent in decorations especially on front porches. There, their sparkly green eyes add a frightful, unnerving ambience.

Myths surrounded black cats survive into modern times.  We all have heard the following:  It is bad luck if a cat crosses your path; Never turn your back on a black cat or you will be cursed; A black cat on the bed of a sick person will bring about death as well as others.

Black cats are not easily adoptable and there are rumours of their torture around Halloween.


However, black cats make great pets.  I have one.  He's called Inky and he's the most adorable and affectionate pet I've ever had


So much for the history lesson. Back to the card.........


 Three horizontal Black Glitter strips are added to the top over the DSP.  A black banner notched at the bottom end has "BOO" white embossed on it in various directions.

The focal image is a haunted house punched with a 2" circle punch from another retired DSP.  To make the house look spookier, the edges of the circle were sponged with Night of Navy ink and the haunted house painted with Crystal Effects.

It is added to the card front across the banner and over the glimmer strips.


Supplies Used:

Stamp:  Make a Hoot

Inks:  Versa Mark, Night of Navy

Papers;  Basic Black, retired SU Halloween DSPs, Black Glimmer

Accessories:  White embossing powder, 2" circle punch, Crystal Effects

Saturday, September 7, 2019

Globe Christmas Ornament

I have really had a lot of fun making different cards using the Still Scenes stamp  set .  I'll post pictures of them at the bottom of this post. Some are made with the globes, some without, and one with a window sheet in front.

This idea came to me just as I was going to bed last night and I wanted desperately to go to the craft room and make it. But I went to bed and got up early to make these wonderful ornaments.


Below is a 2 sided ornament.  Two globe ornaments were made and then adhered together.  The first picture shows one side; the picture below the other side. The bottom picture shows the side view.

Front

Back

Side view

 Here are some cards made with this stamp set and coordinating dies.

Butterfly and flowers 

Card made with die elements

Stamping only.  No dies

Halloween                  

No globe - window sheet


Sunday, August 25, 2019

Birds of a Feather Shaker

People who know me know that I love to make shaker cards, so when I saw several of these shakers on Pinterest (one done by Dawn) I definitely had to make it.

This shaker is different in that the shaker is in the front of the card and is see through.  The image seen in the shaker is actually on the inside of the card.


Supplies and Measurements:

  • Basic Black card stock 4 1/4 by 11 scored at 5 1/2

  • Basic Gray 4 by 5 1/4
  • Halloween Bash DSP 3 3/4 by 5
  • Basic Black 2 1/2 by 4 to die cut shaker window frame
  • Whisper White 4 by 5 1/4" for inside
  • Scraps of Basic Gray, Pumpkin Pie and Whisper White for sentiment
  • Window sheets (2) 2 3/4 by 4 1/4"
  • Shaker elements
  • Stitched rectangle die
  • Punches - 1" circle, 1 1/8" scallop circle, 1 1/4" circle
  • Halloween Bash enamel elements
1.  Adhere DSP to Basic Gray card stock
2.  Die cut opening for shaker using stitched rectangle die
3.  Use this opening to trace with a pencil the outline of the rectangle onto the Basic Black card front.
4.  Use the same stitched rectangle die to die cut opening into Basic Black card front
5.  Hold Whisper White card stock on inside of card and with a pencil trace aperture 
     shape onto it.  
6.  Remove from inside and colour image using Stampin' Blends.  Stamp sentiment under image.
7.  Adhere to inside of card.
8.  Adhere window sheets over aperture on inside of DSP/Basic Gray and on front of Basic Black         card stock.
9.  Apply strips of foam adhesive around edges of rectangle on card base
10. Apply strips of foam adhesive to outside edges of  DSP/Basic Gray.
11.  Remove tops of adhesive
12.  Add a small amount of shaker element to window on card front. Carefully attach the DSP/Basic Gray piece to the card front centering windows.
13.  Stamp sentiment.  Punch with 1" circle punch, mat with 1 3/8" scallop pumpkin pie piece, and again with 1 1/4" Basic Gray circle.  Add to card front using dimensionals.


Supplies Used:
Stamp:  Birds of a Feather
Inks:  Black Memento, Stampin' Blends 
Papers:  Basic Gray, Basic Black, Halloween Bash DSP, Whisper White, Pumpkin Pie
Accessories:  Stitched Rectangle die, Window Sheet, Adhesive strips, Punches:  1' circle, 1 3/8" scallop circle, 1 1/4" circle, dimensionals, shaker elements

Tuesday, October 24, 2017

Creep it Real - Try Stampin' on Tuesday or Not #345

Halloween is less than 3 weeks away, so this Halloween card made for Challenge #345 at Try Stampin or Not on Tuesday is quite appropriate and was a lot of fun to make.

The sketch is by Kaylin.


The card base of Cajun Craze is layered with Spooky Night DSP.  Towards the left is a piece of Cajun Craze card stock, and the art piece is built on this.

I started by die cutting a branch in Basic Black using the Seasonal Layers Thinlet Dies. This was adhered to a Daffodil Delight moon punched using the 2 1/2" Circle Punch. The edges were sponged with Crushed Curry ink.

An owl (from Spooky Cat) was stamped on a separate piece of Whisper White, fussy cut and adhered on the moon so that it is sitting on the branch.  I stamped 3 bats (from Sweet Home stamp set) onto the moon the up the spooky factor.

At the bottom of the Cajun Craze piece I also stamped some rats (they creep me out!)

Supplies Used:
Stamps:  Creep it Real, Spooky Cat, Sweet Home
Inks:  Black Memento, Smoky Slate, Basic Gray, Crushed Curry
Papers:  Cajun Craze, Spooky Night DSP, Daffodil Delight, Very Vanilla, Whisper White
Accessories: 2 1/2" Circle Punch, Seasonal Layers Thinlets, Dimensionals.

Thursday, October 5, 2017

Gourd Goodness Recess Panel Card

Today I thought I'd try my hand at making a Halloween recessed panel card, using a tutorial found here

The base of the card is Basic Black.  I cut a piece of Wicked Night DSP and Very Vanilla card stock, the same size as the card front i.e. 4 1/2 by 5 1/5". The DSP was adhered to the card base.

The Very Vanilla card stock was cut into 3 pieces at an angle using a template I had made previously.  I used only the 2 triangular pieces, discarding the middle piece. You don't need to have a template, but I find it easier to do so.

Next I cut 2 pieces of Pumpkin Pie card stock, about
1 1/2 by 6".  Each piece was adhered to the inside edge of the two triangular pieces so that  only 1/8" piece of the card stock showed.

Before adhering these pieces to the card front I stamped the sentiment on the right lower piece.

On the reverse side of each piece I placed strips of foam tape adhesive about 1/8" from edges and adhered each piece to the card front.

The embellishment at the top is made of pumpkins and leaves that I fussy cut after stamping.

I also die cut some swirls from the "Pattern Pumpkin Thinlets". 

All were arranged and adhered to a 1 1/4" punched circle and then added to the card top using dimensionals.


Supplies Used:
Stamps:  Gourd Goodness, Creep it Reel
Inks:  Black Memento, Pumpkin Pie, Daffodil Delight, Old Olive, Markers (Basic Black, Pumpkin Pie, Daffodil Delight)
Papers:  Basic Black, Very Vanilla, Pumpkin Pie, Spooky Night DSP, Garden Green
Accessories:  Patterned Pumpkins Thinlets, Dimensionals

Halloween Box in a card

TI'm enjoying making this type of card, and decided to make this one of the class projects next week.  The only difference is that instead of making the little box that fits in the cut out slot, we're going to use the Clear Tiny Treat Boxes as they fit perfectly.

 
The card base is Pumpkin Pie card stock.  A piece of Spooky Night DSP with some Vintage Crochet Trim adhered to the bottom was added to the front.

On the upper left is a stamped image from "Creep it Real" as is the sentiment. Black rhinestones decorate the sentiment.

Notice the spooky black cat with a hat on the upper right.

The treat box is decorated with a strip of pumpkin pie card stock punched with the Ticket Tear Border punch with some vintage crochet trim added to the top of that.  On the lid is a square of Basic Black card stock with a smaller square of DSP.  The insect is non SU.  Some treats are added inside, but one has to be careful not to put too many in the box as it might make the box too heavy.

Supplies Used:
Stamp:  Creep it Real
Ink:  Black Memento, Basic Gray
Papers:  Pumpkin Pie, Very Vanilla, Spooky Night DSP
Accessories:  Lots of Labels framelits, Clear Tiny Treat Box, Vintage Crochet Trim, Ticket Tear Border punch, Black rhinestones, dimensionals.

Thursday, September 14, 2017

Test Tube Treat Holders

New in the Holiday catalogue this year are plastic test tubes with a cork stopper.  They come 12 to a box.  Fill them with candy and they make wonderful treat holders.  A work of caution:  I wanted to fill them with smarties.  The smarties were too large and would not go to the bottom of the test tube.  So, I got smarties crisp and they worked very well.

How to make:
1.  Cut a strip of card stock 3 by 6" scored at 2 3/8, 3, and 3 5/8"
2.  Fold in half at the 3" score line.
3.  Using a pair of paper snips, make a cut 1" from each end on the fold line to the 3" score line.
4.  Push the center portion in to become the holder for the test tube.
5.  Decorate the front - 2 by 2 3/4" card stock layered with 1 3/4 by 2 1/2" of DSP.
6.  Decorate the front as desired.
7.  Wrap a piece of Baker's twine around the top of the test tube and tied at the bottom.


Friday, September 8, 2017

Halloween Cello Treats

My eyes are glued to the TV set again today as Hurricane Irma barrels towards the Florida coast.  I have a dear friend who lives north of St. Petersburg and it looks like her city will also take a direct hit.  She was hoping the Hurricane would veer East and then they wouldn't be affected.

Just last weekend my eyes were again glued to the TV as Hurricane Harvey caused massive epic damage in Texas and Louisiana, with so much rain falling that the earth crust there actually sank by the shear weight of the water.

And now Irma.  Plus two other category 5 Hurricanes are brewing in the Atlantic and Caribbean.

And I just heard that Mexico had an earth quake!

Back to Halloween - not quite so scary this year.

Again I am making Halloween treats in cello bags as they are very popular with my customers. However, I have up dated the toppers, featuring Scary Cat, pumpkins and crazy hats.

Here's a close up of the topper.

I used the new Circle Tab punch to seal the cello bags closed as well as providing a base for the other elements.
The Spooky cats were punched directly from the Spooky Cat DSP using the Spooky Cat punch, and the hat and pumpkins fussy cut from the same DSP.  To neaten up the back, I punched an Oval in Pumpkin Pie card stock and adhered it to the back.

Love that Spooky cat!


Saturday, September 2, 2017

Spooky Cat

The new Holiday catalogue is officially LIVE today.  You can now officially order the products from this publication which is chock full of everything you need for Christmas, Thanksgiving, and Halloween.

This week I am turning my attention to Halloween, and particularly the Spooky Cat Suite. The Spooky Cat DSP, combined with the Cat punch and the coordinating stamp set,has endless possibilities for making  cards and projects.  One of the design page is totally covered with Orange and Black cats, cats that can be punched out using the new Cat punch.

So, I went to town punching out cats, first making a wall swag (a catalogue case as well) by adhering two punched cats together along a strip of Baker's twine.  The resultant décor item will be gracing my book at shows up to Halloween.  Picture to follow.

I had several punched cats left over, but I wanted to use the stamp set as well for this Halloween class card.

This middle cat is punched out of the DSP; one cat is stamped with black memento, and the other card is embossed with white embossing powder.
After arranging the cats on a piece of Very Vanilla card stock, I added a Halloween hat that I had stamped and fussy cut.  This hat had a tiny spider hanging from the tip, but this was so small I couldn't cut it out, so I stamped the spider separately, as well as above the cats, and hand drew the spider strings using a black tiny nib pen.
And what's a spooky card without rats!
This art piece was matted with Basic Black card stock before adding it to the card front using dimensionals.

The basic card is Pumpkin Pie card stock, layered with Spooky Cat DSP.  In the middle is a strip of Very Vanilla card stock which has 2 pieces of black trim (new).

Underneath this strip is a piece of Cajun Craze card stock which nestles the art piece on the left side.

The sentiment was black embossed on a piece of Pumpkin Pie card stock, which was notched at both ends and adhered to the art piece just above the had.

Supplies Used:
Stamp:  Spooky Cat
Inks:  Black Memento, Versa Mark, Pumpkin Pie
Papers:  Pumpkin Pie, Spooky Cat DSP,  Cajun Craze, Very Vanilla
Accessories:  Cat punch, Black embossing powder, White embossing powder, Black lacy trim, Dimensionals.

Here is a partial picture of the cat swag that I cased from the Holiday catalogue.

Each cat has a hat (sounds like a Dr. Seuss book), which I fussy cut from the Spooky Cat DSP.  Yes, there's an entire 12 by 12" page devoted the hats as well.  There are a total of 14 cats on this wall hanging.

Friday, August 25, 2017

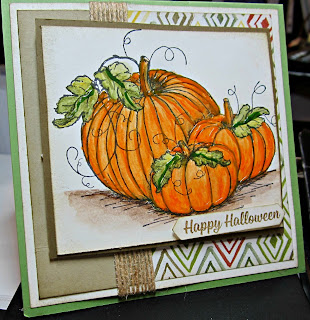
A Trio of Pumpkins Halloween

Today I took a break from making Christmas cards to make a Halloween card, using the Trio of Pumpkins from Rosewood (Frog's Whisker's Ink)

This 5 by 5" square card has an Old Olive base, layered with Whisper White and then retired Halloween DSP (2 patterns).
Before adhering the art piece, I added some Burlap ribbon over the seam of the two DSP's.

The image was coloured with watercolor pencils and an aqua painter.  Some dimensional glitter was added to the pumpkins only.  It was matted with Soft Suede card stock and added to the card front using dimensionals.

Supplies Used:
Stamp:  Pumpkins (Rosewood)
Inks:  Black Memento, Watercolor Pencils (SU)
Papers:  Old Olive, Whisper White, Soft Suede, Halloween DSP (retired SU)
Accessories:  1/2" burlap ribbon, aqua painter, dimensional glitter, dimensionals


Tuesday, October 4, 2016

Haunt Ya Later - The Paper Players #315

What a beautiful day it was today!  The sun was shining and the temperature was in the mid twenties - unusual for October.
I've been having construction done on my house for the last 2 weeks, and today all but one task is completed.
Time now to take part in some challenges.
This card was made for the challenge with The Paper Players The theme this week was Halloween.

 
The Basic Black card base is layered first with Tangelo Twist, followed by Whisper White which has been embossed with the Woodlands embossing folder.

Before embossing, the folder was inked with Marina Mist and Night of Navy and then run through the Big Shot.  After embossing, the trees were lightly sponged with Crumb Cake and a black marker was used to highlight one side of the tree. 

A Raven sitting on the tree limb and some others flying away  were stamped and drawn free hand with a Basic Black marker.

I love cats.  I have a black cat named Mishief - well named I must say.  So, when I saw  this stamp  with a cat wearing a crazy hat and holding a lantern by his tail I just had to use him for this challenge. The image was coloured with a blender pen and markers.  It was then die cut using the Circles Framelits and  matted  with a slightly larger scallop circle in Tangello Twist.  After the image was die cut, I stamped a spider web  in  the upper right and some bats in the upper left.  Both circle edges were sponged with Basic Gray ink.

Supplies Used:    
Stamps:      Cat  with the hat (unknown), Wicked Cool (retired), Among the Branches (retired)
Inks:  Marina Mist, Night of Navy, Black Memento, Crumb Cake, Basic Black marker, Smoky Slate, Basic Gray, Pumpkin Pie, Tangello Twist, Always Artichoke 
Papers:   Tangello Twist, Basic Black, Whisper White
Accessories:   Circle Framelits, Scallop Circle die, Woodlands embossing folder, dimensionals, Dazzling Details.                                                                                                                                                                        
                                  

Monday, October 3, 2016

Have Some Spooky Fun - Fab Friday #97

Most of the construction in my home is finished now and I find myself having time to play and make some cards.  I made this card for the sketch challenge with Fab Friday #97


This top fold card has a base of Pumpkin Pie, layered with Basic Gray and then Halloween Night Specialty DSP.  The later two layers were adhered at a slight angle.
In the middle, I placed a Crushed Curry circle for some whimsical reason became a yellow cat.  In the middle was adhered a skeleton, a Cookie Cutter Halloween critter, who is out trick or treating, I made him a little spookier by giving him googly eyes (retired) He is holding a bag full of loot in his hand.  Two black ravens, hoping for a treat, are following him around.


Supplies Used:
Stamps: Cookie Cutter Halloween, Spooky Fun
Inks: Black Memento, Basic Gray, Crushed Curry, Markers (Pumpkin Pie. Smoky Slate, Crushed Curry), fine black pen.
Papers; Pumpkin Pie, Basic Gray, Halloween Night Specialist DSP, Whisper White, Crushed Curry,
Accessories: Layering Circles Framelits, Cookie Cutter Punch, Classic Label Punch, Googly Eyes (retired), Dimensionals,


Spooky Fun Halloween - Pals Paper Arts #320

I've been so busy getting ready for my craft shows I've had little time to craft just for the joy of it.  Tonight it was Halloween cards, and to my surprise I am enjoying texturizing or grunging the cards.
This card was made for the sketch challenge at Pals Paper Arts
The sketch was wide open - like a lot of the open concept homes I have been seeing on decorating shows, and it allowed me to create what I wanted without boundaries.


ppa-320-sep29 

 The card base is Pumpkin Pie made into a top fold A2 card.  The next layer, Whisper White, was the art layer.

The first thing I did was my favourite thing - sponging and applying texture to the art piece.  The edges were distressed using Basic Gray ink, and the rest of this layer was sponged with Night of Navy and Rich Razzellberry.

The moon was die cut from Daffodil Delight using the Layering circles framelit, sponged with Crushed Curry cardstock and adhered to the left side of the card. The black die cut tree was adhered somewhat in front of the moon, and die cut pumpkins placed underneath it.  Two bats were flying freely in the sky, but above the moon was a bat stamped in black on Smoky Slate, die cut, and adhered using dimensionals.  "Eek" echoed across the sky  Below is a close up.


On the right side I placed a 1/2" strip of pumpkin pie glimmer paper, and a Garden Green banner with the sentiment stamped on it was placed horizontally below the pumpkins.

Supplies Used:
Stamps: Spooky Fun, Timeless Texture
Inks: Basic Gray, Black Memento, Night of Navy, Rich Razzelberry, Crushed Curry
Papers: Pumpkin Pie, Whisper White, Garden Green, Pumpkin Pie glimmer paper, Daffodil Delight, Smoky Slate
Accessories: Layering Circles Framelits, Halloween Edgelits, Dimensionals

Saturday, September 24, 2016

Halloween Twist and Pop Card

This is my kind of card.  I love making it so much I made several bases for the twist and pop card in different colours of cardstock ready to be decorated.  But tonight I made not one, but 2 Halloween Twist and Pop cards. It did take me a long time to decorate, but the process was so relaxing ( I was in the "zone") I hardly noticed the passage of time.


The finished card has a belly band around it, which is secured in the back with velcro.

The card base is Pumpkin Pie, layered with Pumpkin glimmer paper, and then Halloween Night Specialty DSP.  In the middle is a piece of Whisper White which became the art piece.

Here's a better view of the front of the card.

I love the effect of using the Timeless Texture stamp around the edges of the art piece, and using a few other images randomly on the rest of the piece.  It just gives the card a spooky effect.
After spooking the edges, I began sponging, starting with the moon, and gradually adding other colours - Night of Navy, Rich Razzelberry and Pumpkin Pie.  The image of the moon from the stamp set "Spooky Fun" was then stamped over the Crushed Curry area, followed by the witch and a couple of bats. The entire art piece was then embossed with clear embossing powder.

A Basic Black die cut tree adhered to the bottom finished the image piece, except for the sentiment which was black embossed on Whisper White, punched with the Decorative Label punch.  I cut the punched piece in half, sponged the edges black and stamped a few bats on it.  Then it was adhered to the top of the art piece.

The magic comes when the card is opened, and do it gradually for the best effect.

Slowly.....  See it pop and start to twist??


Open more... more twisting..and you begin to see the art work inside.

This was so much fun to design.  I covered the inside of the card, top and bottom with the Halloween Night Specialty DSP, as well as the two outer panels. The two inner panels were 'spooked', using Timeless Texture stamp and die cuts from Halloween Scenes Edgelits.  The fence was cut in half so that it could continue along both the panels.

I did use a retired die "Boo to You" die cut in Pumpkin Pie glimmer paper to use as the sentiment on the upper part.

On the lower part the Lots of Labels framelits die cut in Whisper White and matted with Pumpkin Pie to provide a space to write .  Some stars punched using the Itty Bitty star punch were randomly adhered on the two side panels and the lower sentiment piece.

Supplies Used:
Stamps: Spooky Fun, Timeless Texture, Sweet Home
Inks: Black Memento, Pumpkin Pie, Basic Gray, Rich Razzleberry, Crushed Curry, Night of Navy, Versa Mark
Papers: Pumpkin Pie, Whisper White, Pumpkin Glimmer Paper, Halloween Night Specialty DSP, Basic Black
Accessories: Lots of Labels Framelits, Halloween Scenes Edgelits, Boo to You Framelits, Clear Embossing Powder, Itty Bitty star punch, 1 3/4" circle punch, Velcro (to keep belly band closed)