Showing posts with label Twist and pop card. Show all posts

Saturday, December 3, 2016

Nailed It

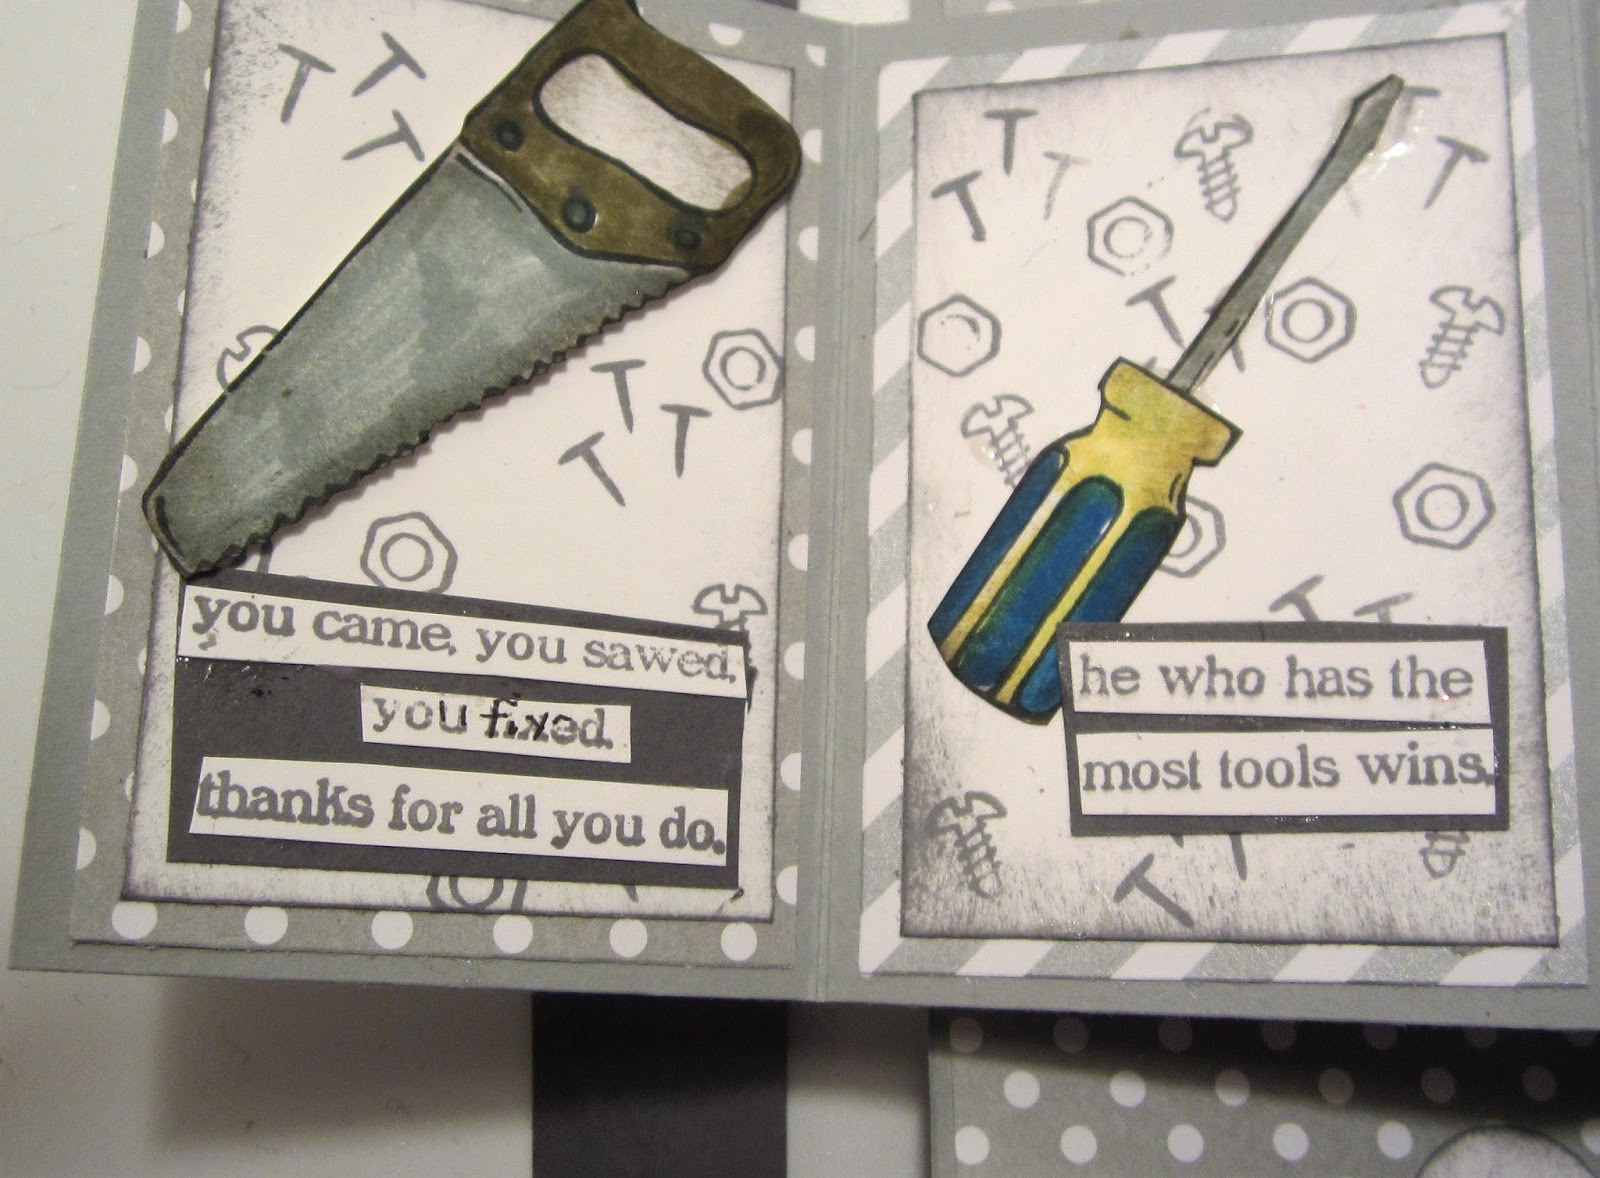
The new Occasions catalogue will be here soon.  Today I made a Twist and Pop card which high lights the new Masculine stamp set "Nailed It"  It reminds me so much of an older stamp set which has a been a favourite of mine for years "Tool Time".  Remember that one?

I did incorporate some images from that retired stamp set into this card.


For the background of the art pieces the smaller images (nails, screws, etc) were stamped randomly using Basic Gray ink. The Timeless Texture stamp set was used as well.  I just love that set!! All edges were sponged with Basic Gray ink.

The images were coloured with markers and then cut out and placed where I wanted them on.
A belly band was used to keep the card closed.  A real screw and bolt  was used as an embellishment on this band.

Supplies Used: 
Stamp: Nailed It, Timeless Texture, Tool Time (retired)
Inks: Basic Gray, Black Memento, Markers (Real Red, Crushed Curry, Smoky Slate, Basic Gray, Crumb Cake, Soft Suede)
Papers:Whisper White, Basic Gray, Smoky Slate, Smoky Slate DSP
Accessories: Labels framelits, 1 3/4" scallop circle punch, 1 1/4" circle punch, 1" circle punch, dimensionals, Clear Wink of Stella glitter, a screw and a bolt.

Thursday, October 13, 2016

Star of Light Pop and Twist Card

My pop and twist cards were so popular at my recent craft show I just had to make some more.  They are a bit time consuming, but that's probably because I fuss.
I've been wanting to use the Star of Light stamp set with it's coordinating framelits, and chose this opportunity to do so.


The card base is 4 by 12 Night of Navy cardstock scored at 6 to make a top fold card.  It was layered with Dazzling Diamond glimmer paper, followed by a retired DSP with emboss resist angled lines in it.  This was sponged with Night of Navy ink.
The art piece in the center is a Whisper White panel, the edges of which are sponged. The galaxy image was stamped with Night of Navy ink, as well as the stars.
The central image is in 4 layers:  The base image is an emboss resist star.  The image was stamped with Versa Mark on Whisper White card stock and embossed white embossing powder.  Night of Navy ink was sponged over the embossed image and then die cut.  A Night of Navy die cut image was placed on top of that, followed by a smaller dazzling diamond glitter paper star die cut.  On the very top is a small dazzling diamond star.  A rhinestone is in the center.
This 3D star was adhered to the image panel on the galaxy image.
The sentiment, embossed with white embossing powder on Night of Navy cardstock, was punched with the Decorative Label punch.  The punched image was cut in half and adhered to the bottom of the panel.
Dazzling diamonds were added to the small stars and the galaxy image for added bling.

Now, this is the fun part - opening the card.  At my craft show, I watched people's faces when the twist and pop cards were opened.  Their eyes popped, their mouth opened and a gasp of pleasure was emitted.


Each panel consists of the following layers:  Dazzling diamond glimmer paper, Night of Navy sponged DSP, and a Whisper White art piece stamped with one or more of the images from the stamp set.

The sentiment in the upper part is white embossed on Night of Navy and matted with glimmer paper.
In the lower part,  Whisper White was die cut using the Labels die and the top and bottom matted with glimmer paper.  The sentiment is stamped in Night of Navy ink.

The card is kept closed with a 1" Night of Navy belly band which is kept closed in the back with velcro.  It is decorated with another white embossed image from the stamp set, punched with the 13/8" circle punch and layered with the DSP and glimmer paper.

Supplies Used:
Stamp: Star of Light
Ink: Night of Navy, Versa Mark
Papers: Night of Navy, Whisper White, Retired DSP, Dazzling diamond glimmer paper
Accessories: Star Light thinlets, rhinestones, Decorative label punch, 1 3/8" circle punch, Layering circles framelits, white embossing powder, dazzling diamonds, velcro (non SU)


Saturday, September 24, 2016

Halloween Twist and Pop Card

This is my kind of card.  I love making it so much I made several bases for the twist and pop card in different colours of cardstock ready to be decorated.  But tonight I made not one, but 2 Halloween Twist and Pop cards. It did take me a long time to decorate, but the process was so relaxing ( I was in the "zone") I hardly noticed the passage of time.


The finished card has a belly band around it, which is secured in the back with velcro.

The card base is Pumpkin Pie, layered with Pumpkin glimmer paper, and then Halloween Night Specialty DSP.  In the middle is a piece of Whisper White which became the art piece.

Here's a better view of the front of the card.

I love the effect of using the Timeless Texture stamp around the edges of the art piece, and using a few other images randomly on the rest of the piece.  It just gives the card a spooky effect.
After spooking the edges, I began sponging, starting with the moon, and gradually adding other colours - Night of Navy, Rich Razzelberry and Pumpkin Pie.  The image of the moon from the stamp set "Spooky Fun" was then stamped over the Crushed Curry area, followed by the witch and a couple of bats. The entire art piece was then embossed with clear embossing powder.

A Basic Black die cut tree adhered to the bottom finished the image piece, except for the sentiment which was black embossed on Whisper White, punched with the Decorative Label punch.  I cut the punched piece in half, sponged the edges black and stamped a few bats on it.  Then it was adhered to the top of the art piece.

The magic comes when the card is opened, and do it gradually for the best effect.

Slowly.....  See it pop and start to twist??


Open more... more twisting..and you begin to see the art work inside.

This was so much fun to design.  I covered the inside of the card, top and bottom with the Halloween Night Specialty DSP, as well as the two outer panels. The two inner panels were 'spooked', using Timeless Texture stamp and die cuts from Halloween Scenes Edgelits.  The fence was cut in half so that it could continue along both the panels.

I did use a retired die "Boo to You" die cut in Pumpkin Pie glimmer paper to use as the sentiment on the upper part.

On the lower part the Lots of Labels framelits die cut in Whisper White and matted with Pumpkin Pie to provide a space to write .  Some stars punched using the Itty Bitty star punch were randomly adhered on the two side panels and the lower sentiment piece.

Supplies Used:
Stamps: Spooky Fun, Timeless Texture, Sweet Home
Inks: Black Memento, Pumpkin Pie, Basic Gray, Rich Razzleberry, Crushed Curry, Night of Navy, Versa Mark
Papers: Pumpkin Pie, Whisper White, Pumpkin Glimmer Paper, Halloween Night Specialty DSP, Basic Black
Accessories: Lots of Labels Framelits, Halloween Scenes Edgelits, Boo to You Framelits, Clear Embossing Powder, Itty Bitty star punch, 1 3/4" circle punch, Velcro (to keep belly band closed)