Showing posts with label Timeless Texture.. Show all posts

Tuesday, July 24, 2018

Lavendar thank you from an Oldie

Yesterday I was selling my stamp sets on-line and came across the Fabulous Flora (retired hostess) stamp set.  What really surprised me was my reluctance to part with some of my sets - well, a lot of my sets.  But I was determined and managed to sell a good number of them.

Back to the Fabulous Flora stamp set.  I couldn't resist one last 'stamp'.  The card is below:

The lavender image was stamped twice and colored with blendabilites.  The background dots were stamped with the Timeless Texture dot stamp. 

Looking at the flowers I realized something was missing.  While sitting in the patio this afternoon and lazily watched a honey bee flit from flower to flower  I realized what it was. A bumble bee.  The flowers needed a bumble bee.  The one on this card  is from "Garden in Bloom"

The image was die cut with the stitched circle framelit, and matted with a Fresh Fig scallop circle. The two were adhered together with dimensionals.

Around this focal image two silver foil doillies cut in half were adhered to the circle.  This unit  was then hadhered to the card front using dimensionals.


The card base of Fresh Fig is matted with a Whisper White layer embossed with the Layered Petals Embossing Folder which was also brayered with Pool Party ink.  On the bottom part is some Tranquil Texture DSP with 1/4" white organza ribbon added to the top

The sentiment is from Hand Delivered.


Supplies Used:
Stamps:  Fabulous Flora, Hand Delivered, Timeless Texture, Garden in Bloom
Inks:  Black Memento, Blends (Highland Heather, Gorgeous Grape, Old Olive, Daffodil Delight, Balmy Blue), Basic Black marker, Pear Pizzazz. Pool Party
Papers:  Tranquil Tide, Whisper White, Tranquil Texture DSP
Accessories:  Layered Leaves Embossing Folder, Brayer, Dimensionals, Silver Doillies,, glitter (non SU), 1/8" white organza ribbon


Friday, May 18, 2018

Animal Outing Thank You - Hand Stamped Sentiments #289

What a beautiful day here in the Kawarthas - with  a lot of sunshine, no humidity and just a hint of a breeze to make it comfortable to work outdoors.

My gardens are slowly taking shape.  The growth of the plants have been absolutely phenomenal, some plants doubling and tripling in size in the last week.  It's a wonder to behold!

For the sketch challenge with Hand Stamped Sentiments I brought in some garden elements while using the Animal Outing stamp set.


I started with an Old Olive card stock base, layering it with a Whisper White layer embossed with  the Woodlands Embossing folder.  I sponged the edges and the top lightly with Basic Gray ink to bring out the pattern in the embossing .

The cute little rhinoceros with a colorful bird on his nose was stamped on a 2 1/2 by 3" piece of Whisper White card stock, matting it with a 2 3/4 by 3 1/4" piece of Old Olive card stock.  I stamped some extra leaves on the upper right, and some texture dots through out the rest of the piece.


The image was colored with Watercolor Pencils and a Blender Pen.  Come Clear Wink of Stella was added to the animal alone.


This focal image was added (using dimensionals) to a 2 by 5" banner of Lots of Lovely DSP matted with Old Olive card stock (which was adhered to the embossed front layer.)  The bottom end was notched using the Triple Layer Punch.


The Classic Label Punch was used to punch out a sentiment from "Rooted in Nature".  This was added to the lower image piece using the small dimensionals.


Supplies Used:
Stamps:  Animal Outing, Rooted in Nature, Timeless Texture
Inks:  Black Memento, Watercolor Pencils, Balmy Blue, Basic Gray
Papers:  Old Olive, Whisper White, Lots of Lovely DSP
Accessories:  Classic Label Punch, Woodland Embossing Folder, Dimensionals, Blender Pen. Triple Layer Punch, Clear Wink of Stella


Wednesday, May 16, 2018

Peaceful Reflection - Just for You - another catalogue sneak peak

This stamp set provided a bit of a challenge for me.  Sometimes it's not obvious how certain stamps of a set work together and this is one of those sets.

After experimenting with various combinations, I settled on this design.


The leaf and stem were stamped first using Old Olive ink, then I two step stamped the flower using Daffodil Delight first followed by Crushed Curry.

Below the flower I stamped three smaller leaves.and  the stem in the water was grounded by  a small eddy.

To add texture and dimension, I used the dot stamp from "Timeless Texture, and stamped "dots" around the plant using Balmy Blue ink (stamped off ).

The Labels framelit was used to die cut the image, and this was matted with green glimmer paper.

The sentiment, from "Root in Nature " was also die cut with the smallest to the label framelits and added to the die cut image with small dimensionals.  A double bow made using the 1/4" white organza ribbon was added at the bottom of the stem.


The base card is Old Olive, layered with Whisper White embossed with the Ruffles Texture Embossing folder. A 2" strip of Delightful Daisy DSP edged with green glimmer paper on both long sides was adhered towards the left of the card front.  A strip of1/4" white organza ribbon was also added.

The focal image was added to the card front using dimensionals.

Supplies Used:
Stamps:Peaeeful Reflection, Rooted in Nature, Timeless Texture
Inks:  Old Olive, Daffodil Delight, Crushed Curry, Balmy Blue
Papers:  Old Olive, Whisper Whit, Daisy Delight DSP, Green Glimmer Paper
Accessories:  Lots of Labels Framelits Ruffles Embossing folder, Green glitter gem, Dimensionals, 1/4" white organza ribbon.

Sunday, June 18, 2017

Beautiful You Pop & Twist

This Pop & Twist card features the "Beautiful You" stamp set as well as "Big on Birthdays"


The base of this card is Tempting Turquoise, layered with Tempting Turquoise DSP.  The art piece shows a large "Happy Birthday" sentiment.  This was accomplished by highlighting each word with a Basic Black marker and stamping each word at a time (the original stamp is one united word).

Three Tempting Turquoise balloons punched with the Balloon Builder punch were adhered to the upper left, and flowers added  to the lower right.

Twist the card open........

Beautiful You is revealed.

Supplies Used:
Stamps:  Beautiful You, Lovely Inside & Out, Big on Birthday, Lots of Love, Timeless Texture
Inks:  Black Memento, Basic Black Marker, Tempting Turquoise, Pear Pizzazz, Crumb Cake, Marina Mist
Papers:  Tempting Turquoise, Whisper White, Tempting Turquoise DSP, Old Olive
Accessories:  Stitched Oval Framelits, Balloon Builder Punch, Blender Pen


Friday, January 6, 2017

Cost Effective Altered Journal for SUO Challenges

The challenge this week with SUO Challenges is to create something using the "stuff" from the Occasions and/or SAB catalogue. Since I had products from both catalogues I decided to use both to alter a journal. Because I sell the journals, I like to keep the cost down as much as possible by purchasing inexpensive journals (and make them look like a million dollars), and decorate them using retired products purchased from the clearance rack plus scraps from my scrap bin.


I purchased this journal from the Dollar store.  Because I like to braid the spine ribbon, I choose journals that have a wire spine.

The front and back cover of the journal were covered with "Carried Away" SAB designer paper, and I used the colours in that paper to decorate the journal. The insides were covered with coordinating Mint Macaron card stock.

Art Piece:
One wonderful thing about this year's Occasion and SAB catalogues is the cooperative interplay between the two.

The DSP from the SAB catalogue features hot air balloons, so naturally the "Lift Me Up" stamp set from the Occasions catalogue, with its coordinating framelits (Up & Away Thinlet dies), was used to create the scene on the front of the journal.

The edges of the Whisper White piece were first distressed with Basic Gray ink using the Timeless Texture stamp set.  Some large and small clouds were stamped randomly on the art piece as well as on separate scrap pieces of Whisper White card stock. The ones on the scrap piece were die cut and placed aside. Once I knew the placement of the hot air balloons, three birds (from "Wherever You Go) were stamped between the clouds.

Three balloons were die cut - the large one with Night of Navy card stock, backed with die cut pieces of various patterns of the SAB Designer paper.  The medium and smaller ones were die cut with the SAB designer paper. Three balloon baskets were die cut with Night of Navy scraps.  One was adhered to the larger balloon; the other two were cut to fit the other balloons.  The edges of the two smaller balloons were sponged with Calypso Coral ink.

After the balloons were adhered to the art piece with dimensionals (except the smallest) the die cut clouds were also adhered with dimensionals among the stamped clouds.

The art piece was matted with Calypso Coral card stock and adhered to the front of the journal.


Decorating the rest of the Journal:
The Tasteful Trim die (retired) was used to cut the Night of Navy trim which was adhered next to the spine, on both the front, back and inside.

The sentiment was punched with the Classic Label punch and matted with a Night of Navy modern word label punchie.

This was adhered to the top of the art piece.

Spine:
Four rows of retired Calypso Coral seam binding was used to braid the spine.  The ends were left a bit longer because I like to attach beads to them.  But because this is a SU only challenge, I used 2 retired Antique brads hot-glued together and to the ribbon end.


Book Mark
As a bonus, I made a book mark using 1/4" strips of the same DSP and the Calypso coral card stock.  These were braided together.  The top was decorated with  2 Calypso Coral and 1 Mint Macaron flowers die cut using the Succulent framelits. The center of the flower was punched in Night of Navy card stock using a 3/4" circle punch.  Before adhering them together with Tombo glue the edges were curled up with a bone folder.
After attaching the flower to the top of the book mark, dazzling details was applied to the edges and center of the flower


Supplies Used:
Stamps: Lift Me Up (Occasions), Timeless Texture (Annual), Wherever You Go (Annual)
Inks: Basic Gray, Calypso,
Papers: Carried Away DSP, Night of Navy, Mint Macaron, Calypso Coral, Basic Gray, Whisper White
Accessories: Up & Away thinlets dies, Succulents framelits dies, Classic Label punch, Modern Word Label punch, 3/4" circle punch, 1/2" Calypso Coral seam binding (R), Antique brads (R), dimensionals, Tasteful Trim die (R), dazzling details.

Tuesday, November 22, 2016

Pop and Twist Birthday Card Using Jar of Love

I'm not quite finished with Christmas yet.  A customer of mine wants me to teach her the Pop & Twist Technique so I thought I would brush up on the technique.  So, I made a birthday card using the Jar of Love stamp set.

I used the video tutorial here although there is a super easy version here

I'm going to use the original version

Stamps: Timeless Texture, Jar of Love, Remembering Your Birthday, Amazing Birthday
Inks: Basic Gray, Sweet Sugarplum, Pear Pizzazz, Black Memento
Papers: Peach Parfait, Whisper White, Sweet Sugarplum, Fruit Stand Designer Paper
Accessories: Everyday Jars Framelits, Layering Circles framelits, Velcro (non SU), dazzling diamonds


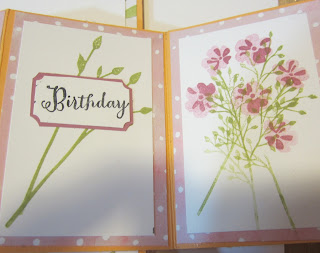
 Here the card is opened to show the various decorated panels, again using the Jar of Love stamp set. Close ups of the panels are below.


Tuesday, August 2, 2016

Thoughtful Branches Merry Christmas

Today I felt like making a Christmas card using the Thoughtful Branches stamp set.  And this Christmas card has lots of sparkle.

On a piece of Whisper White cardstock, I stamped 2 trees in Chocolate Chip ink, and stamped the evergreenery in Old Olive in a 2 step stamping process.
Then I stamped some grass underneath the trees, and with a blender pen added some shadows .
In the sky around the trees, some texture was stamped in Pacific Point ink.  The Timeless Texture stamp set was used for this.  This same stamp set was used to create the texture around the image piece.
Then some dazzling details was added to the trees and the grass underneath the trees.
The birds (blue jays and cardinals) were added using glue dots.

The image piece was matted with Chocolate Chip cardstock, and adhered to the front of the card using dimensionals.

The card base is Chocolate Chip, layered with Whisper White embossed with the sparkle embossing folder.  A 2" strip of Christmas DSP with a 1/4" strip of Red Glimmer paper was added to embossed layer.

The sentiment is from "Versatile Christmas" and is stamped in Real Red, mounted on Real Red cardstock ad notched at both ends.  Both ends were pulled up and adhered to the card bottom using glue dots.

Supplies Used:
Stamps:Thoughtful Branches, Timeless Textures, Versatile Christmas
Inks: Chocolate Chip, Old Olive, Real Red, Pacific Point
Papers: Chocolate Chip, Whisper White, This Christmas Specialty DSP, Red Glimmer paper, Real Red
Accessories: Beautiful Branches thinlet dies, Sparkle embossing folder, dazzling details, dimensionals, glue dots

Sunday, July 31, 2016

Pop of Paradise in a Large Square Double Display Card

This time I think I got the fold right.  It took a couple of tries, but I did it. The fold reminds me of the Triple Fold card.
Again, I used the video tutorial by Dawn here

The base card is Night of Navy, 6 by 12", and was scored and cut accoding to the directions in the video.
On the long side, the cardstock was scored at 1,2,4,5,7,8,10, and 11 inches
On the short side, the cardstock was placed on the 1" mark, and a cut was made from the 1" mark to the 5" mark, and then from the 7"  to the 11" mark.  This was done on both sides of the cardstock.
Making the folds was a bit tricky, but I managed it.  I must admit I stopped and rewound the video several times before I got it right.
Here are the measurements for the cardstock pieces (I used Very Vanilla)
  • one 3 7/8 by 3 7/8" for the center
  • two 2 by 6" for the front
  • two 1 7/8 by 3 3/8"
  • six 17/8 by 7/8"
Use the DSP of your choice for the front, cutting it 1/8" smaller than the cardstock pieces.  I used the Affectionately Yours DSP.

Supplies Used:
Stamps: Pop of Paradise, Timeless Texture, Gorgeous Grunge
Inks: Watermelon Wonder, Crumb Cake, Cucumber Crush, Daffodil Delight, Versa Mark
Papers: Night of Navy, Very Vanilla, Affectionately Yours DSP, Cucumber Crush
Accessories:  1 1/4" circle punch, 1 3/8" circle punch, 1 3/4" scallop circle punch, copper embossing powder

Saturday, June 18, 2016

Happy 2nd Birthday Baby Bear

I played some more with the Baby Bear stamp, and still now happy with the way I'm lining the images up, but I'm getting better.  For this birthday card, I used only 2 colours:  Crumb Cake and Soft Suede (stamped off once).  I used those colours because those are the colours of the teddy bear I got for my 10th birthday.  Unfortunately I couldn't find it, but when I do I will take a picture and put it on my blog post.

  • Base card is Pacific Point, layered with Whisper White
  • I just love the Timeless Texture stamp set and used it to create a background for the baby bear. Then this image piece was matted with Pacific Point cardstock and adhered to the card front.
  • The hand cut out baby bear had its edges sponged with Soft Suede, the eyes and nose darkened with a black marker, and then adhered to the background using dimensionals. 
  • A Pacific Point bow was cut out and adhered to the top of the bear's head.
  • The balloons were stamped using the Balloon Celebration stamp set, and punched out using the coordinating Balloon Builder punch. A line was drawn down from the balloons to the bear's paw using the fine end of black marker.
  • Wink of Stella glimmer brush applied clear gitter to the balloons, the eyes and nose
  • Using the junior alphabet die, the number "2" was die cut using diamond glimmer cardstock and adhered to the bear's tummy.
Supplies Used:
Stamps: Baby Bear, Balloon Celebration, Timeless Texture
Inks: Crumb Cake, Soft Suede, Pacific Point
Papers: Pacific Point, Whisper White, Diamond Glimmer paper
Accessories:Balloon Builder punch, dimensionals, Wink of Stella clear glimmer brush.