Showing posts with label Ornate layering dies. Show all posts

Monday, November 9, 2020

Poinsettia in Red Felt - Color Challenge at The Paper Players #516

 I was surprised today looking at the Calendar that Christmas is less than 2 months away.  The warm weather belies that fact.  Indeed it felt more like May than November as the last several days being around 20 degrees C.  Other years we have had snow on the ground.

One nice thing about the holiday season is making Christmas cards, and I LOOOOOVE making Christmas cards - especially Poinsettia Christmas cards.  And this year's Poinsettia Petals stamp set and coordinating die this year are absolutely gorgeous.

The colours of the challenge at The Paper Players - Real Red, Shaded Spruce, Whisper White and Gold, fit right into my love of Christmas and love of Poinsettias.


Real Red is a perfect colour for Poinsettias, and it is certainly more gorgeous when using Red Felt!

The Red Felt poinsettia flower with a gold foil center, gold foil leaves and gold foil sprigs is adhered to the top of a Whisper White Ornate layer die which has a piece of  Plush Poinsettia Specialty Paper  added to the center.


Two smaller flowers are added below the main flower.

This ornate die is added to the card front using dimensionals.
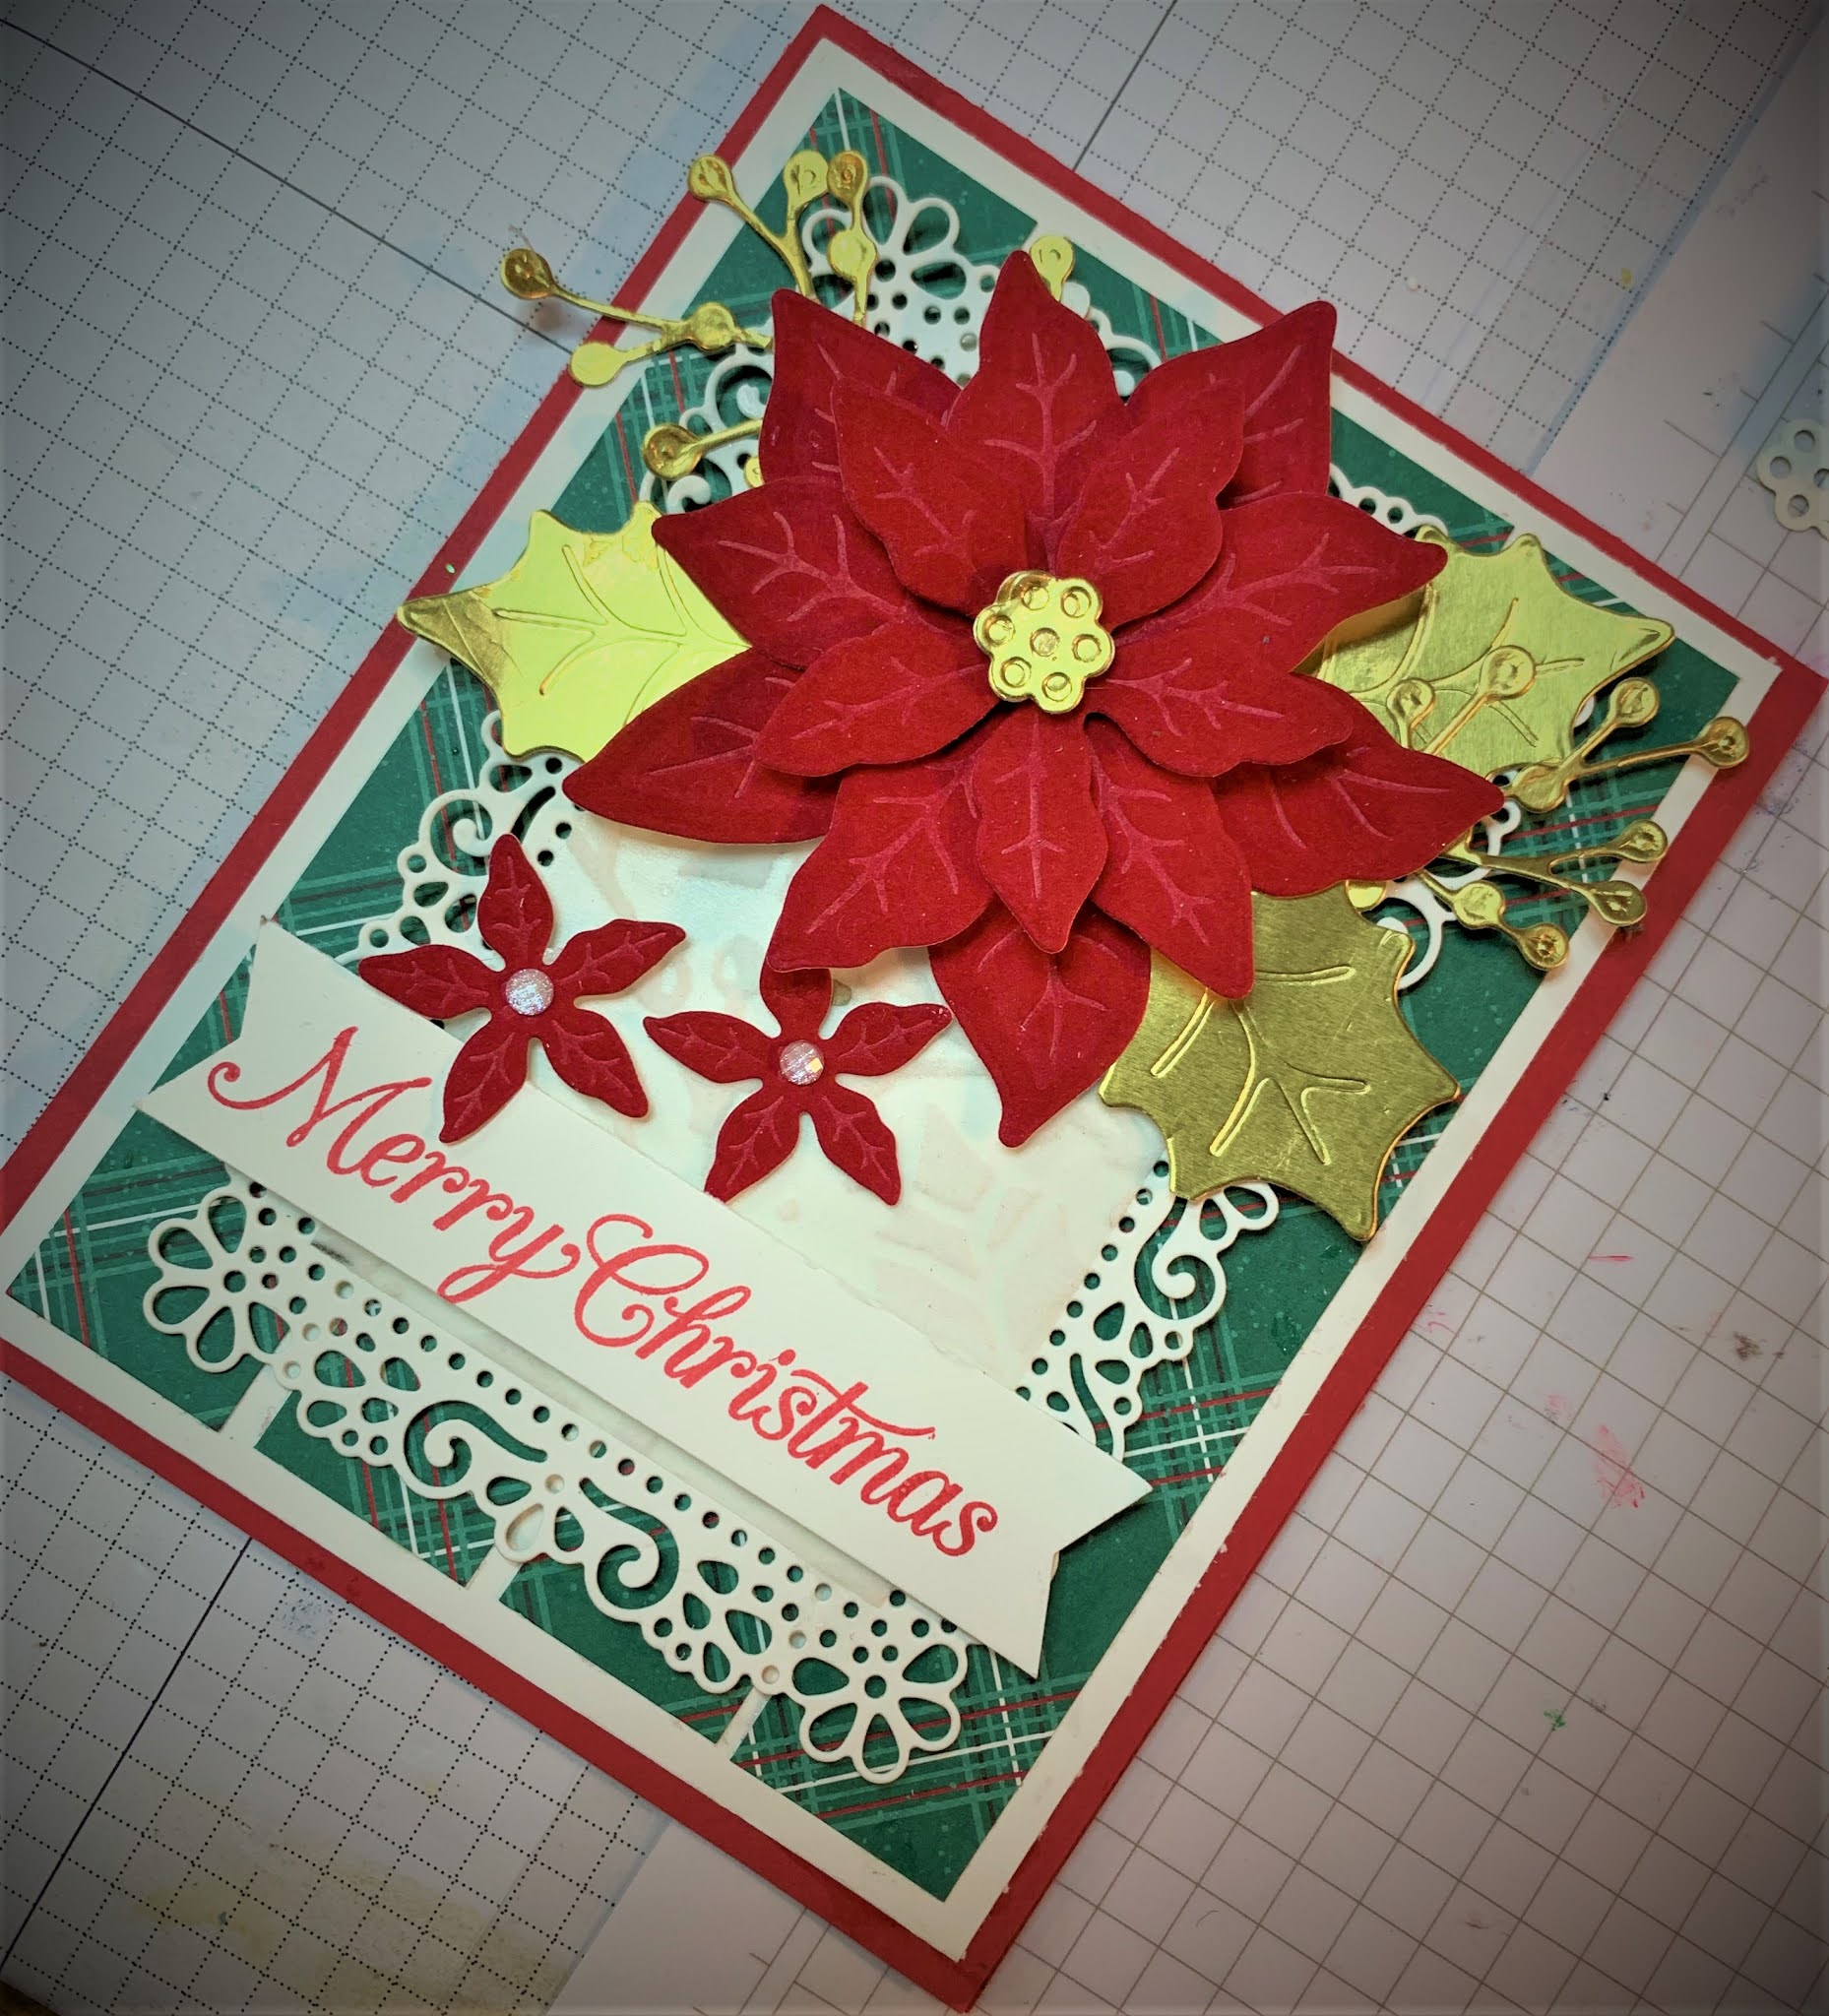

The card front is Real Red card stock, layered with Whisper White.  On top of the Whisper White layer are adhered 4 strips of "Tis the Season" DSP (plaid colours of Real Red, Whisper white and Shaded Spruce).  The focal image is added to the top of this layer.

The sentiment, stamped in Real Red is added to the bottom of the die cut.  Both ends of this are punched using the Banners Pick a Punch punch.

Supplies Used:

Stamp:  Poinsettia Petals

Inks:  Real Red

Papers:  Real Red, Whisper White, Gold Foil, Tis the Season DSP, Red Felt Paper, Plush Poinsettia Specialty Paper

Accessories:  Ornate Layer Dies, Poinsettia Petals Dies, Dimensionals, Banners Pick a Punch Punch, Elegant Faceted Dotsd

Thursday, July 23, 2020

My first Christmas card featuring the Poinsettisa

I love flowers; ergo I love poinsettias; ergo I love the Poinsettia bundle.

Although this bundle has a stamp set and coordinating dies, I chose to use the dies only to make the flower and leaves for this card.


After die cutting the flowers and the leaves, I sponged the edges, using Poppy Parade for the flower, and Garden Green for the leaves.  Each petal was then folded in half with ink added to the fold line.
Two colours were used to die cut the center - the more solid piece was die cut in Daffodil Delight, and the top one which has holes in it was cut in Poppy Parade.  Two sprigs die cut in red glimmer paper were added above and below the flower


The completed flower was adhered to a layered ornate die cut which was added to two different patterns of Poinsettia  DSP.  The sentiment, below the flower is stamped in Garden Green.

The base is Old Olive, layered with Whisper White and then the two patterns of the DSP.  Some sheer Real Red ribbon was adhered where the two patterns met.

Supplies Used:
Stamp:  Poinsettia Petals
Inks:  Real Red, Garden Green
Papers:  Old Olive, Whisper White, Real Red, Daffodil Delight, Red Glimmer, Garden Green, Poinsettia Place DSP
Accessories:  Poinsettia dies, 3/8" sheer Real Red ribbon, Ornate Layer Die, Dimensionals.

Saturday, April 11, 2020

Flower Pot Easel Card

It's spring, and I'm in the mood to make flowers - paper flowers.

So, I grabbed my supplies - punches, inks, daubers, shaping tools, alcohol spritz, adhesives AND my flower pot template which I obtained from Frog's Whiskers ink, a local craft store. For over 2 hours I was lost in a wonderful 'zone', a place where COVID-19 could not reach.

Here's the result:


A Terracotta Tile card base is decorated with the Ornate Garden DSP (small floral pattern).  Old Olive card stock die cut with the Ornate Layer Dies provide a base for Whisper White sentiment pieces.
Various punches were used to make the flowers  and leaves (listed below)

All were punched with Whisper White card stock, and colour applied using finger daubers and various colours of ink.  After colouring, all flowers/leaves were spritzed with alcohol, crumpled, and then straightened a bit and allowed to dry.

Once dry they were shaped with flower shaping tools, adhered together -2 per flower) alternating petals, with tiny beads added to the centers.

The flowers/leaves were then added to the top of the flower pot. Below is a close up of the flowers.


A second sentiment, stamped in Terracotta Tile ink, also matted with Old Olive card stock die cut with the Ornate layering die provides a 'door stop' for the easel. It is adhered to the flower pot base


Two left over flowers are added on either side of the sentiment

This extra large card will close but will need a bubble envelope or box for mailing.


Supplies Used:
Stamps:  Ornate Garden Thanks, Sending Positive Thoughts
Inks:  Terracotta Tile, Flowers (Daffodil Delight, Terracotta Tile, Old Olive, Calypso Coral, Soft Suede)
Papers:  Terracotta Tile, Whisper White, Old Olive, Ornate Garden DSP
Accessories:  Ornate layering dies, tiny beads for flower centers, flower shaping tools
Punches:  Medium Daisy, Small blossom, Medium Daisy, Four Petal Flower, Leaf, Sprig


Monday, April 6, 2020

Morning Star and Ornate layering Dies

The Morning Star stamp set has really been unappreciated. I must admit this set has sat on my shelf for a while - until yesterday when I pulled it down - and couldn't stop stamping.

This set also coordinates with the Stitched Star dies carried over from the Holiday catalogue and is still available to order (#150653 - $52.00)

For this card, instead of measuring and cutting the various layers, the layers are die cut using the Ornate Layering Dies.

Note:  Blueberry Bushel, which is the colour used on this card,  is one of the in-colours that will be discontinued in the end of June, 2020, when the new Annual catalogue comes out.


On a 2 1/4 by 3 3/4" piece of Whisper White card stock, the vines from the Morning Star stamp set, are stamped in Pear Pizzazz,  the Morning Glories in Blueberry Bushel .  The centers of the Morning Glories are coloured with a Daffodil Delight Stampin' Blend, and four tiny stars are randomly stamped with Blueberry Bushel ink.


This art piece is adhered to a Blueberry Bushel Ornate die cut which is then adhered with dimensionals to a Whisper White Ornate die cut.  This is adhered to the Blueberry Bushel card base.


A sentiment is added at the bottom of the art piece.  However, I do not feel this is the best place for the sentiment as it covers up some of the beautiful art work.


You can see all the layers of the card above.

Another die cut whisper White piece is added to the inside with some stamping to match the front.

Supplies Used:
Stamps:  Morning Star
Inks:  Blueberry Bliss, Pear Pizzazz, Daffodil Delight Stampin' Blend
Papers:  Blueberry Bliss, Whisper White
Accessories:  Ornate layers dies, Dimensionals

Friday, April 3, 2020

Morning Star cards

The Morning Star stamp set , up until today, sat on my shelf, neglected.  So, I challenged myself , starting with a simple card while I was getting used to the various images.


I think this is one of my favourite cards, with the Morning Glory stamped in Coastal Cabana with Daffodil Delight added to the center.


Then I stepped up the complexity of the card extending the length of the vines and adding more flowers.  As well as a ribbon , some embellishments were added as well.  The flowers are stamped with Gorgeous Grape ink.