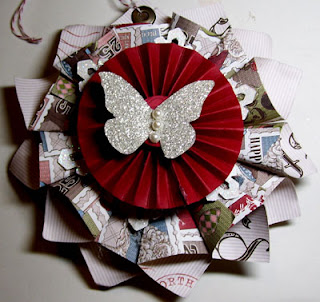
1. Cut 13 pieces of Designer series paper (I used Letters to Santa) 2" by 2"
2. Fold each piece in half and unfold.
3. With a pencil or the handle of a paint brush, roll each piece diagonally. Unroll gently.
4. Fold into a cone shape. Do this for all 13 pieces.
5. Using a hot glue gun, attach each piece to a circle punched with a 1 1/4" circle punch.
See video:
6. Insert a jumbo eyelet in one of the medallions and attach a cherry cobbler and white Baker's twine through it.
7. Using the snowflake die, die cut a snow flake in Whisper White card stock and apply dazzling diamonds.
Attach it to the center of the medallion using stampin dimensionals.
8. Now make the rosette using 1 1/4" by 12" Cherry Cobbler card stock scored every 1/4" on the Simply Scored tool.
9. Attach a 1" circle in Cherry Cobbler punch with the 1" circle punch
10. On top of that attach a Cherry cobbler button.
11. On top of the button attach a butterfly die cut using the Beautiful wings die and silver glimmer paper.
12. Three pearls in the center of the butterfly complete the ornament.
Repeat steps 7 to 12 for the other side of the medallion.
Side view
Close up of Rosette and Butterly
Papers: Letters to Santa designer paper, Cherry Cobbler card stock, Whisper White card stock, Silver Glimmer Paper
Accessories: Punches: 1 1/4", 1"; Dies: Snowflake, Beautiful wings. Other: Scoring tool, Cherry cobbler button, pearls, dimensionals, dazzling diamonds, hot glue gun, jumbo eyelt, cherry cobbler and white Baker's twine.


No comments:
Post a Comment