Showing posts with label Sliding door framelits. Show all posts

Thursday, February 21, 2019

Mr. Ed and friends - SUO Challenge #217

It was really difficult to narrow down a favourite stamp/item from the Occasions and /or SAB catalogues for the SUO Challenge #217 here , and I finally narrowed it down to the horse stamp "Let's Ride".

As I mentioned in my previous post here seeing the horses on this set takes me back to a time when my daughter was young and 'horse crazy'.

For this card, I incorporated the "Sliding Barn Door" framelit and coordinating stamp set with the "Let's Ride" set.

Three horse heads stamped using the Stamparatus were coloured with watercolour pencils and a blender pen as well as Stampin' Blends. Each was fussy cut and the edges sponged.

A window was die cut  in a 4 by 5 1/4" piece of Crumb Cake using the Rectangle Stitched framelit and the horses were placed as above like they were looking out the window. Mr. Ed is the one at the lower front.


Using the Sliding Door Framelits, the door was die cut in Early Espresso and embossed with the Barn Door Embossing Folder.  The sliding mechanism and hardware were die cut in basic Black card stock and attached to the Crumb Cake layer over the die cut window on the left side of the card.  The door looks like it should move but it doesn't.

The 'hello' sign, stamped in Cherry Cobbler ink using the "Barn Door" stamp. was added to the door front.

On the right of the window is attached a piece of Woodgrain DSP

This Crumb Cake layer was adhered to another piece of Crumb Cake card stock using the foam adhesive strips which in turn was added to an Early Espresso card base.

Supplies Used:
Stamps:  Let's Ride, Barn Door
Inks: Black Memento, Watercolour Pencils, Stampin' Blends (Light and Dark Soft Suede, Light and Dark Crumb Cake), Cherry Cobbler
Papers:  Early Espresso, Crumb Cake, Whisper White, Woodgrain DSP
Accessories:  Sliding Door Framelits, Rectangle Stitched Framelits, Foam Adhesive Strips, Woodgrain Embossing Folder

Wednesday, February 20, 2019

Let's Ride

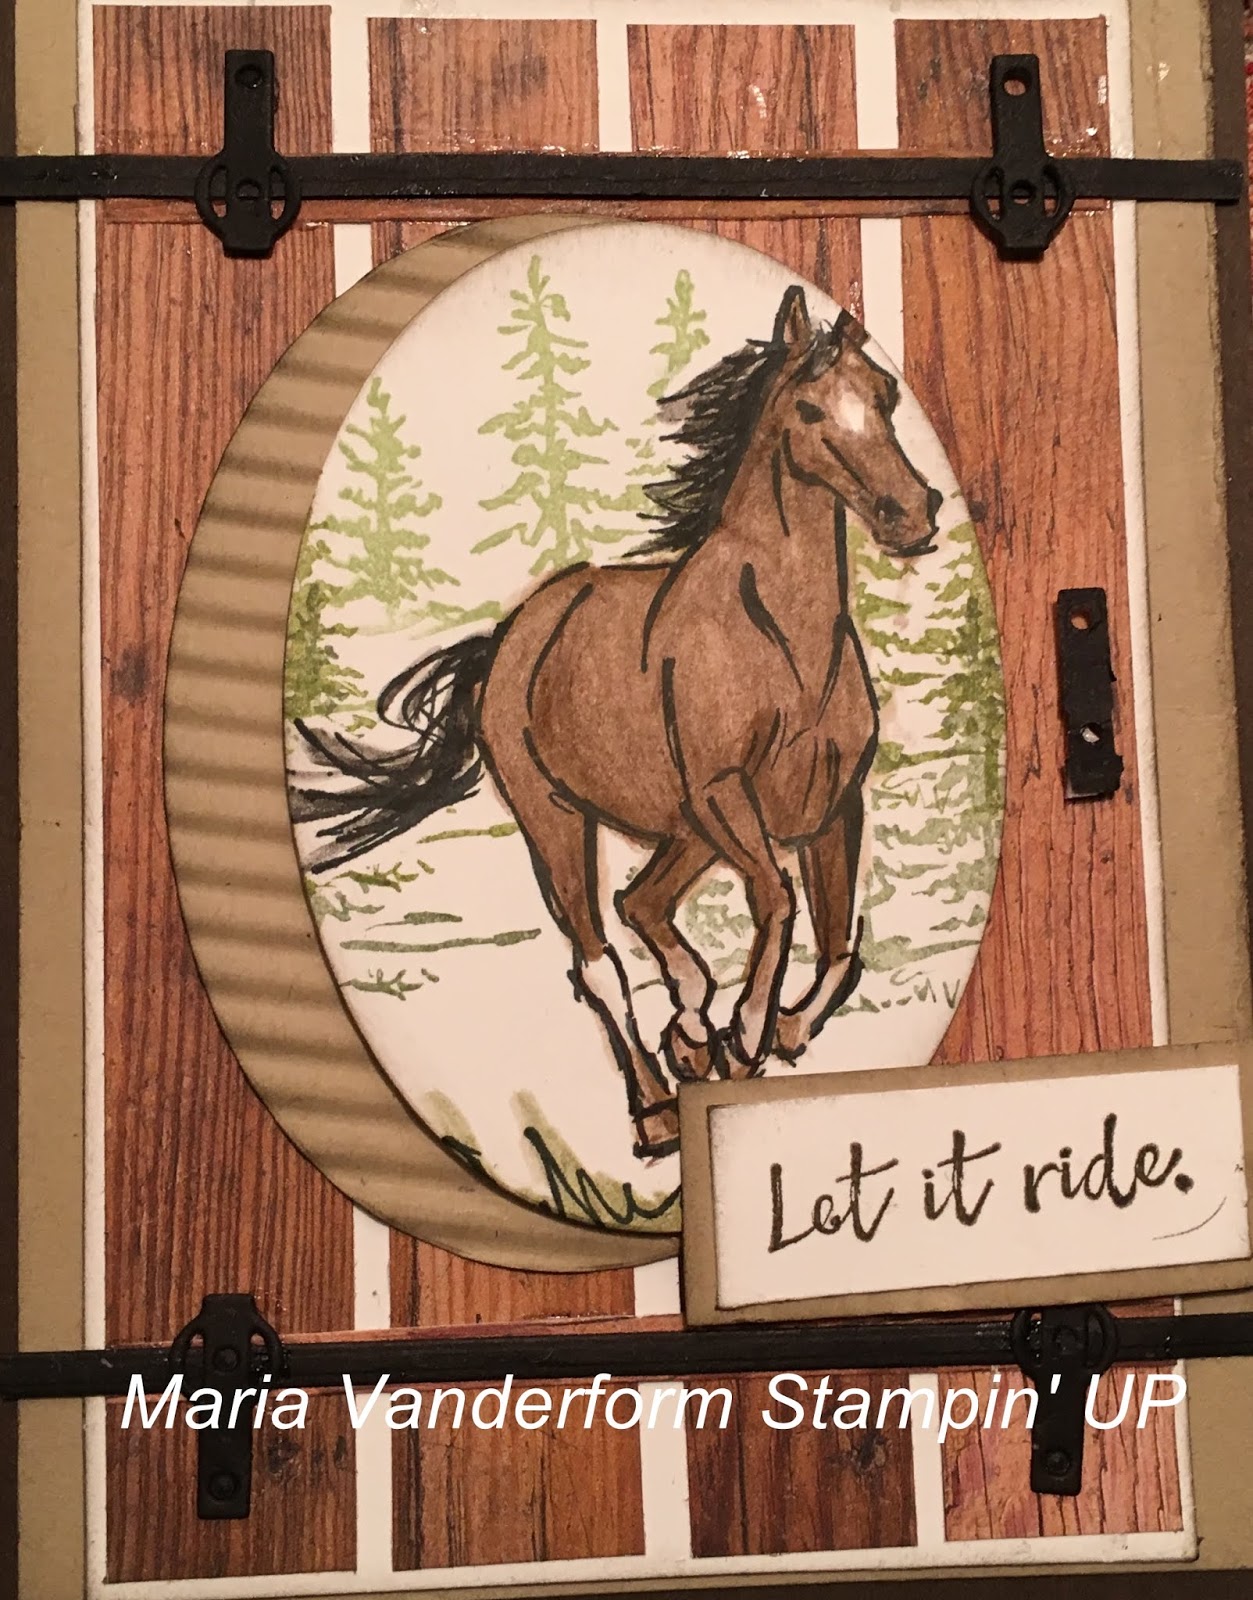
I was thrilled to see the stamp set featuring horses in the Occasions catalogue.

Seeing the horses took me back to an earlier time when my children were young.  My daughter was 'horse crazy'.  She would read books about that animal, and draw them and she was absolutely thrilled when I arranged for riding lessons.

Her special horse was brown with a white star on his head and white socks - and so does the horse on my card today.

The horse was coloured with watercolour pencils and a blender pen, with some areas 'touched up' with a Stampin' Blend.  It was masked so that the trees could be stamped in the background.

An Oval framelit die cut the completed image, which was layered with a crimpled Crumb Cake oval.  The two ovals were off set from each other to give the illusion of movement.


Dimensional were used to adhere this focal image to a 'sliding barn door' background.  This background was created by adhering four 3/4 by 5" pieces of the Wood DSP to a piece of Whisper White card stock and this in turn was adhered to a 4 1/4 by 5 1/4" Crumb Cake layer and then to an Early Espresso card base.

Using the Sliding Barn franelits, the hardware for the bard doors was die cut in Basic Black and adhered to the card front as shown.  The door doesn't actually move, but it looks like it does.


Supplies Used:
Stamp:  Let it Ride
Inks:  Black Memento, Watercolour pencils, Old Olive, Mossy Meadow, Soft Suede
Papers:  Early Espresso, Whisper White, Crumb Cake, Wood DSP
Accessories:  Layering Oval Framelits, Crimper, Sliding Barn Framelits, Dimensionals, Blender Pen

Sunday, January 28, 2018

Sliding Barn Door Birthday

Today I used the Barn Door Stamp with Birthday Wishes to You and Panda Wishes for make a Birthday card.  Now that I've figured out how to make the interactive sliding door I see a lot of  different applications.  Stay tuned for another way to use this stamp and coordinating framelit.


I used the Wood DSP as a backdrop to the door, but because it is not as sturdy as card stock or DSP I adhered it to some copy paper before die cutting the tracks.

My biggest decision was selecting a colour for the door, eventually settling on Calypso coral.  The door is decorated with a Pear Pizzazz wreath with a Bermuda Bay ribbon bow and flowers.

The track and hardware were die cut using Basic Black card stock.

The birthday sentiment was coloured with Bermuda Bay stampin blendabilies with birthday confetti stamped in Bermuda Bay and Calypso Coral, using the Party Panda stamp.

This card front was adhered to a Calypso Coral card base.

Supplies Used:
Stamps:  Barn Door, Birthday Wishes for You, Party Panda
Inks:  Black Memento, Pear Pizzazz, Bermuda Bay, Bermuda Bay Blendabilities, Calypso Coral
Papers:  Wood DSP, Calypso Coral, Whisper White (thick), Basic Black
Accessories:  Sliding Barn Door Framelits, Dimensionals, Washers (3/16 by 1") non SU, Corner rounder punch

Saturday, January 27, 2018

Sliding Barn Door

I don't know why I thought this card would be hard to put together.  In actual fact, it was quite easy!!

Now that I have put this interactive card together once I can see possibilities for branching out.  But here is the card I put together today.

For the background I used the "Hardwood" background stamp with Soft Suede ink on Pool Party card stock.  A barn door needs a barn board background.

The barn door was stamped with Crumb Cake ink onto Crumb Cake cardstock  The hardware was die cut with Basic Gray cardstock

The door slides on washers across the front of the card, moving between sentiments stamped with Early Espresso ink on Very Vanilla cardstock.


Supplies Used:
Stamp:  Barn Door, Hardwood
Inks:  Early Espresso, Soft Suede, Crumb Cake, Sweet Sugarplum
Papers:  Pool Party, Very Vanilla, Whisper White, Crumb Cake, Early Espresso
Accessories:  Sliding Door Framelits, washers (non SU), dimensionals, Foam tape, corner rounder punch