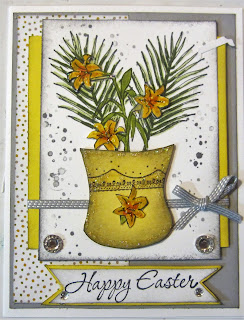
The students worked independently as much as possible, as I was still sick with a cold (don't worry, I wore a mask). This is the last week of Sale-a-bration so I wanted the students to miss out on anything.
Earlier I had made a PDF for each card/project which allowed them to work independently at their own pace.
There are many tutorials for this 3D project, but the easiest to follow is the one done by Janine Tinklenberg at http://jantink.com
The materials I used for the throne are as follows:
- One piece 3 1/4 by 12" piece of Island Indigo (back of cupcake throne)
- One piece of 3 1/4 by 11" piece of Island Indigo (base of throne)
- Two pieces of 1 1/2 by 4 1/2" of Island Indigo (sides of throne base)
- One piece 3 by 4" Cupcakes & Carousel DSP
- Other pieces of Daffodil Delight, Whisper White, Calypso Coral for adding decoration and sentiment.
Stamps: Sprinkles of Life, Easter Message, Timeless Texture, Basket Bunch, Black Memento, Crumb Cake
Inks: Bermuda Bay, Daffodil Delight, Mint Macaron markers, Bermuda Bay ink pad
Accessories: Layering Oval Framelits, Basket Builder Framelits, Petite Flower punch, rhinestones, dimensionals, blender pen, gold metallic ribbon, 2 1/2" circle punch, scoring tool, double sided tape.
For putting the throne together, refer to the tutorial.
Preparing throne pieces:
1. Score 3 1/4 by 12 at 6" and fold in half
2. Score 3 1/4 by 11 at 1" at each end, and then at 5" at each end.
3. Use a 2 1/2" circle punch to create hole for cupcake. Punch in one of the ends between the 1" and 5" score line.
Cupcake Topper:
Supplies:
Stamp: Basket Bunch
Ink: Black Memento, Watercolor Pencils
Papers: Daffodil Delight, Whisper White
Accessories: Layering Oval Framelits, Basket Builder Framelits, Toothpick
Here are the other cards made:


No comments:
Post a Comment