
Stamp: Festive Flurry
Inks: Midnight Muse, Basic Gray, Whisper White
Papers: Midnight Muse, Whisper White
Accessories: Circles framelits, Festive Flurry Framelits, Pretty Print embossing folder, 1/8" silver taffeta ribbon( 16 inches), Frosted Finishes embellishment, dimensionals, hot glue gun
Tutorial
Here's a tutorial on how to make the Festive flurry ornament. It's actually quite easy and can be made up in less than half an hour.
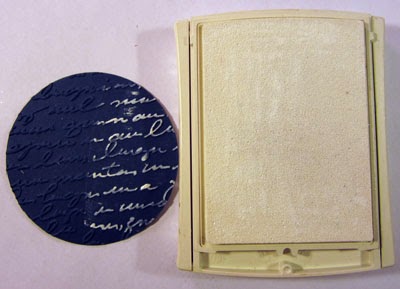
Step 1: Die cut a 3" circle using the Circles Framelits using Midnight Muse card stock.

Step 2: Emboss the circle using the Pretty Print embossing folder. Gently wipe the Whisper White ink pad over the embossed surface.
Step 3: Stamp and die cut the following images:

Step 4:Take the largest Midnight Muse snowflake and score from tip to tip on the large edges and then the small edges.


-----and the small edges toward the outside

Step 6: Open up the snowflake and place on the silicone mat. Using a hot glue gun, place a gob of glue in the middle and press the sides of the snowflake into the middle obliterating the circle. Hold until the glue has set.


Building the Ornament:
Place a stampin' dimensional on the right side of the embossed midnight muse circle in the middle near the upper end. Attach the ribbon to this dimensional making sure there is a loop at the top.


Then, using the hot glue gun, add the modified snowflake

.....and then the small gray snowflake followed by the center of the blue one that was cut out. Lastly add the embellishment.


No comments:
Post a Comment