Supplies:
1. 5 sheets of 12 by 12 Tangerine Tango card stock
2. 1 sheet Crumb Cake card stock
3. Very Vanilla Card Stock
4. Scoring board
5. Adhesive
6. Stamp set: Delicate Doilies
7. Inks: Early Espresso, Chocolate Chip, Summer starfruit, Soft Suede
8. Hot glue gun
9. Autumn Accents die and Big Shot
10. Paper Crimper
Method:
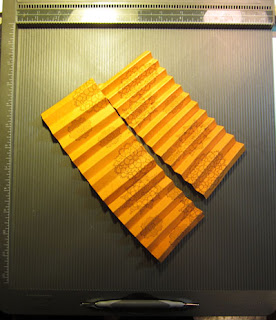
1. Randomly stamp images of doilies in different colours on the 5 sheets of Tangerine Tango card stock. Cover the card stock with the images.
2. To save yourself time, score each 12 by 12 piece of card stock as a whole, scoring every 1/2".
3. Then cut it into the desired strips.
To make this stack into a sphere shape requires making rosettes of graduating sizes. The strip sizes and number of each strip are listed below.
Note: Each rosette is make with 2 strips of equal width, so cut two of each size.
Number and size of paper strips needed to complete
the pumpkin rosettes
Strip width
|
# Strips
|
# Rosettes
|
2
inches
|
2
|
1 (for
the bottom of the stack)
|
2-1/4
inches
|
4
|
2
|
2-1/2
inches
|
4
|
2
|
2-3/4
inches
|
4
|
2
|
2-7/8
inches
|
4
|
2
|
3
inches
|
2
|
2
|
4. Accordian fold all strips and create your rosettes. I will not be including instructions on how to make rosettes.
5. Once you have a stack of rosettes, apply hot glue to the center disk of cardstock on each one and adhere them together. Start with the smallest rosette and stack gradually larger circles until you've used the largest one, and then start decreasing. Once you've used all your rosettes, you'll have your base pumpkin shape completed.
Here is the order to follow:
- Bottom of the stack: 2-inch rosette
- Next up: 2-1/4 inch
- 2-1/2 inch
- 2-3/4 inch
- 2-7/8 inch
- 3 inch
- 2-7/8 inch
- 2-3/4 inch
- 2-1/2 inch
Pumpkin Stem
1. 1. 1. Cut two 1 1/2 by 12 strips of
Crumb Cake card stock. Apply tombo glue to one end and start rolling it
into a tight cylinder. When close to the end of the first strip, glue
in the second piece and keep rolling. Wrap rubber bands around the roll
until it is dry.
2. Cut another 1 1/2 by 12" Crumb Cake card stock and snip fringes
along its entire length. Draw a line along the top as a guide for your
fringe and for gluing.
3. Die cut 3 maple leaves in Very Vanilla using the Autumn accents die
and the Big Shot. Roll each leaf through the Crimper and then sponge
each leaf with Old Olive, Tangerine Tango and Real Red. Spritz each
leaf with water to allow the colours to blend. Allow to dry.
4.Use hot glue to secure the leaves and the curly -ques to the top of the pumpkin.
5. Use hot glue to secure the stem to the base.
Your pumpkin is now complete


No comments:
Post a Comment